In topic 2, you created high-level objects, and you let iText decide where they had to be put on the page. In topic 3, you learned about writing to the direct content, and you discovered how to combine high-level objects with low-level access using the ColumnText object.
Up until now, you’ve used the PdfPTable class as a high-level object. When added to the Document, iText writes the textual content of the cells to the text layer, and all the borders, background colors, and images are written to the layer just beneath. It’s also possible to write a PdfPTable to one of the direct content layers on top of or under the text and graphics layers. See figure 3.2 and read section 3.1.1 for a more elaborate description.
In the next section, you’ll discover that a table also has different layers.
Working with writeSelectedRows()
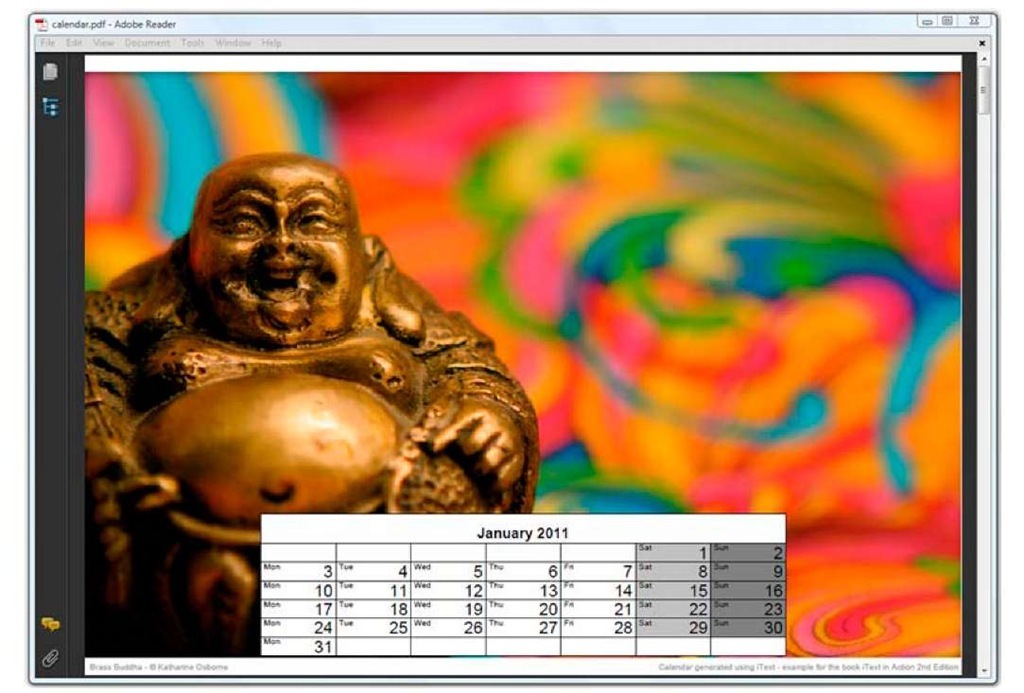
Figure 4.14 shows a calendar I made for 2011. In the background, you can see a picture taken by one of the editors of the topic; in the foreground, you can see a table that was added at an absolute position.
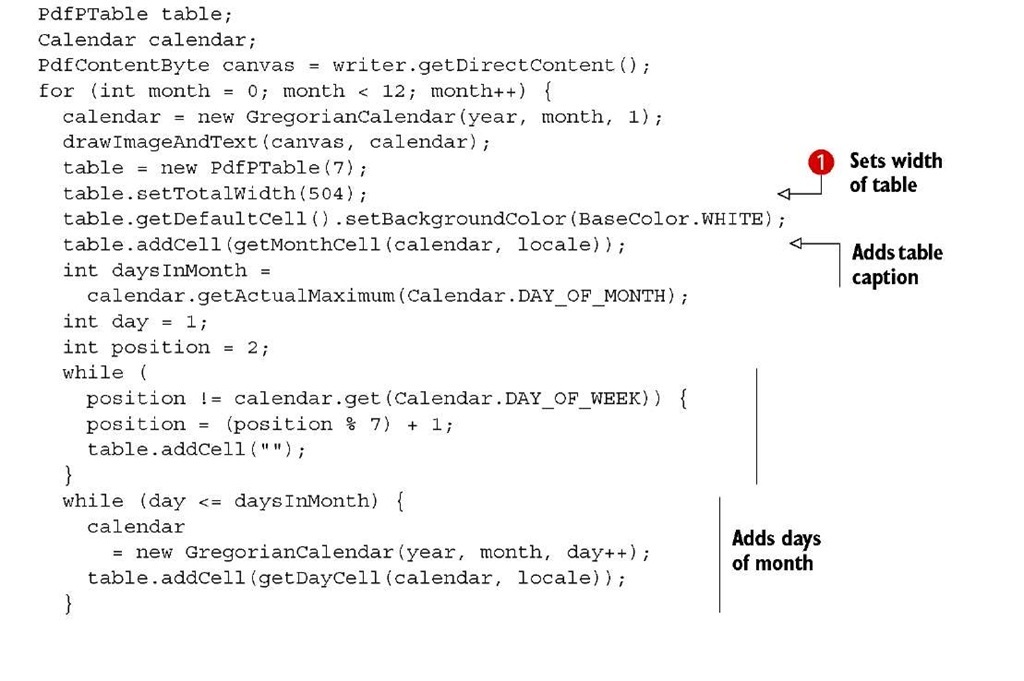
Listing 4.21 shows how it’s done.
Figure 4.14 A calendar in a PDF with a table added at an absolute position
Listing 4.21 PdfCalendar.java
Note that you always have to set the total width O if you intend to add the PdfPTable at an absolute position. You don’t have to lock the width, because iText will ignore the width percentage anyway; that width only makes sense when using document.add().
The table is added to a PdfContentByte object using the writeSelectedRows() method ©. Let’s take a look at the parameters.
SELECTING THE ROWS AND THE TABLE POSITION
With the first two parameters, you can define the start and the end of the table rows. In listing 4.21, all the rows are added, because you use 0 as the starting row and -1 as end row. The value -1 means, “show all the remaining rows.”
The next two parameters of the writeSelectedRows() method define the (x,y) coordinates of the upper-left corner of the table. You want the table to end 18 pt above the lower boundary of the page, so you need to calculate the height of the table and add 18 to that value.
NOTE The writeSelectedRows() method returns the current Fposition after the table is added. If you were to wrap line © inside a System.out.println() statement in listing 4.21, you’d see that every table returns the value 18.
The final parameter is the PdfContentByte object to which you want to add the table. CONTENT CANVASES
Instead of a single PdfContentByte object, you could pass an array of four PdfContentByte objects as the final parameter of the writeSelectedRow() method. These represent four direct content layers (aka, canvases). Each canvas has a specific name and purpose:
■ PdfPtable.BASECANVAS—Anything placed here will be under the table.
■ PdfPtable.BACKGROUNDCANVAS—This is the layer where the backgrounds are drawn.
■ PdfPtable.LINECANVAS—This is the layer where the lines are drawn.
■ PdfPtable.TEXTCANVAS—This is the layer where the text goes. Anything placed here will cover the table.
If you only pass one PdfContentByte object, text will cover lines, lines will cover backgrounds, and backgrounds will cover anything added to the base canvas. Note that iText never adds content to the base canvas. It’s there in case you want to add something that goes under all the other content in a table or a cell event; see topi 5 for examples.
SPLITTING A PDFPTABLE VERTICALLY
Suppose that a table has so many columns that it doesn’t fit the width of a page. In that case, your only option is to split it vertically. This is demonstrated in figure 4.15.
Figure 4.15 Splitting a table vertically
This is a single table listing the movies directed by Zhang Yimou. The total width is set to 600 pt in listing 4.22 O, but the width of a page is only 595 pt.
In this example the writeSelectedRows() method was used twice, with two extra parameters to select the columns.
Listing 4.22 Zhang.java
Columns 0 to 2 (2 not included) are added at position (236, 806) C on one page. Column 2 and all the remaining columns (-1 is used instead of the real number of columns) are added at position (36, 806) on the next page ©.
This is one way to add a PdfPTable at an absolute position. The other way is to wrap a PdfPTable object inside a ColumnText object.
Wrapping tables in columns
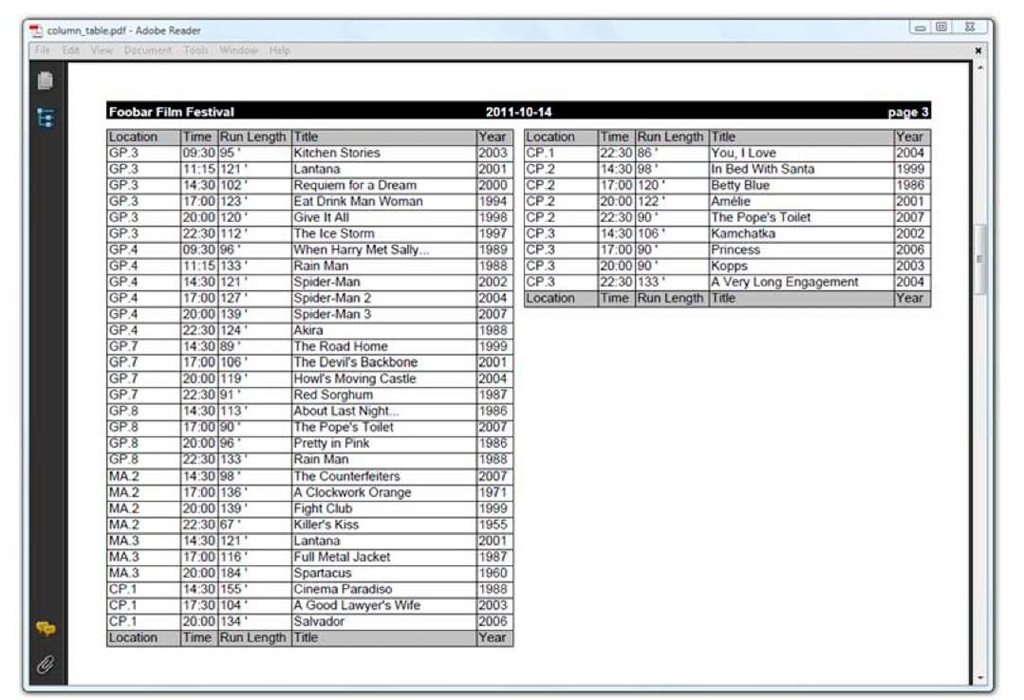
Figure 4.16 shows a table with a header and footer that were added at absolute positions in two separate columns on the same page.
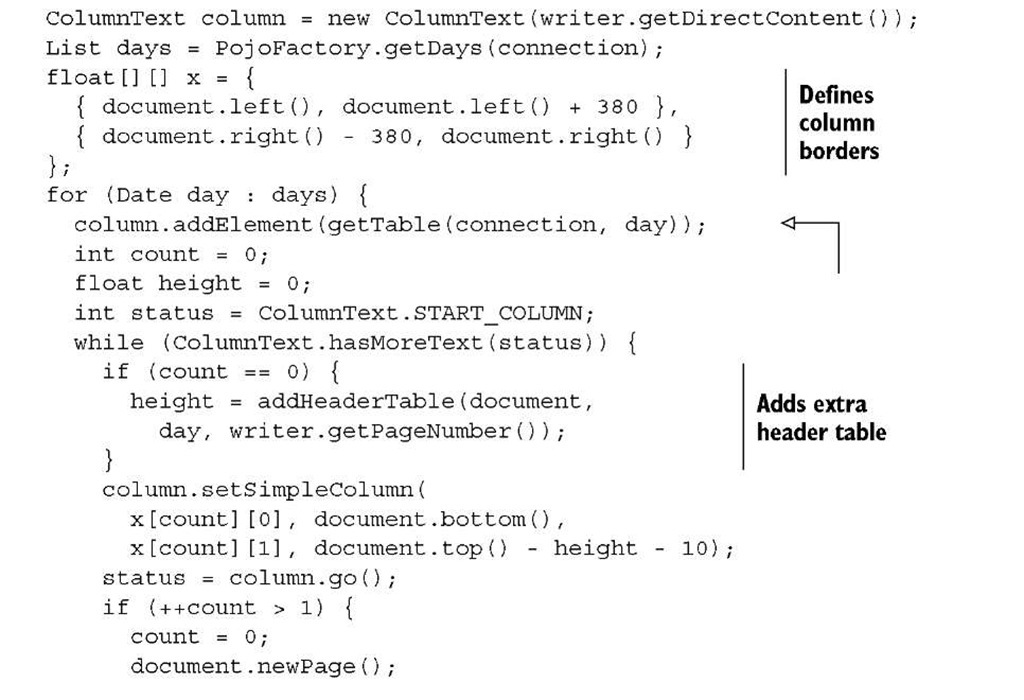
In listing 4.23, you use the ColumnText mechanism from topic 3 in combination with the PdfPTable functionality that repeats headers and footers (explained in section 4.3.1).
Figure 4.16 A PdfPTable rendered in two columns
Listing 4.23 ColumnTable.java
This section introduced some low-level functionality of the high-level table object. In the next topic, we’ll return to the PdfPTable and PdfPCell objects, and you’ll use low-level methods to draw tables and cells with rounded corners and other fancy layout features. But first, let’s look back on what you’ve learned in this topic.
Summary
This topic was dedicated entirely to tables. You learned how to create PdfPTable and PdfPCell objects. You were made aware of the PdfPRow class, but you know that you shouldn’t worry about it: rows are created behind the scenes by iText.
You learned how to define the width, alignment, and spacing of the complete table and its columns, and you discovered that cells are very similar to the ColumnText object that was discussed in the previous topic. You’ve worked with cells in text mode and in composite mode. In the subsection about text mode, you learned more about the properties of a cell. The section with the examples in composite mode focused on special types of cells: cells with images, and cells containing other tables (nested tables).
As soon as you have a table that spans multiple pages, you need to pay special attention to headers and footers if you want them to repeat on every page. You also have to choose whether you want to split the cells of a row if they don’t fit on the current page, or if you want to forward them to the next page. You also learned about the implications on your JVM of having a large table; you learned how to reduce the maximum amount of memory needed when dealing with a large table.
Finally, you added a PdfPTable at absolute coordinates in two different ways: with the writeSelectedRows() method, and by wrapping the table inside a ColumnText object.
In the next topic, you’ll learn how to fine-tune the layout by using table and cell events.


