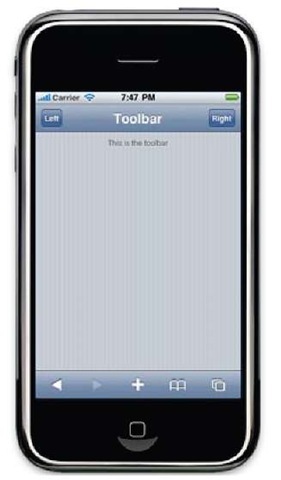
The toolbar bar can contain simple buttons as well, not only navigation buttons. For instance, the Cancel button is very common and the status bar can be the right place for it. This kind of button is different; we don’t need any arrow or icon. A rounded button with a simple text is enough for the purpose.
Getting ready
Once again, iWebKit will be our framework for this new recipe.
How to do it…
It’s possible to put our new button on the left or on the right inside the toolbar. We only need to use a specific attribute, which identifies a CSS style defined in the style.css file of the framework.
To put the button on the left, we’ll add the following line inside the div with the id="topbar" and below the titlediv element:
If we need a button on the right, we’ll add the next line of code:
When you are reloading your page, you should see a screen similar to what is shown in the following screenshot:
How it works…
The main CSS file of the iWebKit framework defines a special style for navigation buttons and another one for common action buttons in the toolbar. Although it is not very common to use one left and one right in the same page, it can be useful for some applications. Usually, developers prefer to use only one of them in the same page. However, it is very common to use an arrow button and a left or right button together in the toolbar. One of them could be used to come back to the home page and the other one for a specific action such as loading a selector widget.
iWebKit has defined a specific style for changing the color of these buttons. In fact, you can change the color of the left button to blue using the blueleftbutton value for the id of the div element. The other style is accessible through the bluerightbutton.
As the navigation buttons, these new kind of buttons must be located inside the topbar element.
See also
► Installing the iWebKit framework recipe in topic 1, Frameworks Make Life Easier
► Creating a toolbar recipe

