The menu is one of the most important widgets of the graphical user interface of the software. It allows a structured and hierarchical way for accessing different options and features offered by the application. Desktop applications use a menu inside the main toolbar and web applications apply techniques such as the use of unordered list or tabs. For the iPhone applications, we will need a specific widget to emulate a conventional and typical menu as the common pull-down menus are not used by the iPhone. Usually, this widget is a navigation list, which is similar to the simple list showed in the previous recipe. However, the native look of the iPhone uses a rounded list where each item has an arrow to get access to other pages or to other menu lists.
This recipe helps you to build menus using lists with the elements and styles provided by the UiUIKit and the iWebKit frameworks.
Getting ready
The UiUIKit and the iWebKit frameworks offer simple methods for building our desired menus, so we’ll use these for our purpose. Make sure you have installed and configured both of them before continuing.
How to do it
The process for building a menu for our iPhone applications is very easy. Both frameworks provide CSS styles to do it. Let’s explore the two different methods.
Using UiUIKit
We’ll start using the UiUIKit for building a simple menu. First of all, create a new HTML file with the reference to the required CSS file of this framework. Don’t forget to include a toolbar using one div element with id equal to header. Instead of adding an id attribute for the tag body, leave it blank. To refresh your memory, take a look at the previous recipe.
The next step will be to create an unordered HTML element, where each item has a link to the next page:
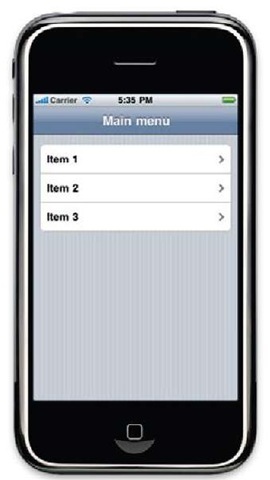
You can see your new menu loading with the just created HTML file using your iPhone device, the software simulator, or a WebKit web browser on your local machine. The result will be as shown in the following screenshot:
Using iWebKit
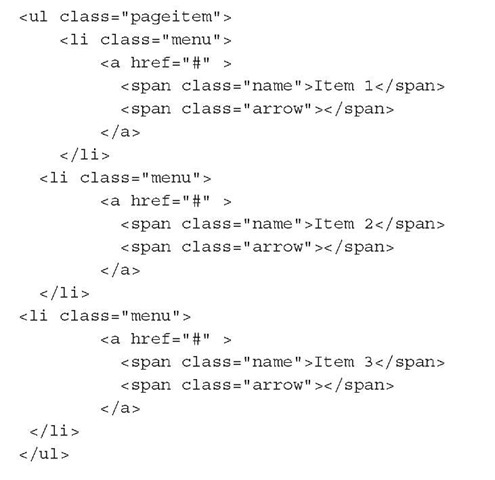
Take the base file that we created for the first recipe of this topic. It had the required references to the iWebKit files plus a toolbar. After this one, we’ll create a new div element, which contains an unordered HTML list. The following code shows how to do it:
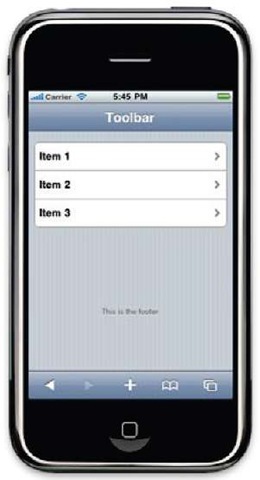
Observe the final result on the screen; it is very similar to the list building using the UiUIKit:
How it works
Both frameworks use CSS styles to get a menu working for our application. The method provided for the UiUIKit is easier than the other offered by the iWebKit. In the first case, we only need to include a link element inside each item and adding a style—called arrow—for the li element.
The method used by the iWebKit is a bit more complicated due to the need of a new div element. As a part of this, we need to use two different span elements inside each item. One of these is for the item text itself, and the other one is for the small arrow, which appears on the right side. Note each span has its own CSS class, name for the text, and arrow for the small arrow. Also, the unordered list presents a different style represented by the value pageitem of the id attribute. The pageitem is the most important element of the iWebKit framework. Basically, this component or style is the outline of other components and widgets, such as menus or textboxes. Each page of your application can include many pageitems, and each of these components will create a group. We can organize widgets using these individual groups.
Keep in mind that the examples shown are using the # symbol for the href attribute. In the real world, we’ll need to replace it with a reference to a new page.
Surely, you can guess that it is possible to create nested menus. If each item points to a new page that includes a new menu, we’ll have the desired effect. Don’t forget that interfaces for mobile devices are quite different than those used by desktop and standard web applications.
There’s more..
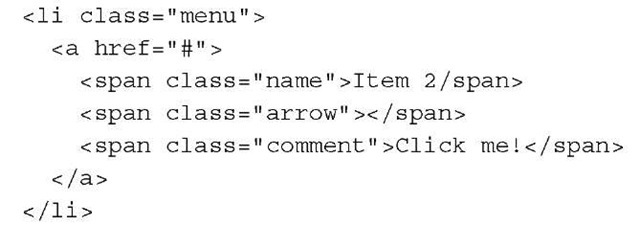
The iWebKit allows you to include a small text on the right side of each menu item. You only need to add a new span element with the class called comment. The following code segment illustrates how to do that:
On the other hand, you can use the UiUIKit for the same task. This issue is very simple; we’ll include a small tag inside the selected item as shown in the next fragment of code:
See also
► Installing the iWebKit framework recipe in topic 1, Frameworks Make Life Easier
► Creating a toolbar recipe
► Building lists for items recipe


