In the last section, you built your first UIView subclass: the LabeledWebview class. You’ll be building a lot more subclasses in your application development, and you’ll often want to use Interface Builder to create a new nib file so you can connect outlets and actions to the object directly. Additionally, you don’t need to crunch numbers for each subview’s size because Interface Builder provides a visual design experience. How do you create a new nib file in Interface Builder? We’ll cover the details in this section.
Creating new nib files
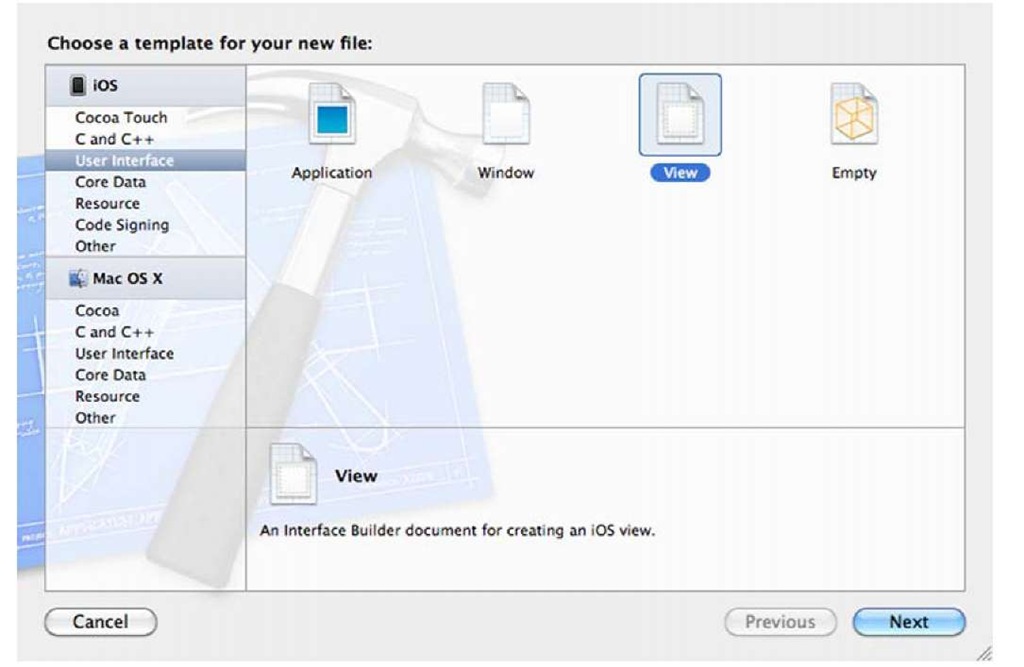
To create a new nib file under Xcode, navigate to the menu under Xcode, and choose File > New File to begin. Select User Interface under the template prompt window, as shown in figure 4.4.
You’re then asked to choose a template: Application, Window, View, or Empty. You’ll most often create new .xib files for view controllers, in which case you should select View. (You’ll learn more about view controllers in topic 5.) To make your new .xib file part of your existing project, save the .xib file to the main project directory.
Figure 4.4 Create a new nib file under Xcode.
Table 4.2 outlines the two-step process. We say that you start the process with an "appropriate object." For a totally new object, this will probably be the blank object. But if you’re making a subclass of an existing object, you should start with that object.
Table 4.2 Creating a new proxy object to link to in Interface Builder takes a couple of steps.
|
Step |
Description |
|
1. Create a new object. |
From the Controllers section of the library, drag an appropriate object to the nib document window. |
|
2. Change the class. |
Open the Identity inspector tab, and change the class name to your new class. |
After you type your new subclass name into your object’s Class field (CustomWebView for example), things are automatically linked up. You’ll use this technique in future topics.
Initializing Interface Builder objects
Eventually, you’ll want to do some initialization when an Interface Builder object is created. But if you try to build your setup into a standard init method, it won’t work. As we’ve mentioned, Interface Builder objects use a special init method called init-WithCoder:. You must create it by hand, as follows:
Other than its decoder argument (which you should be able to ignore), it should work like any other init method.
Accessing .xib files
Finally, we come to the .xib file. We’ve taken it for granted so far, but there are ways you can specify a different .xib file than MainWindow.xib and even ways to specify the use of multiple .xib files.
THE MAIN NIB FILE
The main .xib file is defined in <project name>-Info.plist, which you saw in the last topic. You can look at its contents in Xcode, or you can read the XML from the command line or any text editor. It’s easy to find where the main .xib file (or rather, its compiled nib twin) is defined:
If you ever need to change the name of your main .xib file, do it here, using either Xcode or any text editor. Generally, we’ll leave it the way it’s generated by the project template.
MULTIPLE FILES
As we’ve mentioned, a .xib file should generally lay out the contents of a single program view. Although this has been fine for the programs so far, it becomes a limitation when you want to create more-complex programs. Fortunately, it’s easy to build multiple .xib files into a single program.
New .xib files are usually loaded through view controllers, which is the topic of the next topic. As we’ve discussed previously, view controllers tend to control a pageful of objects, and it makes sense that they use .xib files to help manage that. To use a new .xib file for a new page in your program, all you need to do is associate the new .xib file with the appropriate view controller.
The easiest way to do that is through Xcode’s File menu. Select File > New File, and under Cocoa Touch Class select the UIViewController subclass. Make sure you select the With Xib for User Interface check box.
If you create a view controller, you can link in a new .xib file through its init method:
If you feel a little fuzzy on the concept of view controllers, don’t worry, because we’re about to dive into this topic wholeheartedly in topic 5. For now, note this connection between view controllers and the nib files.
More tips under Xcode
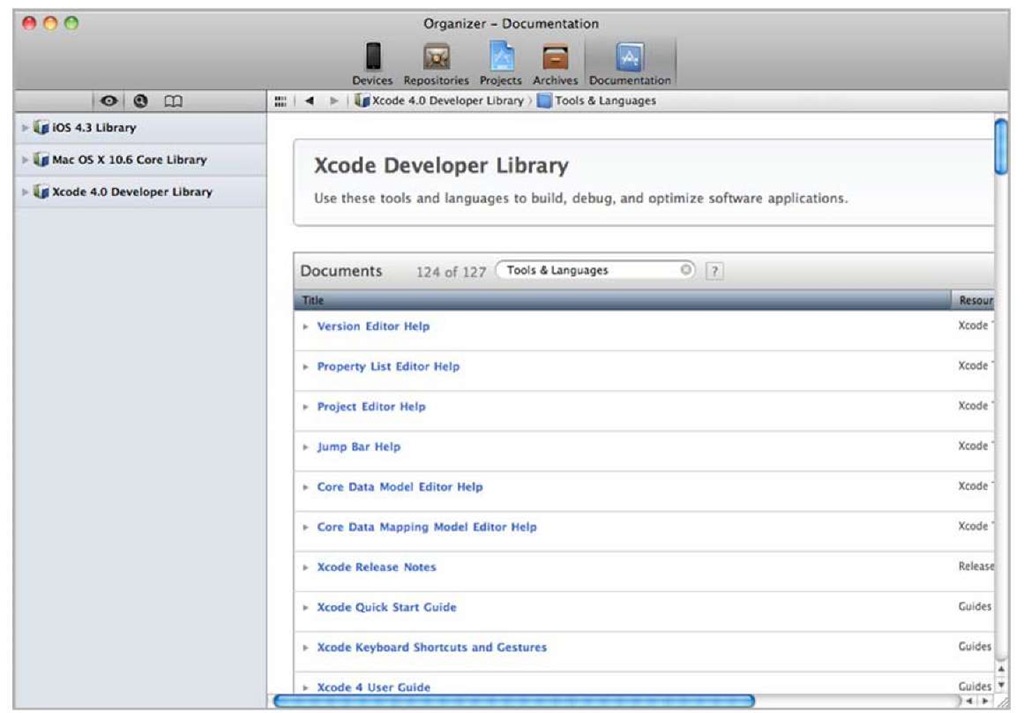
There’s one more important window under Xcode we haven’t covered yet: the Organizer window. You can launch the Organizer (see figure 4.5) by choosing Window > Organizer or by clicking the Organizer button on the Xcode toolbar.
As shown in figure 4.5, the Organizer window is used for organizing your projects and reading documentation. You can look up the Xcode 4 Developer documentation here as well.
For iOS projects, the Organizer window is also used for managing devices for development. You’ve learned how to run the application on the iOS Simulator, but this is the solution for launching the application on your iPhone or iPad.
Note that if you haven’t created the certificate file under the iOS Provisioning Portal, you need to first head over to the iOS developer member center at http:// developer.apple.com/membercenter/; then follow the step-by-step instructions under the iOS Provisioning Portal to generate the certificate for both Developing and Distributing Provisioning profiles (needed for development/personal testing and ad hoc distribution/submitting to the App Store, respectively).
Figure 4.5 Organizer window with the Documentation tab selected
Figure 4.6 Select Automatic Device Provisioning under the Xcode Devices Organizer window.
Now head back to the Xcode Organizer window, go to the Devices tab, select Provisioning Profiles, and then select the Automatic Device Provisioning option (you may need to click the Refresh button to allow the new provisioning file to be downloaded to your Mac, as shown in figure 4.6).
Xcode will use your login credentials to automatically generate the provisioning file under the iOS Provisioning Portal. Now you can plug in your device and select Use for Development to allow Xcode to automatically provision the device for development.
In the next section, we’ll cover another important aspect of iOS development: debugging. You may not need all the debug functions under Xcode right now, but debugger knowledge will be handy when you inevitably encounter a bug in your application.


