Director Approved
Once your timing is done and director approved, you’ll want to save your images for the next step. If you are the director and if you are satisfied with your animation, then you are director approved. Move on to the next step.
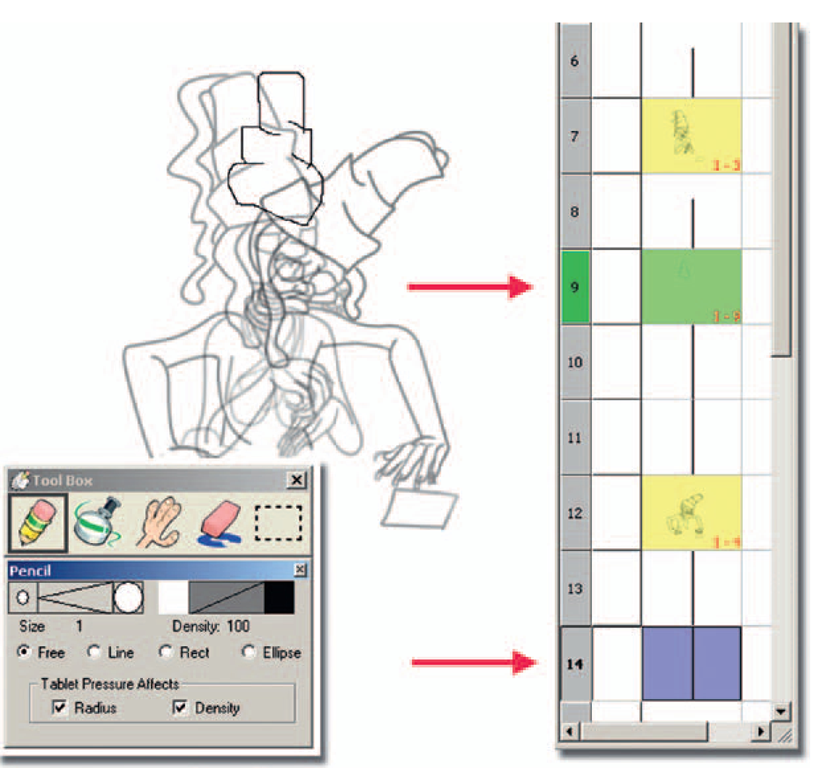
FIGURE 4.15 Yellow = drawing seen in onion skin, green = current drawing, and blue = selected to move in x-sheet.
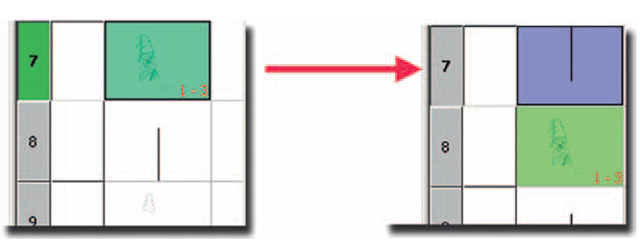
Figure 4.16 Select a keyframe and insert time before it.
In Flash, you will want to go to File > Export > Export Movie …. Because this is a low-resolution reference, we should not be concerned with compression. You can choose jpg sequence. This will save your animation as a series of jpg images with the base name plus the frame number in the old format of name#.ext. If you want a “." between the name and the frame number, add that in the base name you set. For example, you would use the base name “tt." to get the final name of “tt.001.jpg."
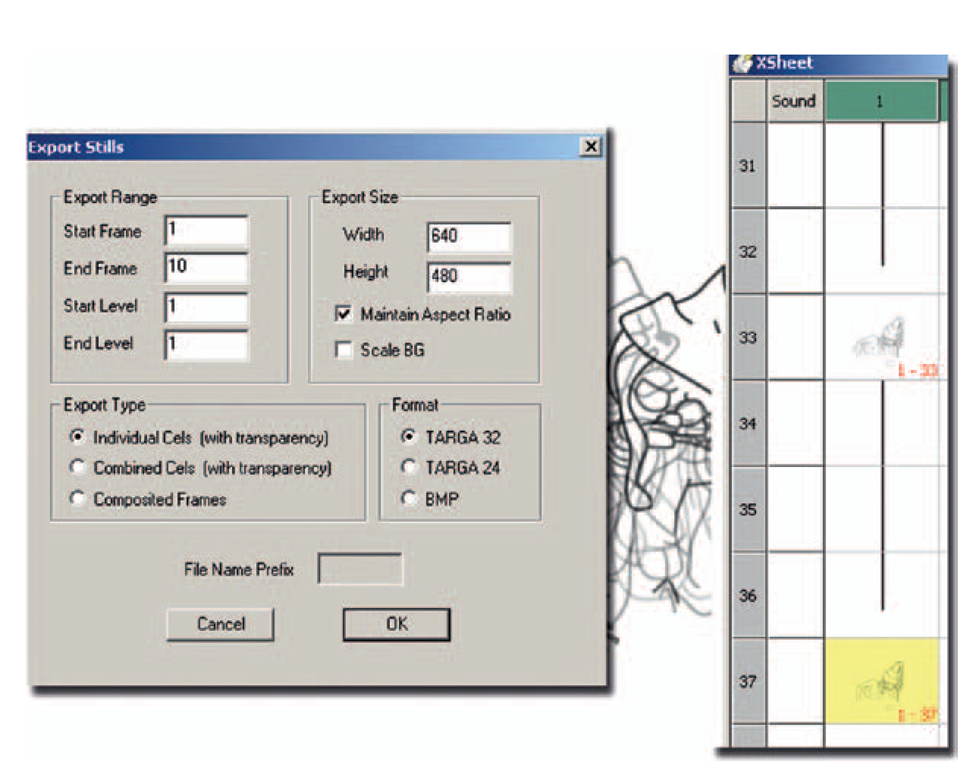
In FlipBook you would also go to File > Export > Export Stills. You might prefer movie or avi files. For production, I’d rather have individual images. It is easier and faster to touch up/replace one image instead of reexporting a whole avi file again. In testing I was only able to use bmp. I would rather have used tga, but the files exported oddly.
FIGURE 4.17 Settings for exporting a sequence of images from FlipBook.
3D ARM IN MAYA
Before cleaning up the 2D animation, you’ll want to get the character completely animated and have that approved. We’ll add the arm appendage. Depending on which 3D software program you are using, the buttons used will be different, but the process will be mostly the same. Your goal is to bring the 2D images in, set up a render camera to match the 2D image, work with the lens of the camera so that it flattens out perspective as much as you need to match your 2D, animate your 3D arm to that camera so that the image you create looks like it registers to the 2D image, and then render. Simple, right? Really, it is. Let’s go through it, shall we?
IMPORT 2D
Inside of Maya, there are many ways to bring in an image plane. To make sure we are animating to the same camera as the 2D image we absolutely need to attach the image plane to the camera. Other techniques of bringing in the image and texture mapping it onto a polygon will not ensure that our 3D camera is accurate.
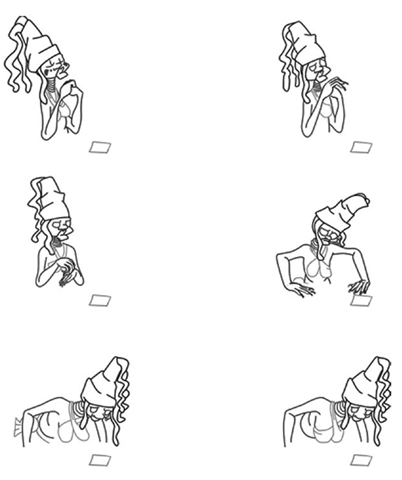
FIGURE 4.18 Pose test from FlipBook. Images.
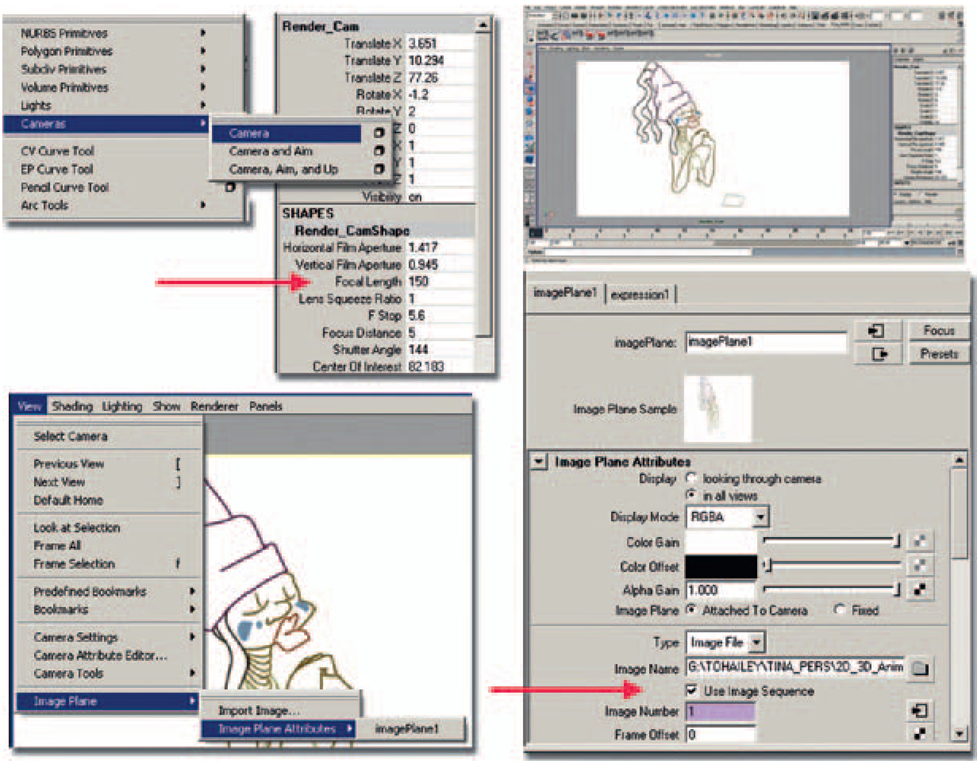
1. Create a new camera: Create > Cameras > Camera. Because this is a locked-off shot (the camera is not moving), we’ll use a plain camera with no aim or up. Rename the camera Render_Cam, and give it a Focal Length of 150.
2. Make sure this camera is the current camera. In the top of the camera window, click View > Image Plane > Import Image .. Select the first image of your 2D sequence.
3. But you have more than one image, don’t you? You’ll have to tell Maya that. Perhaps in a future version they will have a “Use Image Sequence" button right there in the open dialog box. Instead, at the top of the camera window click View > Image Plane > Image Plane Attributes > imagePlanel. In the attribute editor, click on the Use Image Sequence option.
Now in your camera view, you should see your animation. If you use movie files or avi files, those will read in as well (if you have the QuickTime driver installed). If you scrub through the Maya timeline, you should see your animation in the Render_Cam window.
FIGURE 4.19 2D images imported into Maya.
What could go wrong here? If your naming convention is not Name.number.extension, Maya will not be able to figure out that you have an image sequence. If you have a number in the name, Maya gets confused. For example, kitty10001.tif, kitty10002.tif might have issues. It should work if you instead name it kitty1 .0001.tif, kitty1.0002.tif.
Take Note
Make sure that your Maya Render settings are the output resolution that you want! This is a locked-off shot, so the camera (canvas size) should match the 2D images that we created. A way to see immediately if your resolution is set correctly is to go to the Render_ Cam view and click View > Camera Settings > Resolution Gate. The resolution gate (or rectangle) is hard to see because it exactly matches the 2D image that was brought in as an image plane. In the upper right corner of Figure 4.19, the resolution gate is being shown. As you can see, the resolution size is barely visible over the image plane. You do not see the rectangle resolution gate, because it is white and the image plane is white. If the render settings were incorrect, you would see the resolution gate as a different size from the image plane.
Here’s a good question: Do they need to match? No. Actually, your 2D images can be a separate size and you can adjust during compositing time. You would only need to globally resize your 3D image to match. But why go through that? Remember that bad habit we talked about falling into—the “we’ll fix it in post" terror, which is shorthand for “I don’t want to think about it right now. Let someone else fix the problem."
Hold on a moment. I need to stop and look at this. All these button clicks; all these things that could potentially go wrong. And in a group project we’ll have multiple people doing these things? Golly. Animation that goes beyond a single actor doing a vaudeville act in front of the audience is not easy. But we love it, so, okay. That was our reality check. Back to work.
Our file was saved as 2D_Leads_3D_v1.mb inside the 3D_Arm folder.
