A Window/Level Demo Application Using Visual Studio .NET 2003
Our first Visual Studio application is an interactive window/level demo, and it utilizes all of the key libraries that discussed in 2.4. The source code for this program can be found on the CD-ROM in the Chap3\window_level\WindowLevelVS directory. The front-end GUI uses the Microsoft Foundation Classes (MFC) framework for the basic user interface elements, GDI+ for image display and file I/O, and the Intel Integrated Performance Primitives (IPP) Library for a highly efficient implementation of the LUT-driven gray-scale transformation function. The application shell was built using the Visual Studio .NET MFC application wizard.
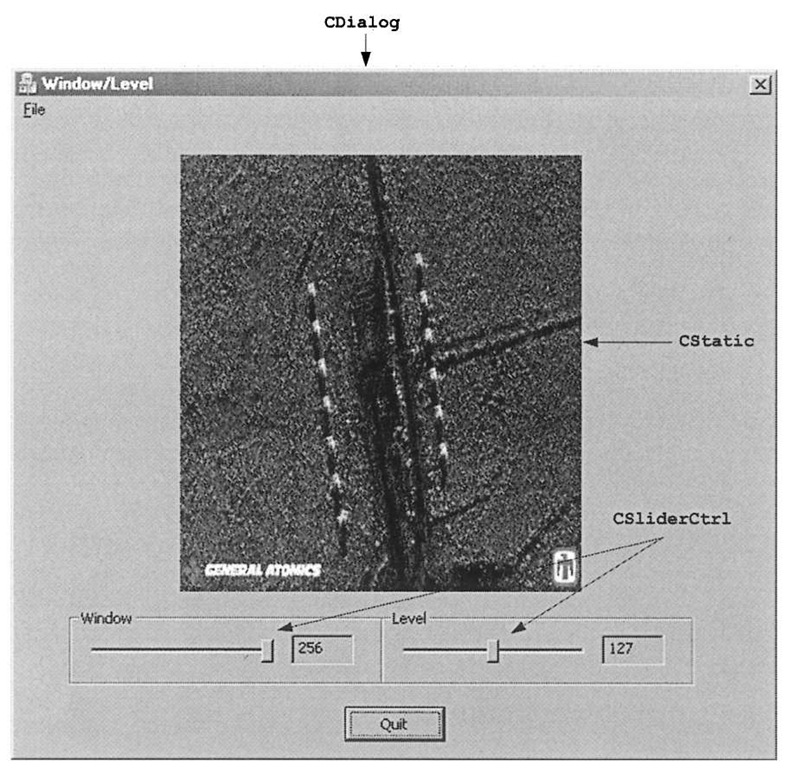
Figure 3-16 shows this application, along with the major MFC objects comprising the main dialog. The user first imports an image into the application using File|Load. This program only supports 24-bit color and 8bit monochrome Windows BMP images, which in the case of 24-bit color are converted to a gray-scale format. The slider bars adjust the window and level, and the processed image is updated in real-time.
A complete listing of the source code is not shown here, but the following explanation pertains to the code in WindowLevelDlg. cpp. In order for the slider bars to attain a range appropriate for 8-bit images, the SetRange method is called within the main dialog’s OnlnitDialog method, where most of the GUI initialization takes place. In the MFC framework6, OnlnitDialog is somewhat analogous to a C++ class constructor. OnlnitDialog is needed because some MFC initialization code, such as that found in SetRange, can not be called from the dialog class constructor.
Figure 3-16. Visual Studio .NET 2003 Window/Level demo program.
This is because at object construction time, the Windows child controls (CStatic, CSliderCtrl, and so on) have not actually been created yet. For this type of GUI initialization, you must wait until the framework invokes OnlnitDialog, which occurs shortly after the dialog is shown. The remaining MFC-centric portion of the code is fairly straightforward. A callback method CWindowLevelDlg: :OnFileLoad instantiates two Image8bpp objects (described shortly), passing in the name of the file the user has chosen. The slider callback methods are
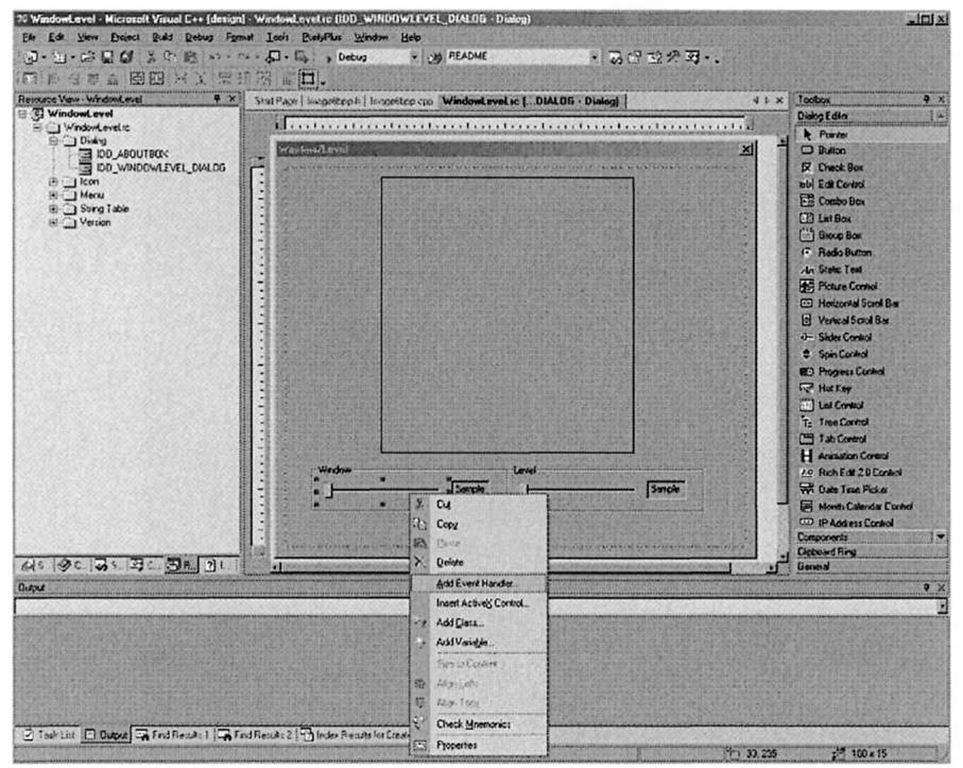
In Visual Studio, these are hooked into CWindowLevelDialog from the resource view of the dialog, as illustrated in Figure 3-17. These methods do very little except grab the current window or level value from the slider control and call on a class variable of type WindowLevel8bpp to actually process the image. After the image is processed, the window is "invalidated," which forces Windows to repaint the dialog and display the windowed and leveled image.
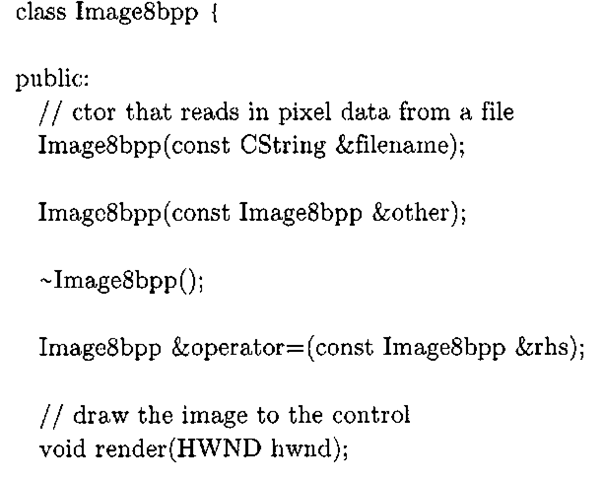
Another major component to the program is the Image8bpp class, whose interface is given in Listing 3-7. Image8bpp is an important utility class used in all the other Visual Studio C++ applications in this topic. Objects of type Image8bpp encapsulate a gray-scale image compatible with both GDI+ (m_bitmap) and the IPP library (m_pPixels).
Listing3-7: Image8bpp.h
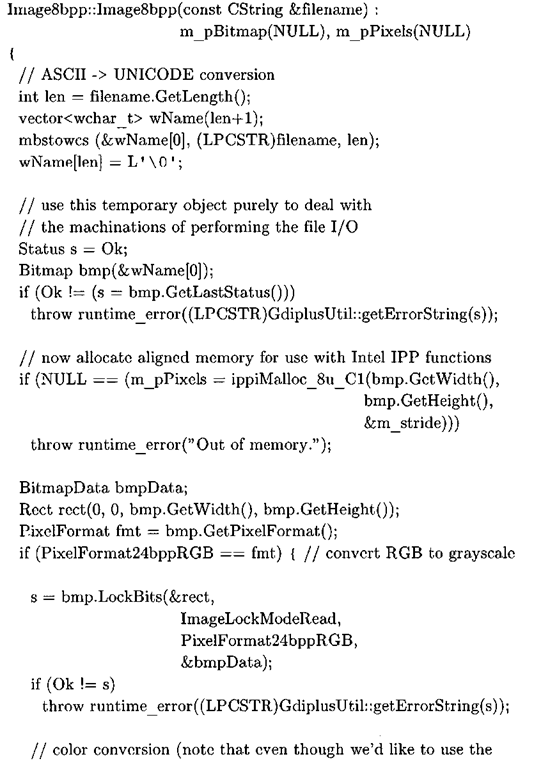
Normally when using GDI+ it is sufficient to package all of the data associated with the image into an object of type Gdiplus : : Bitmap. This object contains meta-data associated with the image (image dimensions, bit depth, etc.), as well as a pointer to the underlying buffer used to store the actual pixel data. In this case, the Image8bpp class, which wraps the GDI+ object, is designed to interoperate with both GDI+ and IPP. To attain optimal performance when using IPP library functions, the API dictates that for an 8bit gray-scale image, pixel data must be stored as a word-aligned array of Ipp8u elements, similar to how the image buffer was aligned in the TI C67 contrast stretching example using the DATA_AL IGN pragma. The Image8bpp class also performs color to gray-scale conversion, placing the gray-scale pixels into this aligned buffer pointed to by m_pPixels. The initial step is to construct a temporary GDI+ Bitmap object with the file name of the input image, leaving GDI+ to deal with the tedious machinations of reading in the image data from disk.
Figure 3-17. Adding an event handler for an MFC slider bar in Visual Studio .NET 2003. After selecting the "Add Event Handler" option, use the Event Handler wizard to add a callback method on your dialog class. In this project, the NM.CUSTOMDRAW Windows event results in CWindowLevelDlg: : OnNMCustomdrawWindowSlider being called, which processes and refreshes the image based on the current parameter value.
If the image is a 24-bit color image, a pointer to the GDI+ allocated buffer is obtained, and the color planes are mapped to gray-scale using the following standard formula:
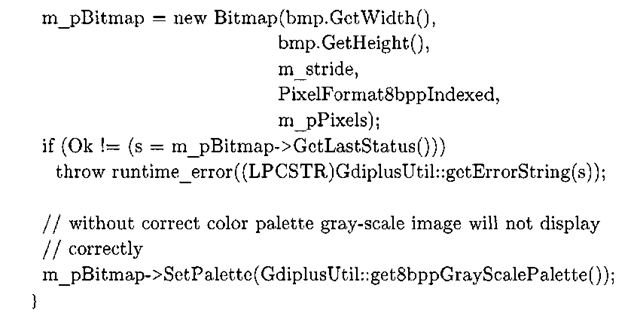
The above relation transforms red, green, and blue pixels to "luminance," or monochrome pixels. Unfortunately, it is not possible to use the built-in IPP color conversion functions7 because Microsoft GDI and GDI+ order color pixels in an unconventional blue-green-red (BGR) order instead of the far more common red-green-blue (RGB) format. The final Image8bpp initialization step involves creating another GDI+ Bitmap object, but this time using a form of the constructor whereby the Bitmap object itself is not responsible for deallocating the pixel data. This is necessary because we are sharing a buffer between GDI+ and IPP, and because that buffer is allocated using IPP routines it must also be deallocated using IPP routines. In addition, an 8-bit gray-scale palette is set so that Windows renders the now monochrome image correctly. All of this bookkeeping is performed within the Image8bpp constructor, shown in Listing 3-8.
Listing 3-8: Image8bpp constructor, from Image8bpp. cpp.
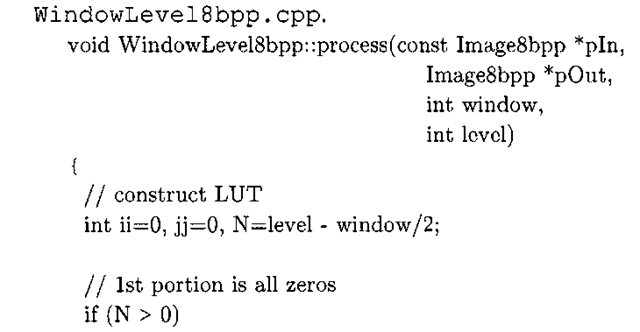
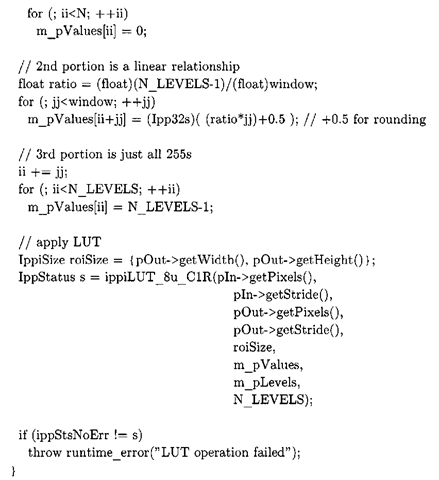
The actual image processing occurs within the WindowLevel8bpp class, invoked by CWindowLevelDlg: : winLevChanged (from the main dialog class) to process the image each time one of the slider bars changes value. The WindowLevel8bpp: : process method, shown in Listing 3-9, is essentially a direct port of Algorithm 3-3, except that it uses the IPP library function ippiLUT_8u_ClR to perform the gray-level LUT pixel transformation in a more computationally efficient manner than a straight-forward C/C++ implementation would yield. Intel IPP functions deal with various data types through a well-defined and consistent naming convention, as opposed to function overloading and/or templates, presumably because the library can then be used within a purely C application. The "8u" in the function name indicates that the function expects a pointer to Ipp8u elements (which are unsigned chars), and "C1R" denotes a single channel (i.e., a monochrome image). For example, if you happen to be dealing with 16-bit gray-scale pixel data, the correct function to use would be ippiLUT_16u_C!R7.
Listing 3-9: The core C++ window/level algorithm, from
The final object of interest in this Visual Studio demo program is GdiplusUtil which, like Image8bpp, shall be utilized extensively in later applications. This object provides two static member functions that have previously been encountered in Listings 3-7 and 3-8. The method getErrorString converts error identifiers (Gdiplus: : Status) to strings, and get8bppGrayScalePalette returns an 8-bit gray-scale color palette. More importantly however, a global object of type GdiplusUtil is declared in GdiplusUtil. cpp. The reason why this is done is that the GDI+ documentation8 states that GdiplusStartup must be called prior to using any GDI+ facility. By creating a global instance of GdiplusUtil, and making the GdiplusStartup call in GdiplusUtil’s constructor, we ensure that GdiplusStartup is invoked at program startup, prior to any code that may use GDI+ facilities. While the C++ standard is somewhat vague about this, in practice one can safely assume that initialization of global objects takes place prior to any user code being called. Whether or not this means that GdiplusUtil’s constructor is called prior to main, or sometime shortly thereafter is besides the point – you can assume that the global object’s constructor, and thus by extension GdiplusStartup, will be called prior to the main dialog being created (which is all that matters, since all GDI+ code is called after dialog initialization). In GdiplusUtil’s destructor, the GdiplusShutdown function is called, ensuring that GDI+ cleanup is performed at program exit, as Microsoft documentation recommends.
![tmp6-85_thumb[2][2] tmp6-85_thumb[2][2]](http://what-when-how.com/wp-content/uploads/2011/09/tmp685_thumb22_thumb.png)
