In this topic, you will sculpt the portrait bust of a young girl named Amy. The focus of this tutorial is to sculpt the head and facial features such as the nose, mouth, eyes, and ears. For traditional sculptors who are transitioning to digital sculpting, comparisons between digital sculpting and traditional sculpting techniques will be made. When working through this tutorial, you will learn to set up reference images to guide sculpting, create camera bookmarks for quick camera navigation, and, of course, become very familiar with Mudbox’s sculpting tools. This tutorial will suggest sculpting tools, tool settings, and a general workflow to sculpt a likeness; however, you are encouraged to experiment and try the different sculpting tools as you gain experience. Once you have completed the work in this topic, you will have enough familiarity with Mudbox to create your own digital sculptures.
Sculpting a likeness may seem intimidating, but when broken down and taken one step at a time, it becomes a doable endeavor. Keep in mind that your task is to sculpt a likeness, not an exact duplicate. Resist the tendency to get caught up with the minutia of details, but instead sculpt the essence of the subject. Remember that you have artistic license and some room for interpretation in creating your sculpture. Here are quick tips on sculpting a likeness:
• Don’t sculpt what you assume something should look like. Check the reference materials.
• Continuously study reference materials while sculpting. Keep all the reference materials organized and handy.
• When you make a change in one area, check how that change has affected other areas of the sculpture.
• Continuously compare the sculpture to the reference materials.
Collecting Reference Material
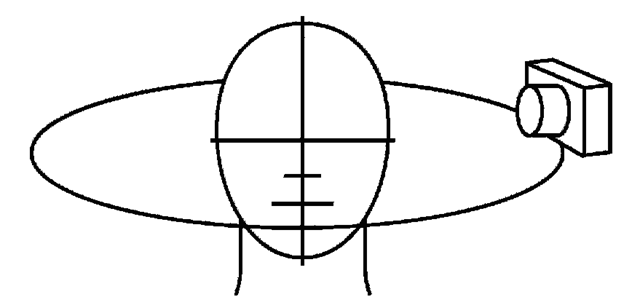
Sculpting a portrait is dependent on capturing form and proportions to produce a good likeness. You could do this by sculpting while the subject is posing in front of you, but more often, sculpting is done from photographs. So, it is important to have a good photograph reference of the subject. If possible, the photograph reference should show both neutral facial expression and the final expression to be sculpted. Take photos all the way around the subject on the same plane (Figure 3.1). Also take photographs from the front, sides, three-quarter view, and looking up and looking down on the subject. It may be difficult to get an absolute straight front or side photographs, especially when working with children, but do your best. You may also want to find photographs of the subject that are not posed. It is these candid shots that often show that “special" expression. All of the photograph reference that you will need to complete this tutorial is available at www.digitalsculpting.net. The following are some tips on getting good photograph reference:
FIG 3.1 it’s important to Take Good Reference Photographs All the Way around the Subject on the Same Plane and from Different Angles.
• Photograph the subject against a simple background to eliminate distractions.
• Light the subject to get good shadows and contrast as this will provide good reference for proper depths.
• Use a photograph-editing program to change the contrast if the photographs don’t provide good contrast.
• Take photographs all the way around on the same plane preferably at the eye level with your model, and from different angles like from above and below.
Facial Expressions
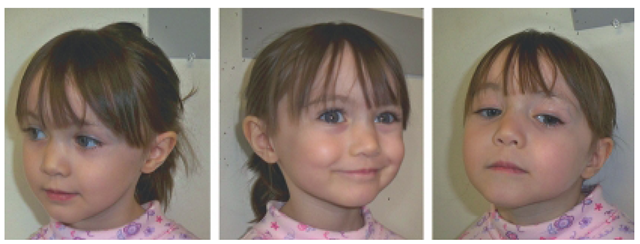
Understanding how expressions affect and change the face is important in sculpting a natural likeness of an individual. Different facial expressions can drastically change the face. For example, a full smile changes the shape of the mouth, the cheeks, forehead, and even the eyes. As you progress through the sculpting process, you will move away from the neutral facial expression to the final facial expression that the subject will express. In this project, Amy will have a subtle smile (Figure 3.2).
Measurements
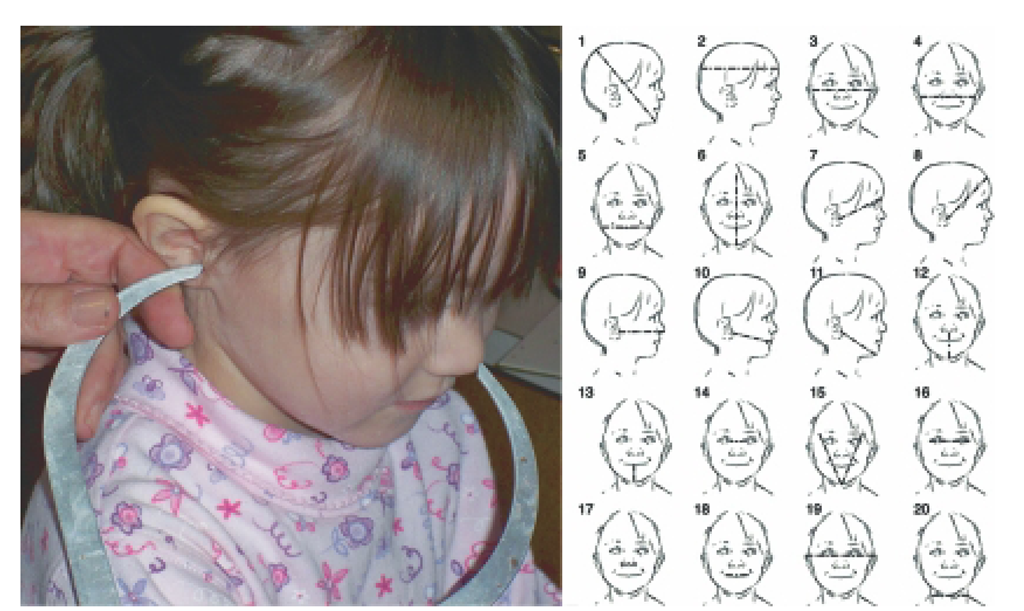
In traditional clay sculpture, physical measurements of the subject are taken to assure accurate form and proportions. Specific measurements of the subject are often taken from the notch of the ear as a reference point, for example, from the ear to the tip of the chin, from the ear to the tip of the nose, and so on. Many measurements are very similar and can help you remember proportions. For instance, the measurement from the ear to the nose is the same as across the face, and from the chin to the eyebrows (Figure 3.3).
FIG 3.2 In This Project, the Sculpture Will Have a Subtle Smile, but In the Photo Sitting, Amy Exhibits Quite a few Expressions. Expressions Noticeably Change the Shape of the Face.
FIG 3.3 In Traditional Sculpture, Measurements Are Taken with Calipers. Many Are Taken from the Notch In the Ear.
If when working on your own digital sculptures, you have an opportunity to take measurements of your subjects, it’s a good idea to do so. Even though Mudbox does not have measuring tools at this point, the measurements you take will provide you with a solid reference for the correct proportions of your subject. In Mudbox, you will use reference sketches placed into the program to assure proper form and proportions.


