Another AutoCAD workspace
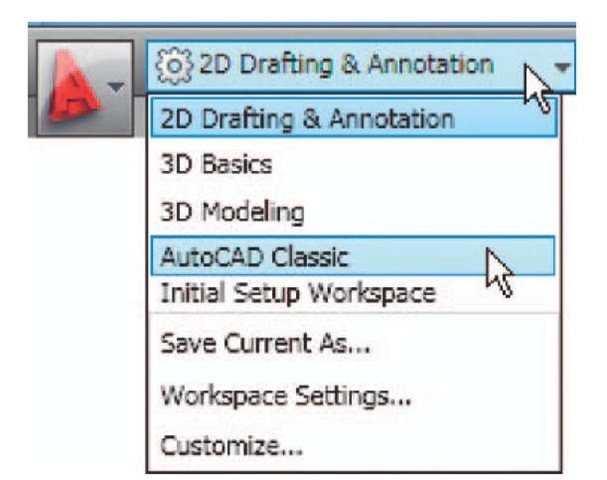
Other workspaces can be selected as the operator wishes. One in particular which may appeal to some operators is to click AutoCAD Classic in the 2D Drafting & Annotation popup menu (Fig. 1.29).
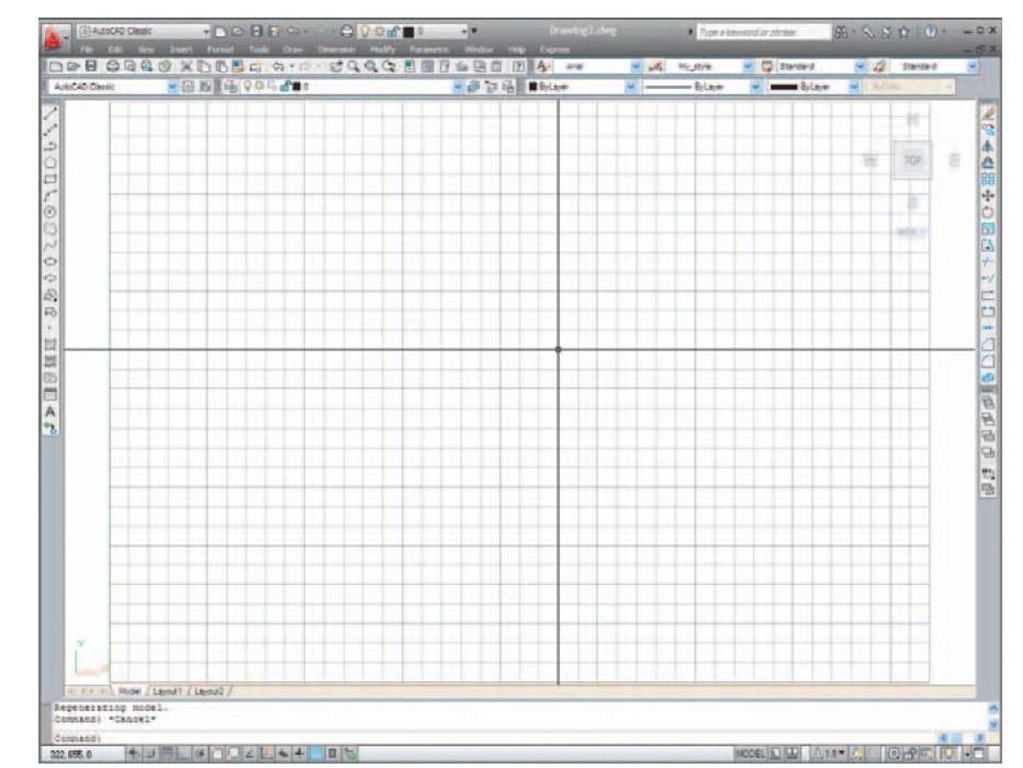
Fig. 1.30 shows the AutoCAD Classic workspace screen.
Fig. 1.29 Selecting Classic Workspace from the popup menu
Fig. 1.30 The AutoCAD Classic workspace
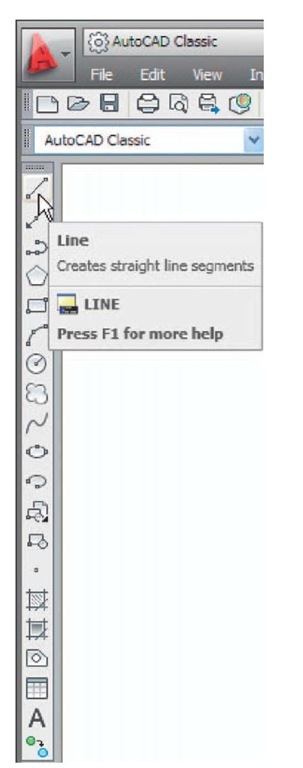
In the AutoCAD Classic workspace, tools icons are held in toolbars, which are docked against the sides and top of the workspace. The tool icons in the Draw toolbar (docked left-hand side) are shown in Fig. 1.31. Note the grid lines, spaced at 10 coordinate units in both X and Y directions.
Fig. 1.31 The tool icons in the Draw toolbar
The Ribbon
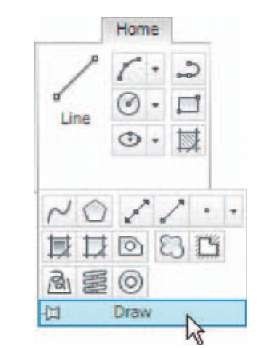
Fig. 1.32 The Home/ Draw panel and its fly out
In the 2D Drafting & Annotation workspace, the Ribbon contains groups of panels placed at the top of the AutoCAD 2011 window. In Fig. 1.3, there are eight panels – Draw, Modify, Layers, Annotation, Block, Properties, Utilities and Clipboard. Other groups of palettes can be called from the tabs at the top of the Ribbon.
If a small arrow is showing below the panel name, a left-click on the arrow brings down a fly out showing additional tool icons in the panel. As an example Fig. 1.32 shows the fly out from the Home/Draw panel.
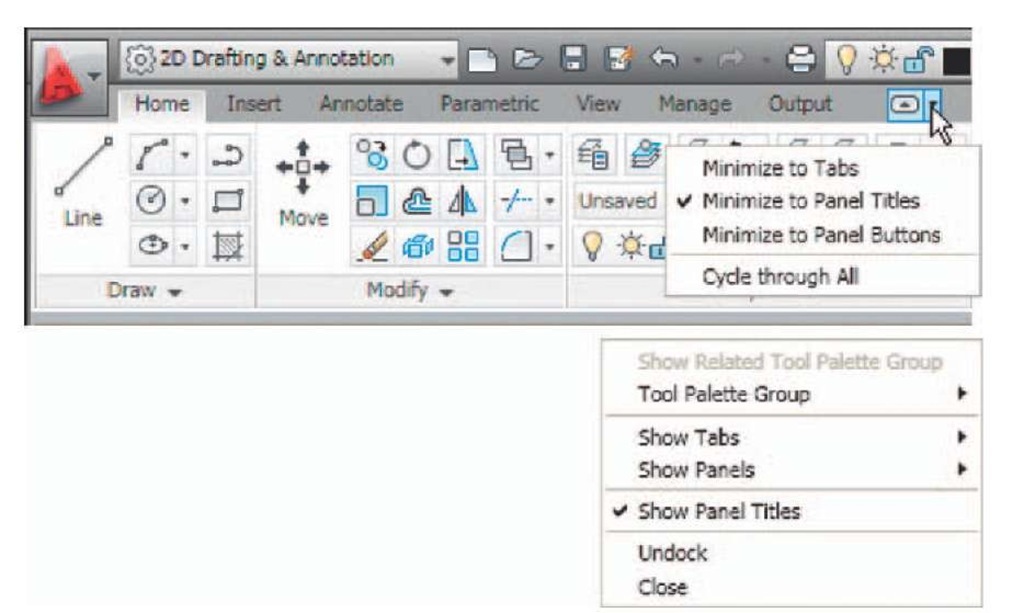
At the right-hand end of the panel titles (the tabs) are two downward pointing arrows. A left-click on the right of these two arrows brings down a menu. A right-click on the same arrow brings down another menu (Fig. 1.33). Options from these two menus show that the ribbon can appear in the AutoCAD window in a variety of ways.
Fig. 1.33 The two menus from the right-hand arrow
It is worth while experimenting with the settings of the ribbon – each operator will find the best for him/herself. The left-hand arrow also varies the ribbon.
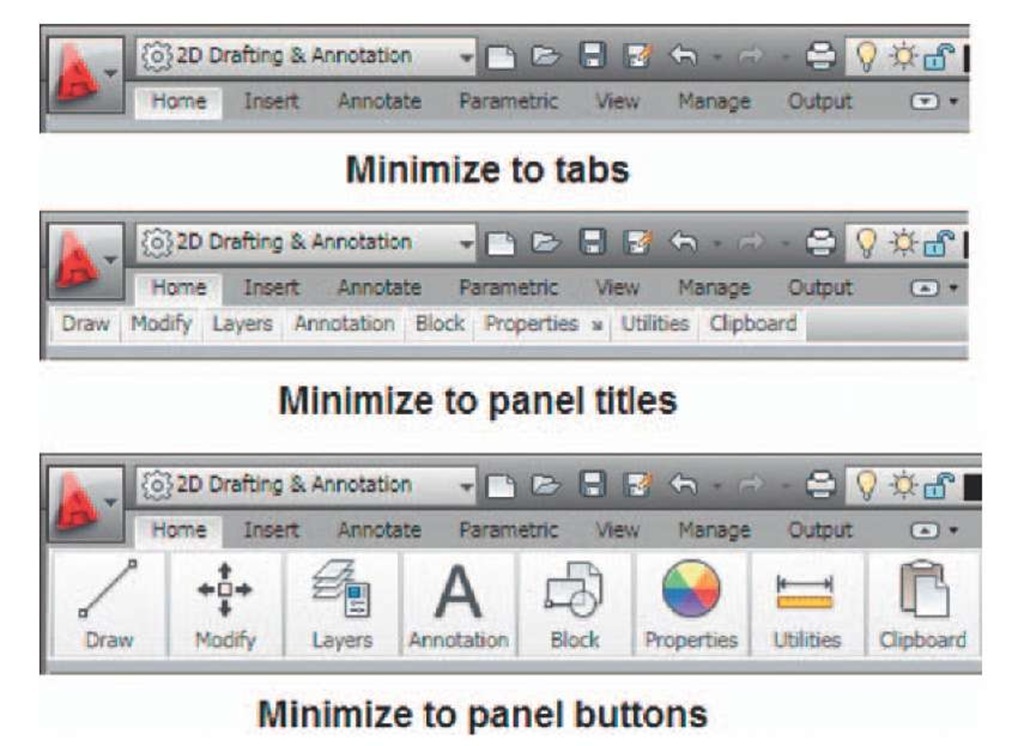
Repeated left-clicks on this arrow cause the Ribbon panels to:
1. Minimize to tabs
2. Minimize to panel titles
3. Minimize to panel button
4. The full ribbon.
Continuing clicks cause the changes to revert to the previous change.
Fig. 1.34 shows the Minimize settings. Any one of these settings leaves more space in the AutoCAD drawing window in which to construct drawings. The various settings of the ribbon allow the user discretion as to how to use the ribbon. When minimized to panel titles or to panel buttons passing the cursor over the titles or buttons causes the panels to reappear and allow selection of tools. Also try Undock from the right-click menu.
Fig. 1.34 The Ribbon minimize settings
The Quick View Drawings button
One of the buttons at the right-hand end of the status bar is the Quick View Drawings button. A click on this button brings miniatures of recent drawings on screen (Fig. 1.35). This can be of value when wishing to check back features of recent drawings in relation to the current drawing on screen.
Fig. 1.35 The result of a click on the Quick View Drawings button
Customization of the User Interface
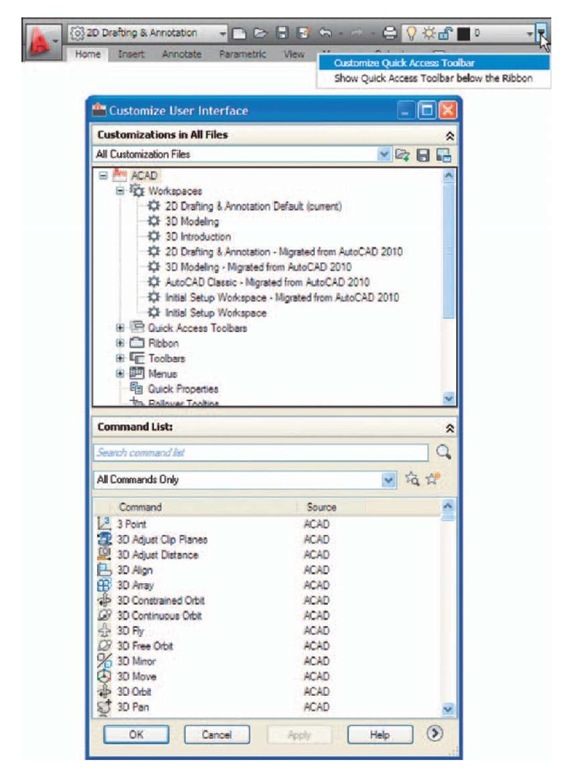
The AutoCAD 2011 workspace can be arranged in any format the operator wishes by making settings in the Customize User Interface dialog (Fig. 1.36) brought to screen from the right-click menu from the button in the Quick Access toolbar. The dialog can be opened using other methods such as entering cui at the command line, but using this right-click menu is possibly the quickest method. The dialog is only shown here to alert the reader to the fact that he/she can customize the workspace being used to suit their own methods of working.
Fig. 1.36 The Customize User Interface dialog
REVISION NOTES
1. A double-click on the AutoCAD 2011 shortcut in the Windows desktop opens the AutoCAD window.
2. There are FOUR main workspaces in which drawings can be constructed – the 2D Drafting & Annotation, AutoCAD Classic, 3D Basics, 3D Modeling. Part 1, 2D Design, of this topic deals with 2D drawings and these will be constructed mainly in the 2D Drafting & Annotation workspace. In Part 2, 3D Design, 3D model drawings will be mainly constructed in the 3D Modeling workspace.
3. All constructions in this topic involve the use of a mouse as the digitiser. When a mouse is the digitiser:
A left-click means pressing the left-hand button (the Pick) button. A right-click means pressing the right-hand button (the Return) button. A double-clickmeans pressing the left-hand button twice in quick succession. Dragging means moving the mouse until the cursor is over an item on screen, holding the left-hand button down and moving the mouse. The item moves in sympathy to the mouse movement. To pick has a similar meaning to a left-click.
4. Palettes are a particular feature of AutoCAD 2011. The Command palette and the DesignCenter palette will be in frequent use.
5. Tools are shown as icons in the tool panels.
6. When a tool is picked, a tooltip describing the tool appears describing the action of the tool. Tools show a small tooltip, followed shortly afterwards by a larger one, but the larger one can be prevented from appearing by selecting an option in the Options dialog.
7. Dialogs allow opening and saving of files and the setting of parameters.
8. A number of right-click menus are used in AutoCAD 2011.
9. A number of buttons in the status bar can be used to toggle features such as snap and grid. Functions keys of the keyboard can be also used for toggling some of these functions.
10. The AutoCAD coordinate system determines the position in units of any 2D point in the drawing area (2D Drafting & Annotation) and any point in 3D space (3D Modeling).
11. Drawings are usually constructed in templates with predetermined settings. Some templates include borders and title blocks.
Note
Throughout this topic when tools are to be selected from panels in the ribbon the tools will be shown in the form, e.g. Home/Draw – the name of the tab in the ribbon title bar, followed by the name of the panel from which the tool is to be selected.
