Adding Text and Formatting a Web Page
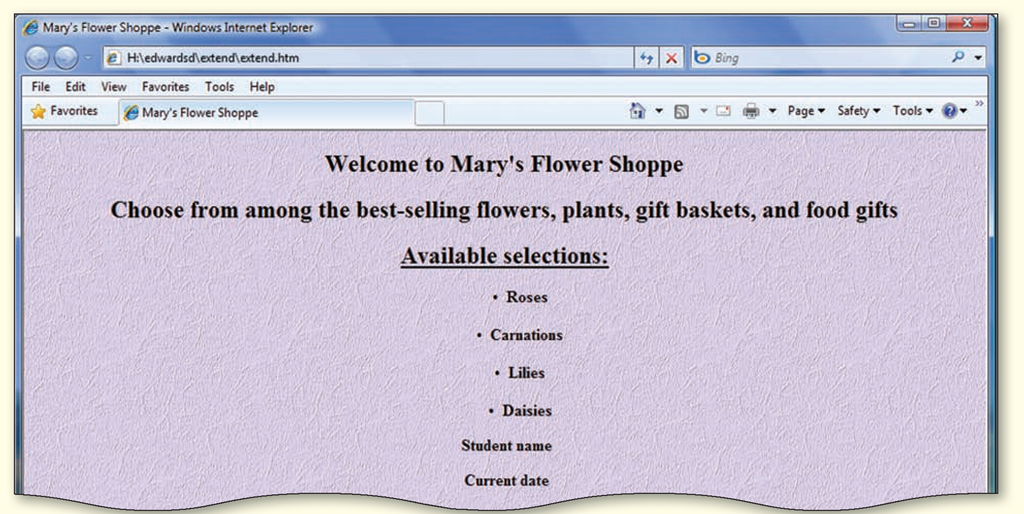
Instructions: In this activity, you modify a Web page by adding a background image, inserting line breaks, and centering text (Figure 1-70). To use Dreamweaver effectively, it is necessary to create a new site for the Extend Your Knowledge exercises in this topic. Make sure you have downloaded the data files for Chapter01\extend, which are available in the Data Files for Students folder. See the inside back cover of this topic for instructions on downloading the Data Files for Students, or contact your instructor for information about accessing the required files.
Figure 1-70
Perform the following tasks:
1. Start Dreamweaver. Use the Site Setup dialog box to define a local site in the your name folder. Enter Extend Exercises as the name of the new site.
2. Using the Browse for folder icon next to the Local Site Folder text box, create a new subfolder in the your name folder. Enter extend as the name of the subfolder. Open the folder, and then select it as the local site folder.
3. In the Advanced Settings category of the Site Setup for Extend Exercises dialog box, click the Browse for folder icon next to the Default Images folder text box. In the extend folder, create a subfolder named images. Open the images folder, and then select it as the default folder for images.
4. Make sure the path in the Default Images folder text box ends with your name\extend\images.
Click the Site category and make sure the path in the Local site folder text box ends with your name\extend. Click the Save button in the Site Setup for Extend Exercises dialog box to save the settings for the new site.
5. Using Windows Explorer or the Windows Computer tool, copy the extend.htm data file from the Chapter01\extend folder into the your name\extend folder for the Extend Exercises Web site. Copy the extend_bkg.jpg from the Chapter01\extend\images data files folder into the your name\extend\ images folder for the Extend Exercises Web site.
6. Open the extend.htm page. If necessary, expand the Property inspector. Verify that the HTML button on the left side of the Property inspector is selected.
7. Click the Page Properties button in the Property inspector and apply the extend_bkg background image to the Web page.
8. Type your name and the current date where indicated.
9. Apply the Heading 2 style to the first three lines.
10. On the Format menu, use the Underline command on the Style submenu to underline the third line.
11. Select the next four lines containing the names of flowers and bullet the text. Press shift+enter at the end of the first bulleted item, and then press shift+enter again to insert a blank, unbulleted line. Do the same to insert a blank line between each of the remaining bulleted items.
12. Center all of the text. Bold the bulleted list, your name, and the date.
13. Enter Mary’s Flower Shoppe as the title of the document.
14. Save your document and then view it in your browser, comparing your Web page to Figure 1-70. Submit your work in the format specified by your instructor.
Make It Right
In this activity, you analyze a Web page, correct all errors, and/or improve the design.
Adding Text and Formatting a Web Page
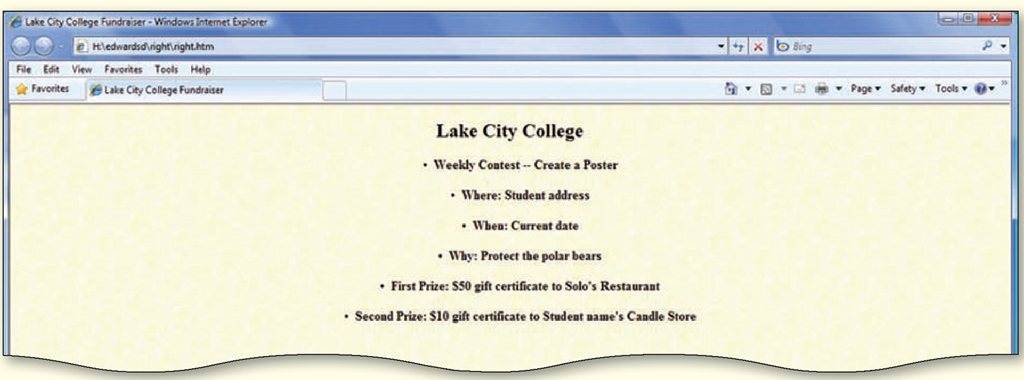
Instructions: In this activity, you modify an existing Web page by formatting and adjusting text and adding data (Figure 1-71). To use Dreamweaver effectively, it is necessary to create a new site for the Make It Right exercises in this topic. Make sure you have downloaded the data files for Chapter01\ right, which are available in the Data Files for Students folder. See the inside back cover of this topic for instructions on downloading the Data Files for Students, or contact your instructor for information about accessing the required files.
Figure 1-71
Perform the following tasks:
1. Start Dreamweaver. Use Site Setup dialog box to define a local site in the your name folder. Enter Right Exercises as the name of the new site.
2. Using the Browse for folder icon next to the Local Site Folder text box, create a new subfolder in the your name folder. Enter right as the name of the subfolder. Open the folder, and then select it as the local site folder.
3. In the Advanced Settings category of the Site Setup for Right Exercises dialog box, click the Browse for folder icon next to the Default Images folder text box. In the right folder, create a subfolder named images. Open the images folder, and then select it as the default folder for images.
4. Make sure the path in the Local Site Folder text box ends with your name\right and the path in the Default Images folder text box ends with your name\right\images, and then click the Save button in the Site Setup for Right Exercises dialog box to save the settings for the new site.
5. Using Windows Explorer or the Windows Computer tool, copy the right.htm data file from the Chapter01\right folder into the your name\right folder for the Right Exercises Web site. Copy the right_bkg.jpg from the Chapter01\right\images data files folder into the your name\right\images folder for the Right Exercises Web site.
6. Open the right.htm page. If necessary, expand the Property inspector. Verify that HTML is selected in the Property inspector.
7. Apply the right_bkg background image to the Web page. Select and center the title. Apply the Heading 2 format.
8. Select the rest of the text and add bullets. Bold the bulleted text. Center the text and add a blank, unbulleted line break between each item.
9. Insert your school’s address and a date where indicated. Replace “Carole” with your name.
10. Enter Lake City College Fundraiser as the document title.
11. Save your document and then view it in your browser, comparing your Web page to Figure 1-71. Submit your work in the format specified by your instructor.
In the Lab
Create a Web page using the guidelines, concepts, and skills presented in this topic. Labs are listed in order of increasing difficulty.
Lab 1: Creating a Computer Repair Services Web Site
Problem: After watching his computer repair service grow, Bryan asks for your help creating a Web page describing his services. He asks you to assist him in preparing a Web site to list his activities and promote his mission statement.
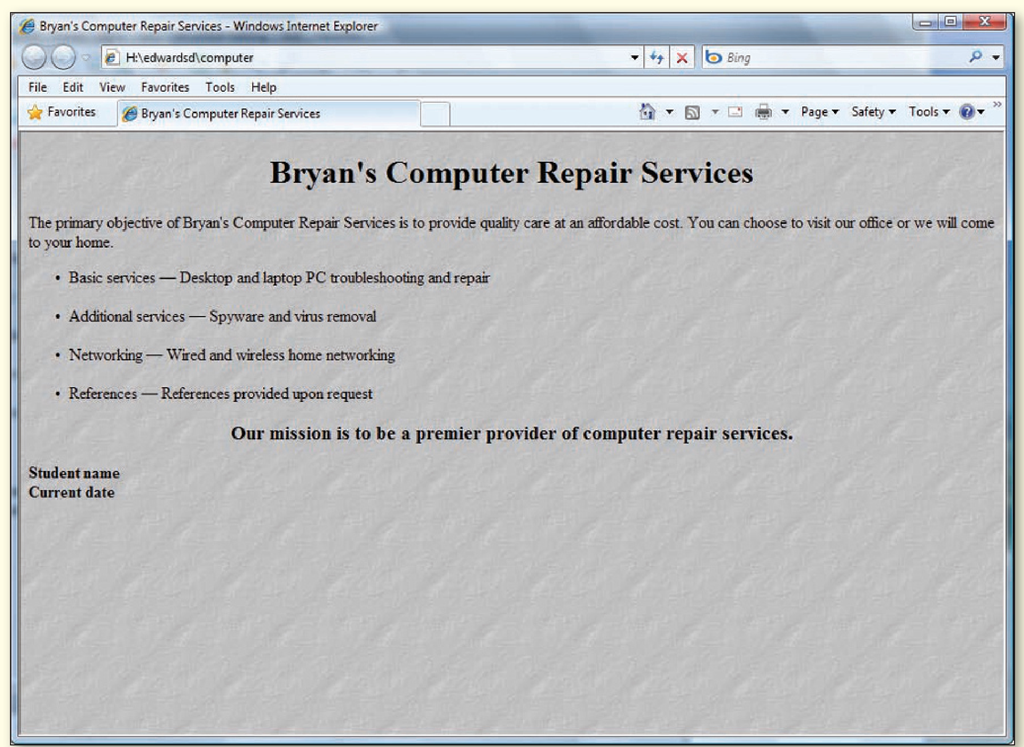
Define a Web site and create and format a Web page for Bryan’s Computer Repair Services. The Web page as it is displayed in a browser is shown in Figure 1-72 on the next page. The text for the Web site is shown in Table 1-4 on the next page.
Software and hardware settings determine how a Web page is displayed in a browser. Your Web pages may be displayed differently in your browser than the pages shown in the figure.
Figure 1-72
Table 1-4 Bryan’s Computer Repair Services
|
Section |
Text |
|
Heading |
Bryan’s Computer Repair Services |
|
Introductory paragraph |
The primary objective of Bryan’s Computer Repair Services is to provide quality care at an affordable cost. You can choose to visit our office or we will come to your home. |
|
List item 1 |
Basic services — Desktop and laptop PC troubleshooting and repair |
|
List Item 2 |
Additional services — Spyware and virus removal |
|
List Item 3 |
Networking — Wired and wireless home networking |
|
List Item 4 |
References — References provided upon request |
|
Closing |
Our mission is to be a premier provider of computer repair services. |
Perform the following tasks:
1. In Dreamweaver, click Site on the Application bar, click New Site, and then use the Site Setup dialog box to create a local Web site in the your name folder. In the Site Name text box, enter Computer Repair Services as the name of the site.
2. Using the Browse for folder icon next to the Local Site Folder text box, create a new subfolder in the your name folder. Enter computers as the name of the subfolder. Open the folder, and then select it as the local site folder. The path will be H:\your name\computers (substitute your name and the drive letter of the drive on which you are saving your files).
3. In the Advanced Settings category of the Site Setup for Computer Repair Services dialog box, click the Browse for folder icon next to the Default Images folder text box. In the computers folder, create a new subfolder. Enter images as the name of the subfolder. Open the images folder, and then select it as the default images folder. The path will be H:\your name\computers\images.
4. Click the Save button in the Site Setup for Computer Repair Services dialog box to save the settings for the new site.
5. Using Windows Explorer or the Windows Computer tool, copy the repair_bkg.jpg from the Chapter01\lab01\images data files folder into the your name\computer\images folder for the Computer Repair Services Web site.
6. Click File on the Application bar and then click New. Click Blank Page and HTML, verify that <none> is selected under Layout, and then click Create. Use the Save As command on the File menu to save the page with the name index.
7. Click Modify on the Application bar, and then click Page Properties. Apply the repair_bkg background image (located in the images folder) to the index page.
8. Type the Web page text shown in Table 1-4 on the previous page. Press the enter key after typing the text in each section and after each one of the list items in the table. The em dash, used in the four list items, is an HTML object. To insert the em dash, click the Insert menu, point to HTML, point to Special Characters, and then click Em-Dash.
9. Select the heading text and then apply the Heading 1 format. Use the Format menu to center the heading.
10. Select the four list items. Click the Unordered List button in the Property inspector to create a bulleted list with these four items.
11. Click at the end of the first bulleted item. Press the shift+enter keys twice to insert a blank line between the first and second items, press the shift+enter keys twice to insert a blank line between the second and third items, and then press the shift+enter keys twice to insert a blank line between the third and the fourth items.
12. Select the closing paragraph. Center the sentence and then click the Bold button in the Property inspector. When this is complete, do not deselect the sentence.
13. Click the Format button in the Property inspector and apply Heading 3 to the sentence.
14. In the Title text box on the Document toolbar, enter Bryan’s Computer Repair Services as the title of the Web page.
15. Click at the end of the closing paragraph and then press the enter key. Point to Align on the Format menu and then click Left. Type your name, insert a line break, and then type the current date.
16. Select your name and the current date, and then apply bold to the text.
17. Click at the beginning of the document, click Commands on the Application bar, and then click Check Spelling. Spell check your document and correct any errors.
18. Click File on the Application bar and then click Save.
19. Press the F12 key to view the Web page in the primary browser. Compare the Web page to Figure 1-72 on the previous page and make additional changes as necessary. Submit your work in the format specified by your instructor.


