Triggering behaviors by events
The last piece to the puzzle is to see how the different behaviors are triggered by events. This, of course, is also done by ActionScript code.
1 Choose Edit > Edit Document to exit symbol-editing mode.
2 In the Timeline, click the first frame in the layer MAIN AS3.
3 In the Actions panel scroll down so you can see the lines 126 and 128. In line 126 you’ll see the following command: site.home.carMiddle.addEventListener(MouseEvent.ROLL_OVER, onOverCarMiddle);
This command installs an event listener, a function that is executed when a specific event occurs, for the instance carMiddle on the home page. The event to listen for is a mouse rollover event and the function to be executed is called onOverCarMiddle. Note the similarity to defining a behavior in the Behaviors panel. The command in line 128 adds another event listener for a mouse roll-out event.
Note: For a complete list of available ActionScript commands and their syntax, refer to the "ActionScript 3.0 (or 2.0) Language and Components Reference” in Flash Help.
4 Scroll down further so you can see lines 148 through 158 where the two functions onOverCarMiddle and onOutCarMiddle are defined.
The commands in lines 149, 150, and 151 are executed when the pointer is moved over the middle car. The command in line 149 positions the current-time indicator on the frame labeled in in the Timeline of the instance carMiddle, triggering the rumble animation. In lines 150 and 151 the two headlights are slowly turned on using a tween command to change the Alpha value of the two headlight images. (We combined the two headlight images to one image for the work on the simple page.) The function onOutCarMiddle, executed when the pointer is moved away from the middle car, stops the rumble animation and turns off the headlights again.
Copying library assets between documents
For the car in the middle, you still need to design the over state. You’ll do this by copying library assets from one document to the other.
1 Close the Actions panel if it’s getting in your way. From the Edit Symbols menu at the right end of the Edit bar at the top of the document choose Symbols > Cars > CarMiddle.
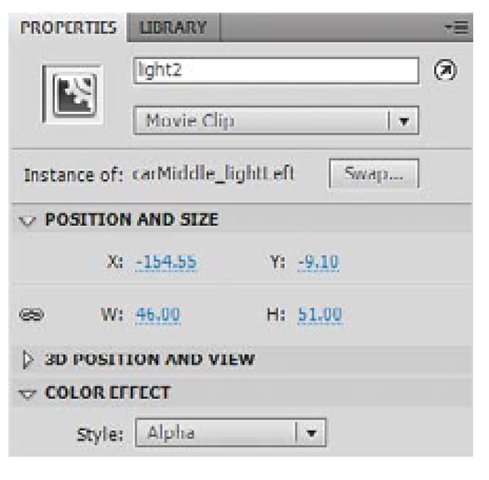
2 In the document window, click to select the headlight to your left. In the
Properties panel, confirm that you’ve selected the movie clip with the instance name light2.
3 Choose Edit > Copy.
4 Switch to the document Simple.fla. From the Edit Symbols menu at the right end of the Edit bar choose Car_middle_symbol.
5 In the Timeline, click to select the frame Over (the second frame for a button symbol) in Layer 1.
6 Choose Insert > Timeline > Keyframe.
7 Choose Edit > Paste In Place.
8 Click to select the newly placed movie clip symbol in the document window. Under Color Effect in the Properties panel, set the Alpha value to 100%. This will be the Over state appearance for the left headlight.
9 Switch back to the document index.fla. Try selecting the headlight to your right by clicking it. You’ll notice that you can’t select it the same way as the left headlight. You will first have to unlock the layer containing the right headlight in the Timeline. Locking layers enables you to avoid unwanted modifications. You can’t select and thus copy or edit elements on locked layers.
10 In the Timeline, click the lock icon in the layer carMiddle_lightRgt.png. The lock icon disappears and the layer is unlocked.
11 As you did in steps 3-7, copy the symbol light1 and paste it into place in the Car_middle_symbol of the Simple.fla document. Select the newly placed symbol in the document window, and in the Properties panel, set the Alpha value to 100%.
12 Choose Edit > Edit Document to exit symbol-editing mode, and then choose Control > Test Movie > In Flash Professional. Move the pointer over all three cars to see the headlights go on and off.
13 When you’re done reviewing, close the preview window and save your work.
You’ve finished the section of this lesson about creating a Flash document. In the next section you will learn to publish your Flash document for viewing in a web browser or as an AIR application.
Publishing a Flash document
Flash supports a variety of file formats to deliver your animation to an audience. For example, you can export your animation in SWF (Shockwave Flash, pronounced swiff) file format for playback using the Flash Player, create a complete web page for playback in a standard web browser, or create a stand-alone AIR application for playback on your desktop.
Exporting SWF (Shockwave Flash) files
If you intend to use your animation as content in another application, such as Dreamweaver, export the entire document as a SWF file.
1 Switch to the complex document index.fla.
2 Choose File > Export > Export Movie.
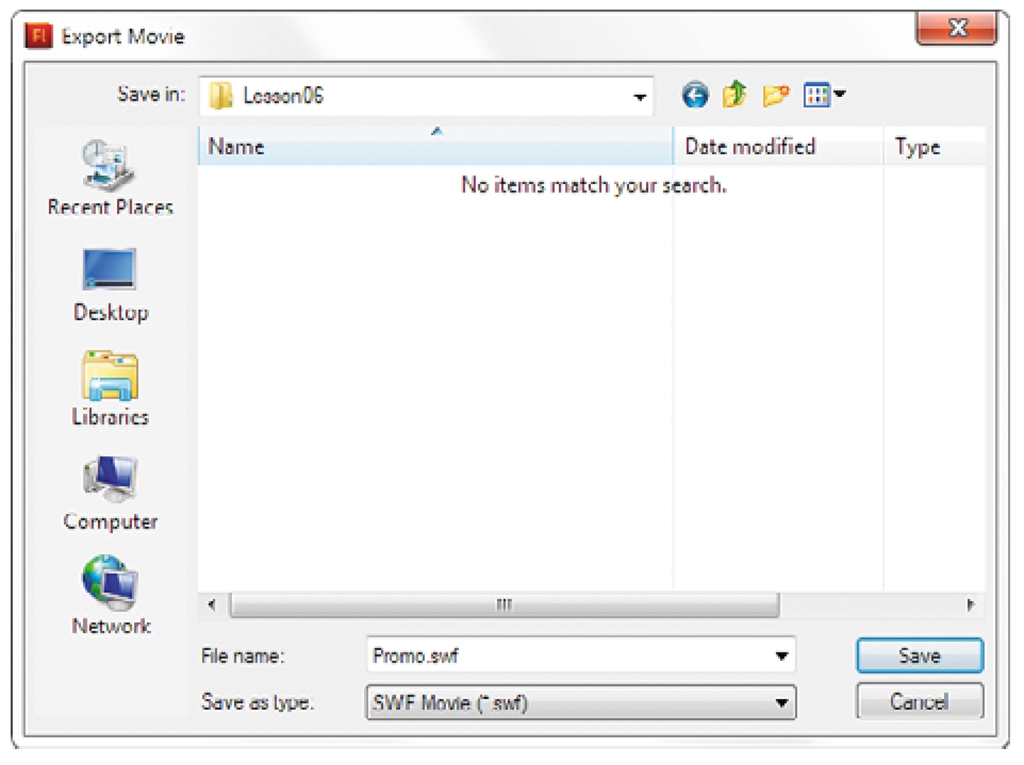
3 In the Export Movie dialog box, navigate to your Lesson06 folder, choose SWF Movie (*.swf) from the Save As Type/Format menu, type Promo.swf in the File Name/Save As text box, and then click Save.
Note: You can specify publish settings for SWF files in the Flash tab of the Publish Settings dialog box (File > Publish Settings).
4 In Windows Explorer/the Finder, right-click/Control-click the file Promo.swf inside the Lesson06 folder and choose Open With > Adobe Flash Player from the context menu.
5 When you’re done reviewing the document in the Flash player, close the file.
6 Launch Adobe Dreamweaver CS5, and in the Welcome screen, click HTML in the Create New section.
7 Choose File > Save As. In the Save As dialog box, navigate to the Lesson06 folder, type index.htm in the File Name/Save As text box, and then click Save.
8 Choose Insert > Media > SWF. In the Select File dialog box, navigate to the Lesson06 folder, select the file Promo.swf, and then click OK/Choose. (If you see an Object Tag Accessibility Attributes dialog box, click Cancel.)
9 Save the file, and then choose File > Preview In Browser > [Web Browser Name]. If you see an alert about copying dependent files, click OK. Depending on the security settings, you may need to allow blocked content before the website will open in your default web browser.
10 When you’re done reviewing, close the web browser window and return to Dreamweaver.
Roundtrip editing between Dreamweaver and Flash
To make modifications to your website, you can open the SWF file in Flash from Dreamweaver. When you’re done editing the site in Flash, the SWF is reexported and the changes are automatically reflected in Dreamweaver.
1 In Dreamweaver, select the placed SWF file in the Design view, and then click the Edit button in the Properties panel.
2 In the Locate FLA File dialog box, navigate to the Double Identity folder inside the Lesson06 folder, select the file index.fla, and then click Open.
3 Normally you would make changes at this point, but for this lesson you don’t have to make any changes. You’ll make the return trip to Dreamweaver from here. Click the Done button in the Edit bar above the document window.
The SWF file is reexported, and the content in the Dreamweaver document is automatically updated.


