Online publishing with the EPUB format
The EPUB format is an XML-based format designed to enable text to reflow according to the capabilities of various eBook readers, which means that you can resize the text, change the font, or view an eBook on different screen sizes, and the text will reflow to fill the available view area. This makes the EPUB format the best choice for eBooks that are read on small, handheld reading devices. In contrast, PDF preserves the original layout of a document, giving you complete control over page design and presentation. PDF is the optimal choice for eBooks that have a complex design or will only be read on regular-sized computer screens.
Because EPUB is XML-based, the format can be converted into other proprietary formats such as the MOBI format, which is compatible with the Amazon Kindle. For detailed instructions on converting an EPUB file into the MOBI format, see the technical paper "From Adobe InDesign to the Kindle Store” at www.adobe.com/products/indesign/pdfs/indesigntokindle_wp_ue.pdf.
The EPUB format does not define page structure, so all the content flows together in one continuous linear stream. This can present a problem for publications that have an elaborate design. If your layout is quite simple, you probably won’t notice much of a difference between it and its eBook equivalent. Because the EPUB format is based on XML, which is similar to the CSS web standard, the more a publication is formatted similarly to a CSS layout the higher the chance that the document will translate well to EPUB.
Some publications may be too design-intensive to be properly presented as an EPUB file. In such cases, PDF is a more suitable format for online viewing.
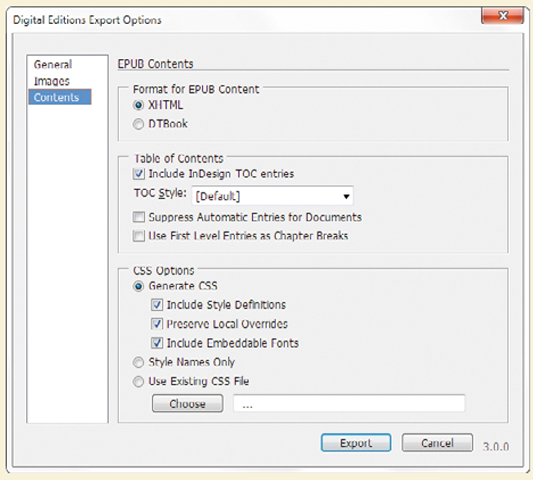
InDesign CS5 can export directly to the EPUB format when you choose File > Export for > EPUB. In the Digital Editions Export Options dialog box, you can specify how formatting in the InDesign file will be translated to EPUB format.
To preview your EPUB documents, use Adobe Digital Editions software, a free download from adobe.com.
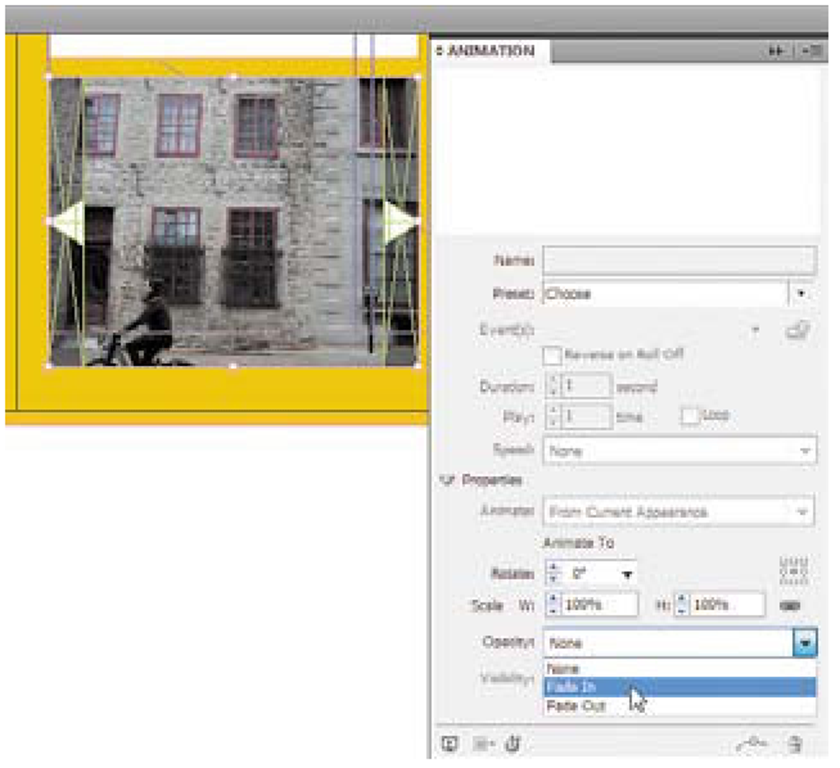
4 Click the Properties triangle at the bottom of the Animation panel to reveal more options, and choose Fade In from the Opacity menu.
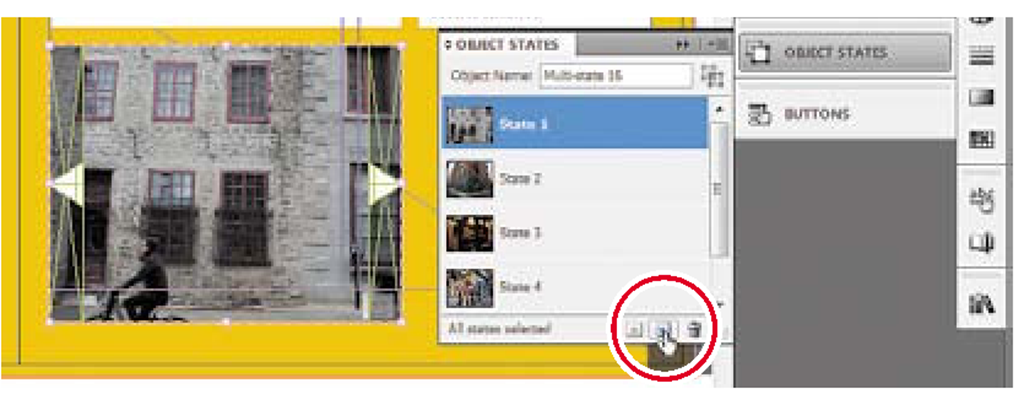
5 In the Object States panel, click the Convert Selection to Multi-State Object button. InDesign uses the selected objects to create a single object with multiple states that now appear in the Object States panel.
6 Now try it out. Click the various states in the Object States panel to see how the multi-state object changes on the layout.
7 In the Object States panel, select State l. You’ll leave the object in this state.
8 Choose Edit > Deselect All so that no objects are selected on the layout.
You’ve created a single object with multiple states; each picture is now a state that can be displayed. To let a reader flip through the pictures, you’ll add buttons next.
Creating buttons from objects
Each photo in the multi-state object includes a pair of triangle graphics that are intended to be used as buttons. At this point they’re just graphics, but you’ll now make them function as buttons.
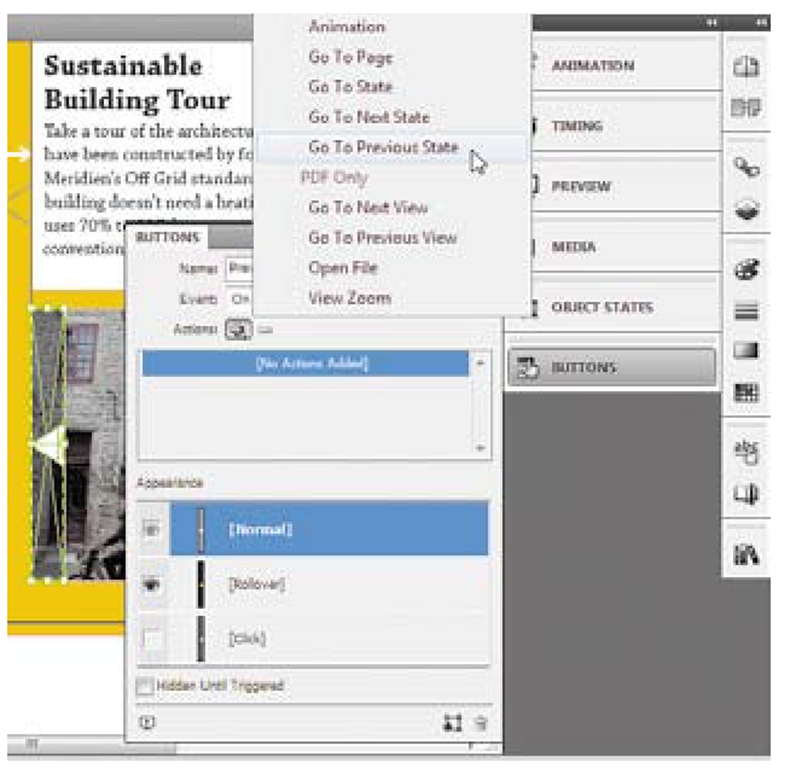
1 With the Selection tool, select the tall, narrow object containing the triangle at the left edge of the multi-state object.
2 In the Buttons panel, click the Actions + button (add an action), and choose Go to Previous State.
3 Select the object containing the triangle on the right side of the multi-state object and use the Buttons panel to add the Go to Next State action, just as you did in steps 1 and 2.
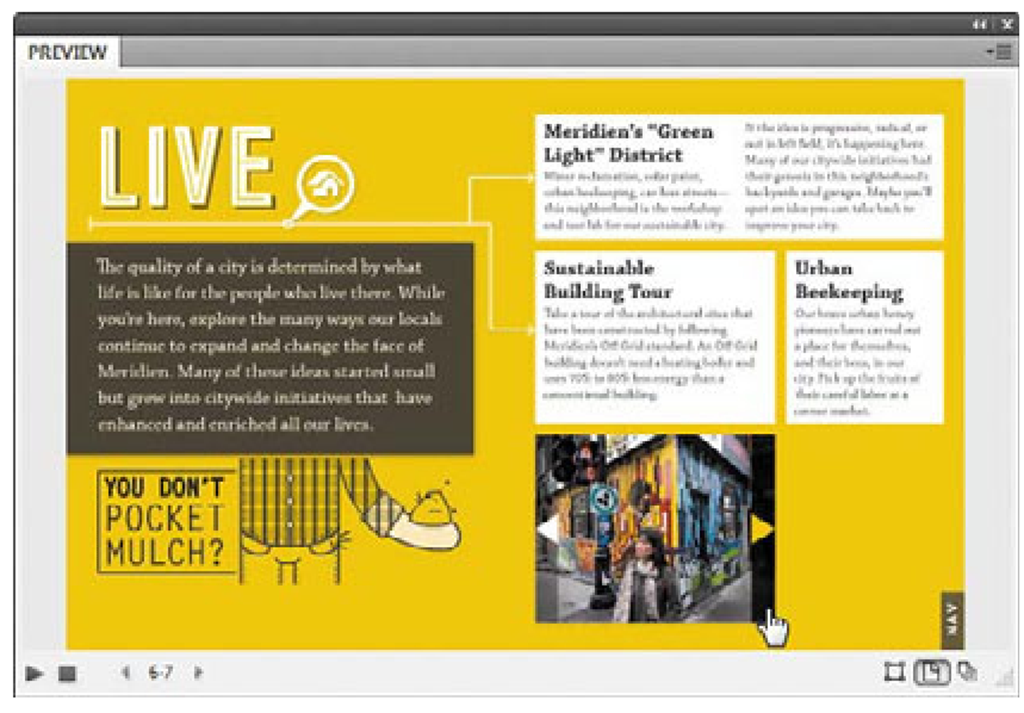
4 Drag the Preview panel tab to the left to separate it from the other panels, and enlarge the panel so that the buttons you just created are easier to see.
5 Click the Preview Spread button at the bottom-left corner of the Preview panel. After the initial animation plays, click the left and right buttons you just set up to test how well the buttons change the states of the multi-state object.
Tip: To create a multi-state button from scratch, simply design it using the drawing tools in InDesign or import a graphic, and then click Convert Object to Button (S) at the lower-right corner or the Buttons panel. Then use the Buttons panel to customize it.
6 When you’re done testing the buttons, drag the Preview panel tab back to the stack of other interactive panels to move it out of the way. Or you can click Interactive in the Application bar and choose Reset Interactive to restore the original arrangement of the Interactive workspace.
Adding a sound to a button
Now you’ll make a button on another spread play a sound.
1 Go to page l2. If necessary, choose View > Fit Spread in Window to see the entire map.
You need to add a sound to a button for an establishment called The Grease Cart.
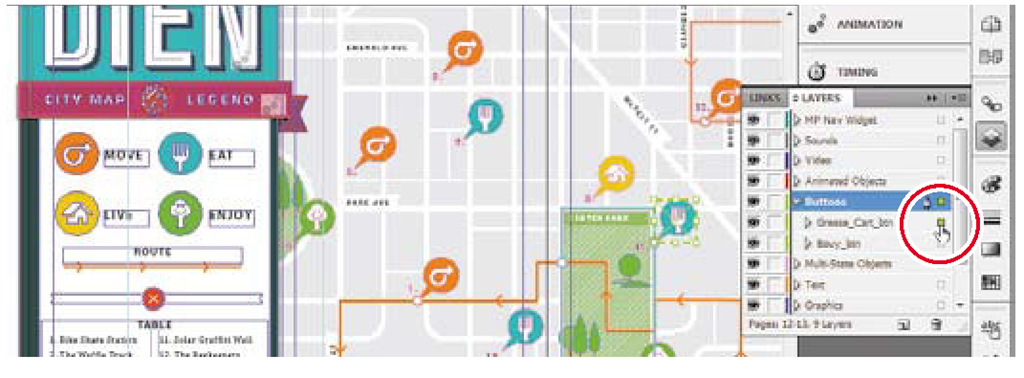
There are many buttons on the map. While you could locate the correct button by using the legend, the designer of this file intelligently organized the objects using the Layers panel so the button would be easier to select as a layer.
2 In the Layers panel, expand the Buttons layer and click the selection box for the object Grease_Cart_btn to select it.
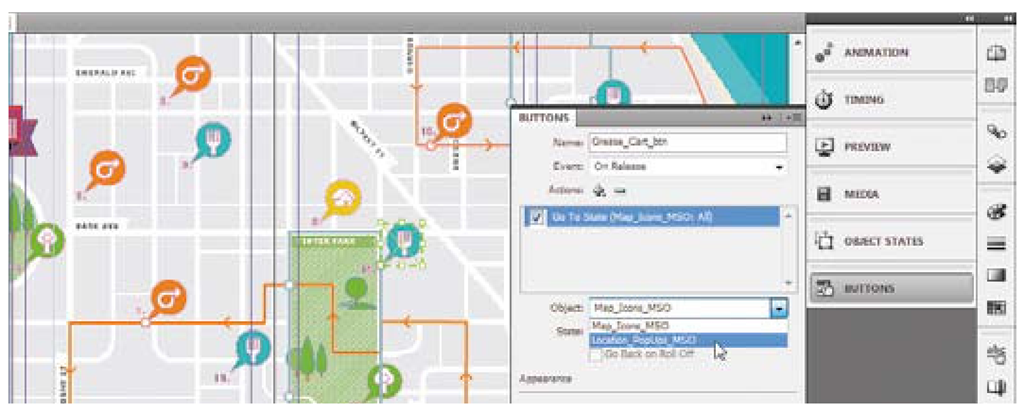
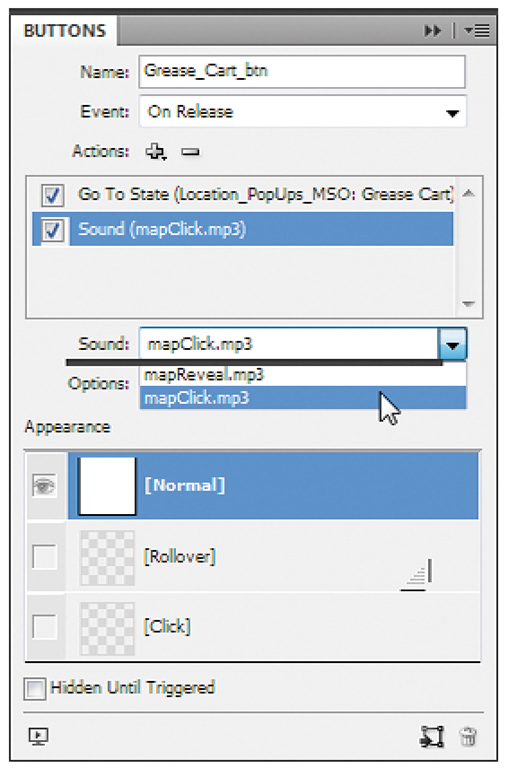
3 In the Buttons panel, click the Actions + button (add an action), choose Go to State, and then choose Location_PopUps_MSO from the Object menu.
4 In the Buttons panel, choose Grease_Cart from the State menu, click the Actions + button, and choose Sound. Notice that this adds Sound to the list of actions in the Buttons menu, meaning that when this button is released, InDesign will go to the specified state and play a sound. You still need to specify which sound to play, so you’ll do that next.
5 In the Buttons panel, choose mapClick.mp3 from the Sound menu.
6 Click the Preview Spread button at the bottom-left corner of the Buttons panel, and enlarge the Preview panel as needed.
7 In the Preview panel, click the Eat button to display just the places where you can eat in the city of Meridien, and then click the fork icon in the middle, next to the legend number 14. This is the button you just set up.
Clicking the fork icon should display the state that appears as a pop-up window describing The Grease Cart (the state called Location_PopUps_MSO that you applied in step 3), and if you can hear your computer audio you should hear a click sound.
8 When you’re done testing your work, close the Preview panel and the other panels you were using, or reset the Interactive workspace.
9 Save the InDesign document.
Next you’ll add a video clip to the InDesign document, but there are a couple of things you need to do first. You’ll add a text overlay to the video using the video editing features in Photoshop, and then you’ll convert it to Flash video so that it can be delivered online as part of a Flash project.
![tmp272f-15_thumb[2] tmp272f-15_thumb[2]](http://what-when-how.com/wp-content/uploads/2012/06/tmp272f15_thumb2_thumb.png)
