Lesson Overview
In this lesson, you’ll learn all the skills and techniques you need to put together a sophisticated multimedia brochure:
• Adding animation
• Adding interactivity
• Editing movie files in Photoshop
• Adding video and audio
• Exporting to Flash Player and Flash Professional CS5 format You’ll probably need between one and two hours to complete this lesson.
Note: Before you start working on this lesson, make sure that you’ve installed the Creative Suite 5 Design Premium software on your computer, and that you have correctly copied the Lessons folder from the CD in the back of this topic onto your computer’s hard disk.
About converting print documents to Flash
The City Guide document you’ll use in this lesson starts out as an insert in the Local print magazine you’ve worked with in the earlier lessons. Converting the City Guide is straightforward because it was designed to capture readers’ attention both in print and as an interactive online document. In addition, Adobe InDesign CS5 makes it easy to convert a print document to Flash Player (SWF) or Flash Professional (FLA) format without writing code, so you can focus on designing your layout.
When you gain the ability to easily create compelling online experiences from print documents using InDesign, you can potentially save money by not requiring additional software and reducing your printing, materials, and shipping costs as well as your carbon footprint.
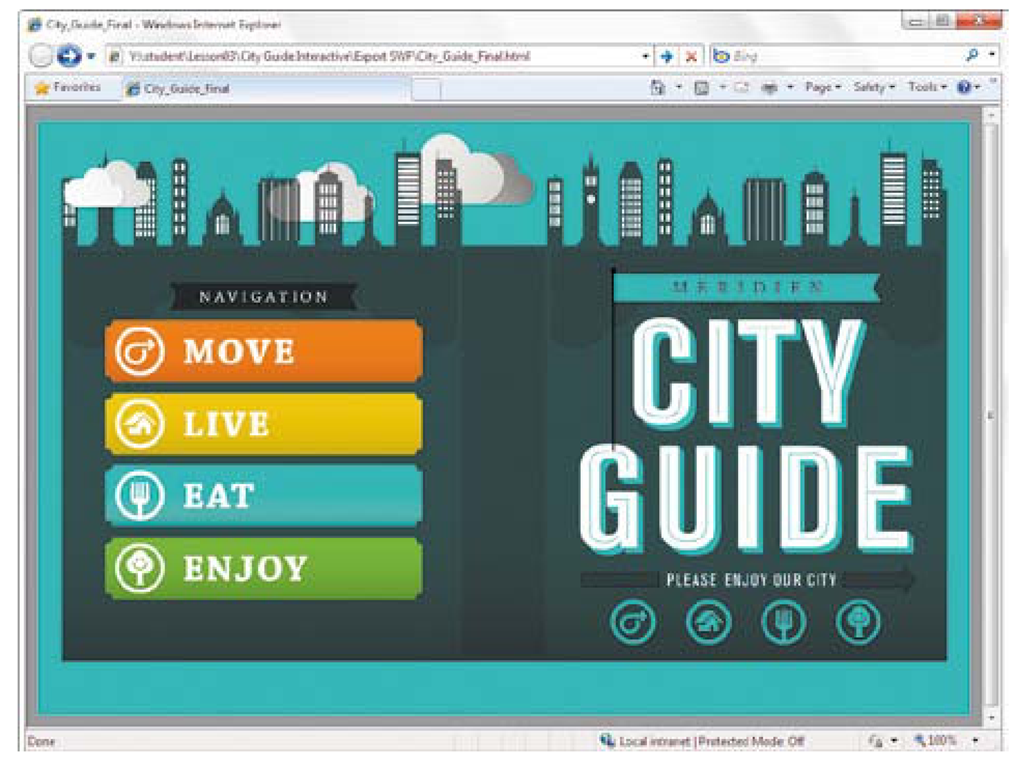
You’ll start by taking a look at the finished City Guide online document.
1 Open your Lesson03 folder on your desktop, open the folder Export SWF, and double-click the file City_Guide_Final.html to open it in your default web browser. This file includes a SWF file that plays back in the Flash Player plug-in in your web browser.
2 Click the Move button. Notice that this document includes animation in addition to interactivity.
3 In the bottom-right corner of the City_Guide_Final document, move the cursor over the Nav button. It expands to reveal navigational controls. Click the right arrow to see the next page, and explore the rest of the pages by clicking the right arrow again.
Tip: When designing specifically for the web, consider using a horizontal page layout.
4 Click the Map button in the Nav panel. In the legend on the left side, click the Move, Eat, Live, and Enjoy buttons to see how they show and hide different groups of points of interest on the map.
You can leave this web page open for reference as you work on this project during the lesson.
5 Open your LessonO3 folder on your desktop, and double-click the file City_Guide_Start.indd. If you see a message asking if you want to upgrade links, click Upgrade Links.
6 Choose File > Save As, and save the document to your LessonO3 folder as City_Guide.indd.
7 Go from spread to spread to explore the document.
Adding animation
The default workspace in InDesign CS5 hides the animation panels, but choosing a different workspace quickly brings them to the forefront for your convenience. Animations you create in InDesign are preserved when you export to Flash Player or Flash Professional. In addition, InDesign CS5 comes with the same motion presets as Flash Professional CS5, and if you create motion presets in Flash Professional CS5, InDesign CS5 can use them. This means that animations you create in InDesign don’t exist in isolation—you’re building a foundation that you can optionally enhance using Flash Professional CS5.
1 In the Application bar, choose Interactive from the workspaces menu. This rearranges the panels to make the animation and interactivity controls the most prominent along the right side of the workspace.
2 Go to page 6, and with the Selection tool, select the LIVE headline at the upper-left corner of the page.
3 In the Animation panel, choose Fly in from Top from the Preset menu. This applies an Adobe Flash motion preset to the selected object. In the Animation panel, the butterfly graphic previews the effect for you.
4 Click the Preview Spread button at the bottom-left corner of the Animation panel. This opens the Preview panel, where you can evaluate the current state of the animation.
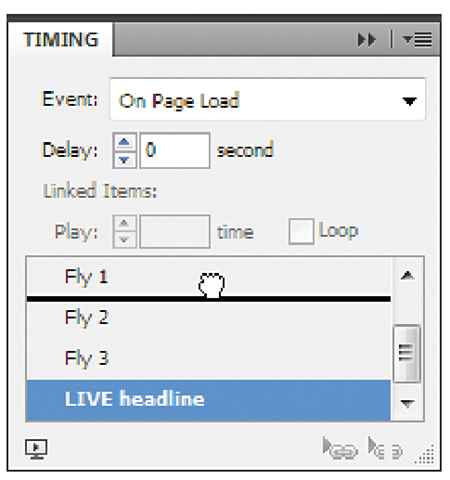
The LIVE headline moved last because it was the last animation that was created. However, you want it to be the first object to animate, so you’ll change the animation order using the Timing panel.
The Preview panel is fully interactive, so if you want to test buttons without exporting the project, the Preview panel is the place to do it. It’s a good idea to enlarge the Preview panel to make it easier to click buttons and links.
Comparing buttons and hyperlinks
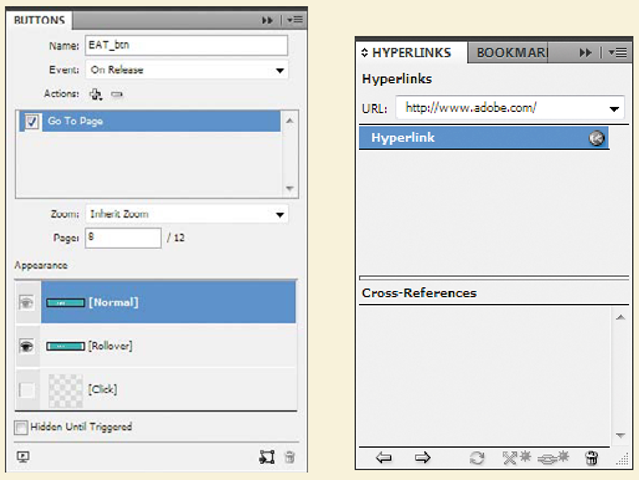
You can use buttons and hyperlinks to build navigation controls in InDesign. While at first glance it might seem that there’s overlap between what buttons and hyperlinks can do, to choose between them, you need to know a few key differences in how they work.
Buttons are generally graphic in nature, such as a picture or drawn object that you set up as a button. A button works much like a graphics frame; for example, you can replace the contents of a button. Buttons can also have multiple states. Options for buttons are in the Buttons panel (Window > Interactive > Buttons). You’re more likely to use buttons in graphically engaging multimedia projects, where appearance and compelling interactivity is important.
Hyperlinks are generally text-based and can be generated from text. For example, InDesign can create a live URL hyperlink from URL text you’ve selected. Hyperlinks have fewer display and rollover options than buttons, and can handle only a couple of basic states. Hyperlink options are in the Hyperlinks panel (Window > Interactive > Hyperlinks). You’re more likely to use hyperlinks in a text-heavy reference document, where the hyperlinks may be automatically generated and also automatically preserved when you export the file to PDF.
5 In the Timing panel, drag LIVE Headline from the bottom of the list to the top.
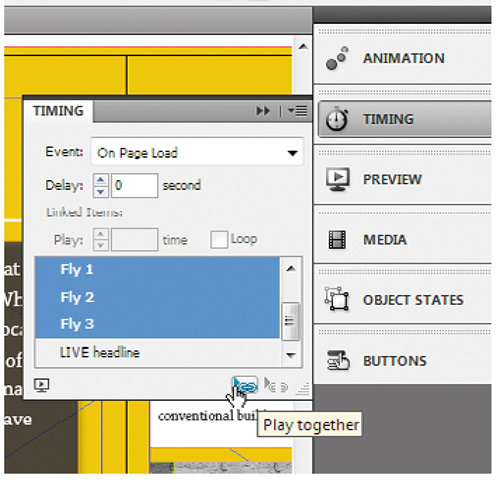
6 In the Timing panel, select Fly l, Fly 2, and Fly 3, click the Play Together button, and preview the spread again. This is an easy way to play multiple animations simultaneously.
You’ve successfully added and edited an animation in InDesign. Next you’ll add buttons with multiple states that can respond to mouse rollovers.
Adding interactive elements
When you publish a brochure (or a newsletter, or flyer—you name it) for onscreen viewing rather than for print, you typically need to add interactive content so that readers can navigate the document online.
Creating multi-state objects
With InDesign CS5 you can easily create multi-state objects, which are commonly used to improve interaction feedback for buttons. You can also use multi-state objects to augment the media that was in your print layout as in the following steps, where the space that contained one image in the print layout can contain multiple images in the online layout.
1 Close any open panels, and open the Layers panel (press F7).
2 In the Layers panel, click the selection box for the Multi-State Objects layer to select all of the objects on that layer, which are pictures.
Leave the objects selected for the rest of the steps; you’ll use each of these pictures as a different object state.
3 In the Control panel, click the Align Top Edges button, and then click the Align Left Edges button. If you don’t see these buttons in the Control panel, your monitor may not be wide enough to display them; in that case choose Window > Object & Layout > Align, and click the same buttons in the Align panel.
Tip: InDesign shows and hides options on the Control panel depending on the width of the monitor. If you want to see an option that there isn’t room to show in the Control panel, you can make room by hiding options. Click the panel menu at the right edge of the Control panel and choose Customize.
The Align buttons are a quick and easy way to make sure all states are lined up.


