Selecting and editing frames that are stacked behind other frames
The sunrise image should also be extended across the new page, but you can’t select it by clicking because it’s completely behind the Cover_Models.psd image. Fortunately, there’s more than one way to select it.
1 With the Selection tool, hold down the Control/Command key, and then click the sunrise image. The first time you click, the bounding box for the Cover_Models.psd image may activate. Keep the Control/Command key pressed and click again until the blue outline of the sunrise image activates. You can confirm this by noting which object in the Layers panel has a selected square to the right of it.
2 Once the sunrise image’s frame is selected, you can drag the handle in the middle of the right edge until it is 74 picas wide.
► Tip: You can restack objects by dragging them up and down in the Layers panel.
Note: With multiple overlapping frames, you may need to Control/Command-click repeatedly through the stack until the correct frame is selected.
3 Save your changes.
The second way to select the sunrise image would be to locate it in the Layers panel and click the square to the right of it, as you did with the Cover_Models.psd image.
Placing a Photoshop file with layer comps
Navigate to the last page, the back cover. Currently, the back cover is blank. You will first place the back page photo into the frame provided for it, and then make adjustments to the image in Photoshop.
1 Use the Selection tool to select the frame on the last page.
2 Choose File > Place. Navigate to the Links folder inside the Lesson02 folder. Select the file wifi_laptop.psd, select both Show Import Options and Replace Selected Items, and then click Open.
Note: If your placed graphic does not look as smooth as shown in the illustration on this page, choose View > Display Performance > High Quality Display.
3 In the Image Import Options (wifi_laptop.psd) dialog box, select the Show Preview option. In the Layers tab, notice that not all layers are turned on. Choose Sponsor Off from the Layer Comp menu; the preview thumbnail updates. Click OK.
4 To view the cover without page frames and guide lines, click the Screen Mode button at the bottom of the Tools panel and choose Preview. When you’re done previewing, choose Normal from the same menu. You can also toggle between Normal and Preview by pressing the W key.
► Tip: You can hide or show each layer independently. Layer comps are just a convenient way to hide or show preselected groups of layers.
The sunset doesn’t match the blue bottom background very well, so you will now use Photoshop to unify the image by altering the color balance of the sky.
5 Use the Selection tool to select the frame containing the image and choose Edit > Edit With > Adobe Photoshop CS5 (default).
6 In the Layers panel in Photoshop, click the triangle next to the Background layer group to reveal its contents. Select the Background Image layer at the bottom of the Layers panel.
7 In the Adjustments panel, click the Color Balance icon. This adds a new Color Balance adjustment layer immediately above the selected layer.
8 In the Color Balance panel, make sure Midtones is selected, and then enter -62 for the Cyan/Red slider, 1 for the Magenta/Green slider, and 31 for the Red/Blue slider. Leave Preserve Luminosity selected.
Because the document now contains a layer that wasn’t included in the original layer comps, you’ll learn how to update the layer comps so they’re properly preserved when you return to InDesign.
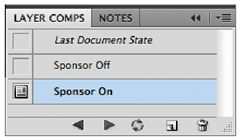
9 Open the Layer Comps panel (Window > Layer Comps). Two layer comps have already been defined, named Sponsor Off and Sponsor On. Click the box to the left of the Sponsor On layer name to enable that layer comp, and notice the effect it has on the visibility of the layers in the Layers panel and in the image.
A layer comp is simply a snapshot of the visibility, position, and layer style settings for various layers in the Layers panel. You may notice that the Color Balance layer you created was turned off when you turned on the Sponsor On layer comp, because that layer didn’t exist when the layer comp was originally saved.
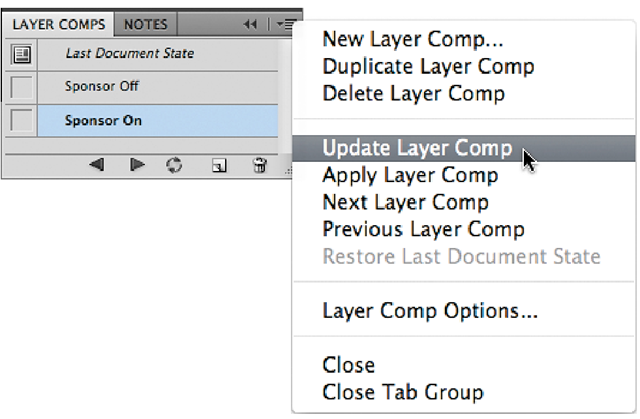
10 Turn on the Color Balance layer, make sure Sponsor On is highlighted in the Layer Comps panel (but don’t turn it on), and then choose Update Layer Comp from the Layer Comps panel menu. Now the Sponsor On layer comp includes the Color Balance adjustment layer. You can repeat this process for the Sponsor Off layer comp: Turn on the layer comp, turn on the Color Balance adjustment layer, and update the layer comp.
When placing a Photoshop file containing layer comps in InDesign, you can choose which version—or layer comp—you want to use in your publication without having to reopen and adjust the file in Photoshop.
11 Save changes, close the document, and then switch back to InDesign. An alert may appear, letting you know that the graphic has changed, click OK.
12 With the back cover image still selected in InDesign, choose Object > Object Layer Options. From the Layer Comp menu in the Object Layer Options dialog box, choose Sponsor On, select the Preview check box to see the effect, and then click OK.
![tmpbd7a-28_thumb[4] tmpbd7a-28_thumb[4]](http://what-when-how.com/wp-content/uploads/2012/06/tmpbd7a28_thumb4_thumb.png)
![tmpbd7a-29_thumb[4] tmpbd7a-29_thumb[4]](http://what-when-how.com/wp-content/uploads/2012/06/tmpbd7a29_thumb4_thumb.png)
![tmpbd7a-30_thumb[4] tmpbd7a-30_thumb[4]](http://what-when-how.com/wp-content/uploads/2012/06/tmpbd7a30_thumb4_thumb.png)
![tmpbd7a-31_thumb[4] tmpbd7a-31_thumb[4]](http://what-when-how.com/wp-content/uploads/2012/06/tmpbd7a31_thumb4_thumb.png)
![tmpbd7a-32_thumb[4] tmpbd7a-32_thumb[4]](http://what-when-how.com/wp-content/uploads/2012/06/tmpbd7a32_thumb4_thumb.png)
![tmpbd7a-33_thumb[4] tmpbd7a-33_thumb[4]](http://what-when-how.com/wp-content/uploads/2012/06/tmpbd7a33_thumb4_thumb.png)


![tmpbd7a-36_thumb[4] tmpbd7a-36_thumb[4]](http://what-when-how.com/wp-content/uploads/2012/06/tmpbd7a36_thumb4_thumb.png)
