Geoscience Reference
In-Depth Information
Spend some time looking at the
exposure and deciding how many
units there are (Section 3.2.2). Look
for any major features such as
cross-cutting relationships or
displacements. Choose a
representative part of the cliff to
sketch (shown by the yellow box
in this case).
4
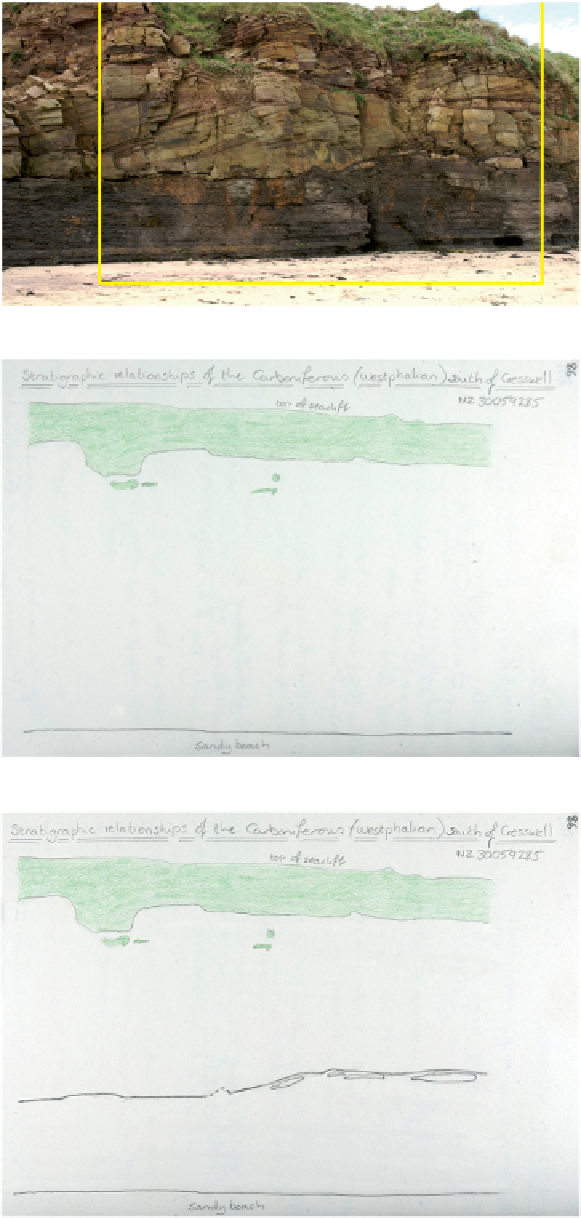
2. Draw the outline
Decide on the best orientation of your
notebook for the sketch (in this case
landscape). Put a title/caption at the top of
the page, detailing the subject of the sketch
and the aims. Draw the outline of the area
first, i.e. the bottom and top of the cliff, and
extend the sketch laterally to the edge of
the chosen area. If there are areas of
vegetation add at least the main ones as
points of reference.
3. Draw the major geological
boundaries
Draw the major boundaries between the
units. As you sketch in the boundaries pay
particular attention to whether the
boundaries are sharp, or gradational,
undulatory or planar. Use a thick, bold line
for where the boundary is sharp and
distinctive, and a medium density line for
those that are gradational. Use your
compass-clinometer to estimate apparent
angles (Section 4.3.1) and your thumb held
up in front of you at arm's length to estimate
the relative thicknesses. Ensure that the
boundaries between the units are
continuous for their entire length; if the
boundary is obscured by vegetation or
slipped material mark this in.
Figure 4.5
Photograph of Carboniferous-age strata near Cresswell, Northumberland, UK and series of sketches
showing how a fi eld sketch of this exposure might be gradually constructed. Note that features of no interest
such as the large cracks have been ignored because they would detract from the geological features of interest.