Geoscience Reference
In-Depth Information
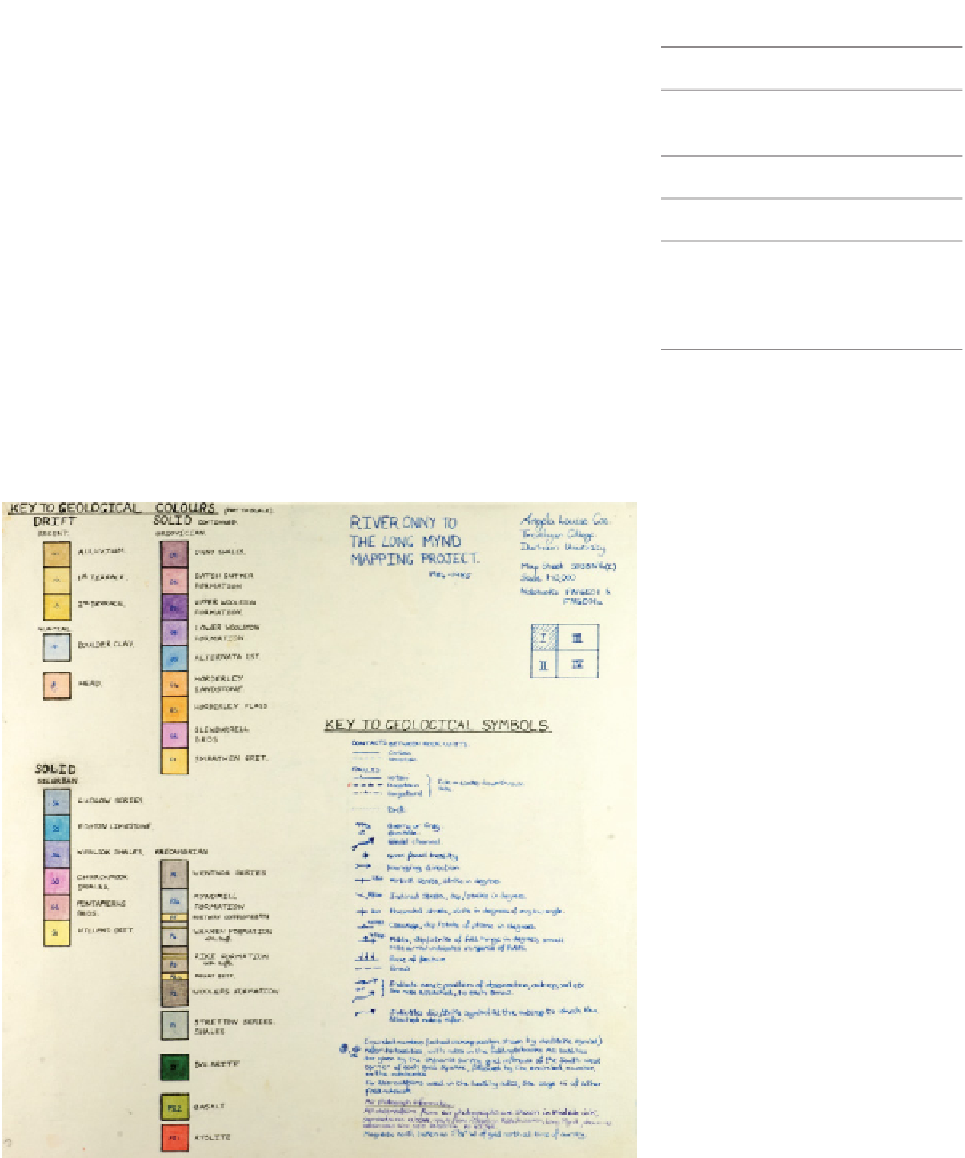
Protect your fi eld maps carefully; use single sheets that fi t in
the map case, as folded sheets wear quickly so that important
topographic details or data can be lost. Make sure each fi eld
map sheet has the information in Table 10.4 (on the reverse if
there is not enough space, as in Figure 10.6). Table 10.5
(p. 218) provides a summary of the other types of information
that could be included on the fi eld map; some examples are
given in Figure 10.7 (p. 219). The emphasis will depend on the
purpose of the exercise.
Table 10.4
Checklist of
information to be included on
each fi eld map.
Additions to a fi eld map
Scale and N arrow
Explanation of colours used
10
Stratigraphic column (if
appropriate)
Field maps must be neat, drawn with a sharp, thin pencil lead,
and should not include so many notes and symbols that the
map becomes cluttered. Record more detailed notes, and
multiple structural observations, in your notebook, with
localities cross referenced to the map. Label localities on the
fi eld map with the same numbers as used in the notebook, and
ring or box them to distinguish them from other numbers on
the fi eld maps (Figure 10.7c, p. 219). Label faults and
unconformities (e.g. with 'f', 'uc'), as pencil line thicknesses
cannot be standardized (you could also use coloured pencils to
distinguish different lines). Colour rock exposures lightly as
you go (Figure 10.7a), and label them with their corresponding
List of non-standard symbols used
Cross reference to notebook(s) used
Name and contact details of
author
Date of mapping
Reference direction for structural
data (e.g. grid N)
Figure 10.6
A well-structured
layout for additional information on
a fi eld map that contains most of
the elements mentioned in Table
10.4, including a small graphic
showing how this fi eld map sheet
relates to three adjacent sheets
produced for the project. (Reverse
side of fi eld map of Angela L. Coe,
The Open University, UK.)