Graphics Reference
In-Depth Information
Image Compression
When it comes to optimizing images for use in
Flash, I
ve heard advice stating that compres-
sing your images before importing them is bet-
ter and I
'
ve also heard that letting Flash do the
compressing is better. I
'
'
d like to offer the fol-
lowing
advice: Compress a
little before importing and let Flash do the rest.
By that, I mean you should save your images at
a high-quality compression setting and then
adjust as needed within Flash.
“
middle of the road
”
High-Quality Images
Because you are most likely creating work to be
viewed on a computer monitor, you don
tneed
to worry about your images having high resolu-
tions as you would for another medium such as
print. The fact that computer monitors show
everything at 72 dpi also helps with your file
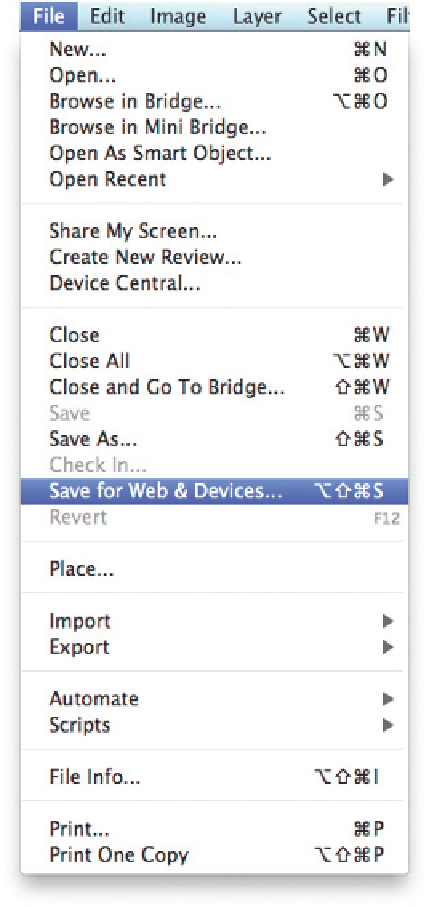
size. One mistake I
'
ve seen made by various
people is to save an image from Photoshop with
the
'
“
Save As
…”
command as opposed to using
the
“
Save for Web
&
Devices
…”
option in
Photoshop
s File menu (Fig. 5.8). The reason I
consider this to be a mistake is due to file/image
control and resulting file size. Although the dif-
ference in the resulting file sizes may not be
huge in some cases, there is still a difference
that could end up pushing your work just over
the constraints set by your project specs. The
“
'
Save for Web
&
Devices
…”
option is a very
easy process that I
'
ve outlined in the following
steps:
1. With your image already open in Photoshop,
choose
“
Save for Web
&
Devices
…”
from
Figure 5.8
The Photoshop File menu.
the File menu (Fig. 5.8).
2.
”
(or any other available choice) from the
Preset menu on the right and press the Save button (Fig. 5.9).
3. When the Save Optimized As window opens, navigate to the
correct folder where your image will live and name your file
accordingly (Fig. 5.10).
4. Use your saved image in your banner or microsite.
In the resulting window, choose
“
JPEG High