Graphics Programs Reference
In-Depth Information
1
Defining and saving your custom grid from the Define Perspective
Grid dialog (View menu)
The new one-point grid created by modifying
the [1P-Normal View] preset
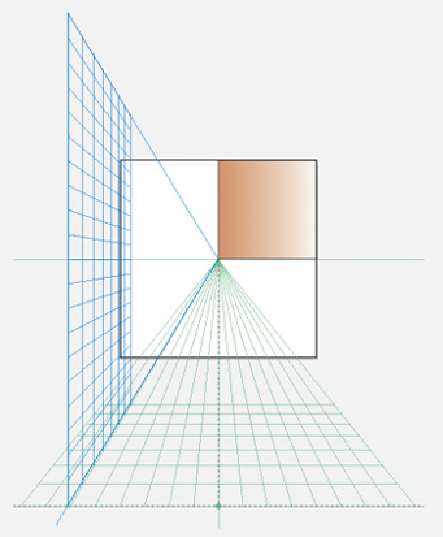
2 Adjusting the grid to fit the illustration design.
To begin customizing the grid to fit her
design, Drew chose View> Perspective Grid> One Point Perspective and selected the
preset she had created previously. Selecting the Perspective Grid tool (which made
the grid editable), she dragged the left Ground Level control until it met the lower-
left corner of the artboard. Then she dragged the Horizontal Level control down and
the Vanishing Point control to the right. Finally, to extend the bottom grid plane to
the rear wall, she dragged the Extent of Grid control upward so that the grid met the
bottom of the wall (to accurately see the full extent of the grid, it may be necessary to
zoom in).