Graphics Programs Reference
In-Depth Information
Be thrifty with image maps
Size your map artwork appropriately (both in file size and dimensions) to avoid
potential errors when rendering. You should also position your 3D objects first and
then map only the visible surfaces.
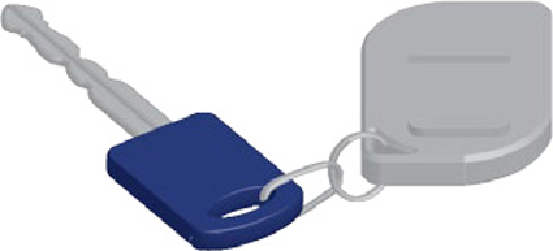
3 Extruding and positioning the 3D objects.
He selected one object at a time and chose
Effects> 3D> Extrude & Bevel. For each piece he adjusted value in the Extrude Depth
field until it looked right. For objects such as the bow of the key he applied a Round-
ed bevel selected from the Bevel menu. He changed the fill color of the key bow to
blue, but he left the other objects gray, a color similar enough to the metallic maps
that some surfaces wouldn't need image maps. Next, McGarry selected objects one at
a time and re-entered the Extrude & Bevel dialog, where he rotated each object to the
appropriate angle using the cube widget. With all the parts now positioned, he sepa-
rately applied perspective first to the fob and then the key, this time by customizing
the Perspective field in the Extrude & Bevel dialog.
Unlike conventional 3D software, Illustrator's 3D objects cannot pass through other
objects occupying the same space; objects can only be moved in front or behind other
objects. As a result, McGarry had to create the illusion of the interconnecting links in
the image as separate pieces, arranging them in front or behind each other.
3
Artwork extruded and rendered as 3D objects, then positioned be-
fore applying maps