Graphics Programs Reference
In-Depth Information
1
The separate parts of the power cord drawn using the Pen tool, in-
creasing the stroke weight for each section: 7
pt for the wire, 12 pt for the insulation, and
40 pt for the jacket
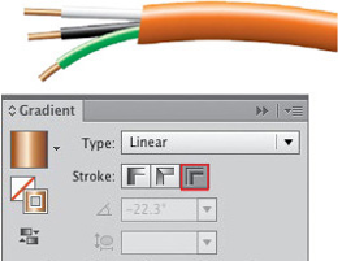
2 Applying gradients to strokes.
McGarry applied gradients to his paths using the Gra-
dient panel chosen from Swatch Libraries> Gradients. The copper wire, for example,
used a copper gradient from the Gradients> Metals library. In the Stroke area of the
Gradient panel, he chose “Apply gradient across stroke” (the third option) and then
adjusted it using the slider. He also used this option for the insulation and cord jack-
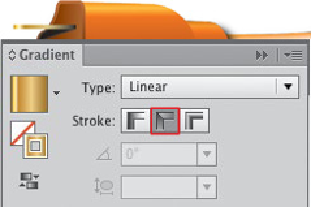
et. Since the live and neutral plug prongs were flat straight edges, he chose “Apply
gradient along stroke” (the middle Stroke option) and moved the lightest stop on the
slider to the left to indicate where the prong turns at the tip. He duplicated these
prongs and used Paste in Place to put a copy on top. He then applied a Gradient>
Fades swatch to darken the end of these prongs but still expose the brass beneath,
creating a more natural transition than darkening alone. For the plug body end he
drew the contour with the Pen tool and applied an orange gradient to the stroke and
the fill; he adjusted the stroke gradient to indicate a soft edge transition.
2
Applying a gradient to the copper wire from the Metals library us-
ing the third Stroke option to apply it across
the stroke width
The plug prong using a gradient from the Metals library using the
middle Stroke option to apply it along the
stroke length