Game Development Reference
In-Depth Information
Once you have a good model sheet, you need to put the images into your Blender file
and set up your workspace. Follow these steps:
1. Open a new Blender file if you have not done so and set it up to have two orthogonal
viewports: one from the front view (Numpad 1) and one from the side view (Numpad
3), as in Figure 3.2.
Figure 3.2
Blender interface
with front and side
viewports
2. Hover the mouse over the left viewport and press the N key to bring up its Viewport
Properties panel. Do the same with the right viewport. Scroll down in either
Properties panel to a panel entry called Background
Images. There you will find a check box and a clickable
arrow. Click both.
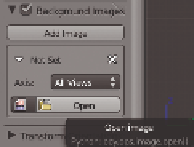
3. Clicking the arrow will reveal a button labeled Add Image.
Click it to reveal yet another panel entry with an arrow that
says Not Set next to it (Figure 3.3).
4. Click the Open button to bring up the File Browser window. For the front
viewport select
ProfessorZombieModelSheetFront.jpg
and for the side choose
ProfessorZombieModelSheetSide.jpg
. These files can be found in the chapter's online
materials. When you have loaded images into both viewports, you
are ready for the next step.
5. The images will need to be resized and centered in the viewport
so they match up on the grid when modeling. For this, you will
need to utilize the image controls that are now in the Background
Image panel entry that you were just working with.
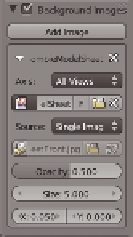
6. You'll need to change two different settings here: Size and the X/Y
placement of the image. For the front viewport, enter
.1
for the X
value and 0 for Y (Figure 3.4). Press the N key once you adjust the
Figure 3.3
The fully expanded
menu for adding
background images
Figure 3.4
Settings for the
front viewport


Search WWH ::

Custom Search