Game Development Reference
In-Depth Information
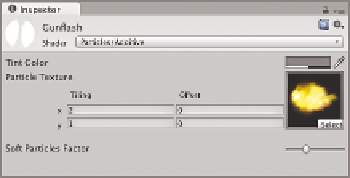
3. Create a new material with the Project view's Create menu. Give this material a
Particles/Additive shader.
4. Add a muzzle flash appropriate texture, like
muzzleFire.tif
found in the online
resources version of the project (Figure 10.17). If you are using the material from the
online resources, match the tile settings to the ones in the image. Add this new object
to the
Muzzle Flash
variable of the
Handgun.js
script on the
HandGun
object.
5. Create a point light and make it a child of
muzzleFlash
. Position it exactly on its par-
ent. Give it a range of 3 and an orange color. Rename the light
MuzzleLight
so it
interacts with the gun script.
6. Select the
Standard Assets
b
Particles
b
Legacy Particles
folder in the Project
view and find the
Sparks
prefab. Drag and
place this prefab to the Hierarchy view so
it is a child of
HandGun
.
7. If you do not already have one, create a new prefab called
Player
. Add the FPS con-
troller and all its child objects to this prefab. Save your Unity scene and project.
If you play your game now, you will have a handgun that fires bullets, creates sparks,
shows a muzzle flash, and lights a small area around you, as shown in Figure 10.18. You can
also shoot zombies in the head and kill them with this gun, so enjoy.
As you can now see, creating even simple reactions in a video game can be complex.
In the next section of this chapter, you will add a few more mechanics that can make your
games more playable and exciting, such as health and ammo pickups, a score, and an
ammo counter. You will also turn your one zombie into hundreds with a zombie spawner.
Figure 10.17
Creating the gun-
Flash material. If
you are using the
material from the
online resources,
match the tile set-
tings to the ones in
the image.
Figure 10.18
Firing the gun now
has a greater effect.

Search WWH ::

Custom Search