Game Development Reference
In-Depth Information
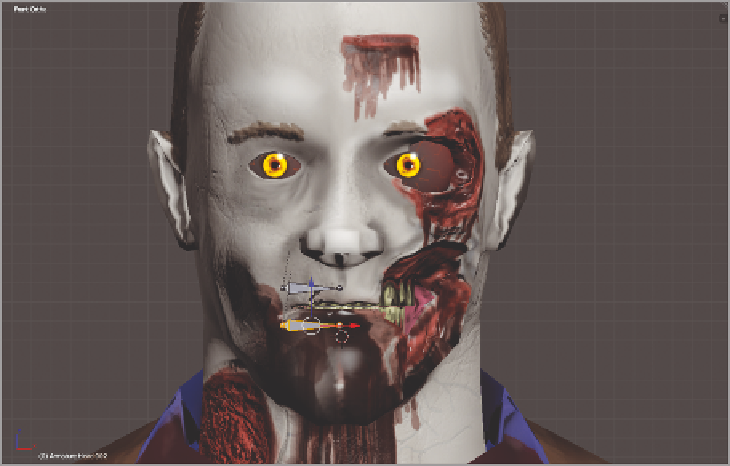
5. The Head bone will also be the source for several other bones in the face, since they
will need to move when the head moves. Extrude and disconnect another bone from
the top of the head and move it so it is in front of the zombie's upper lip. Rotate it so
it aligns parallel to the lip. Use Figure 7.26 as a guide. Press Shift+D to duplicate the
bone for the lower lip as well. In a full character rig, you would create several bones
near each lip to control each part of the mouth, but this zombie only needs to snarl.
Call these bones
UpperLip
and
LowerLip
.
Figure 7.26
Placing bones so
you can make the
zombie snarl at
the player. X-Ray is
turned off for visual
clarity.
6. Press Tab to enter Object mode. Select one of the eyes and press Shift+S to open the
Snap menu. Select Cursor To Selected to place the 3D cursor at the center of the eye.
Select the armature again and enter Edit mode.
7. Press Shift+E and then press Z to extrude two bones from the head along the z-axis.
Select one of these new bones, press Alt+P to access the Clear Parent menu, and
choose Disconnect Bone. Press Shift+S to bring up the Snap menu again and choose
Selection To Cursor. This will place the bone at the center of the eye.
8. With the bone still selected, change the Pivot Point options, located next to the
Display mode options in the viewport header, to 3D Cursor. This will make the bone
use the 3D cursor as the center for transformations. Press R to rotate the bone and
enter
-90
for the number of degrees you wish the eye bones to rotate. The bones will
now be pointing with their tail/tips forward (Figure 7.27). Call these bones
Eye_L
and
Eye_R
.
Search WWH ::

Custom Search