Game Development Reference
In-Depth Information
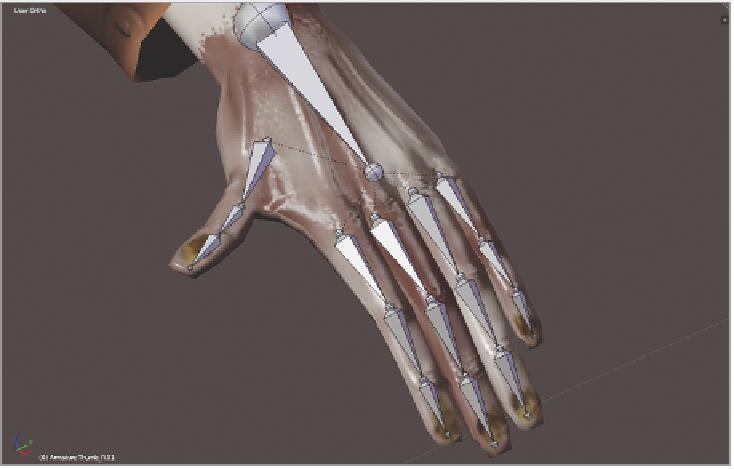
9. Extrude another bone from the hand bone's tail/tip and disconnect it as you did the
fingers. This will be the basis for the thumb. Position this first bone in the palm of
the hand near the base of the thumb. Extrude twice more and put these bones in the
thumb itself, as shown in Figure 7.23. Use Wireframe mode to adjust the positioning
of geometry.
Figure 7.23
Adding bones for
the thumbs
10. Call the thumb bones
humb_L.01
,
humb_L.02
, and
humb_L.03
for the left
hand and
humb_R.01
,
humb_R.02
, and
humb_R.03
for the right.
Now that you have created the hand bones, you can move up to the head geometry to
finish off the armature with controllers for the head and face.
Laying Out Head and Face Controllers
The head is one area where typical human anatomy and your armature do not need to
match. Instead, the bones used to control the geometry around the head are situated in
places where they can control the head and face geometry.
1. Enter side view and pan up to the top of Spine.02. Select its tail/tip.
2. Extrude a bone upward a short way to the base of the zombie's skull. Call this
bone
Neck
.
3. Extrude again from the tail/tip of Neck to the top of the zombie's head. Call this bone
Head
. Use Figure 7.24 as a reference.
Search WWH ::

Custom Search