Game Development Reference
In-Depth Information
Figure 5.46
Arranging the
normal maps into
one image using
the UV layout
7. As you did with the sculpting textures, open the Type pull-
down list and select Image or Movie. Find your newly com-
posited normal map and make that your image (Figure 5.47).
8. Your normal map should be appearing unevenly as a
color map. To fix this, first scroll down further in the
Texture panel and find the Mapping panel. There is a pull-
down marked Coordinates there. Select UV from this list
(Figure 5.48).
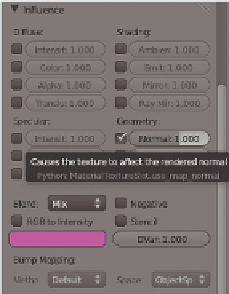
9. Scroll down further and find the Influence panel. This con-
tains the options for how Blender interprets your image. Currently, Color is selected.
Deselect Color from this list and find Normal (Figure 5.49). After selecting it, your
normal map is affecting the normals of the model.
Figure 5.47
Adding the normal map
Figure 5.48
Mapping the image
to the model's UVs
Figure 5.49
Telling Blender to
apply the texture to
the model's normals


Search WWH ::

Custom Search