Game Development Reference
In-Depth Information
already unwrapped the model, make sure this setting is turned on so your sculpting can
be applied to the low-polygon version of the model.
As powerful as the Multires is, it is little use without its counterpart, Blender's Sculpt
mode. The next section explores the options available in this mode.
Using Blender's Sculpting Interface
Blender is unique among other 3D art programs in its integrated Sculpt mode. Although
other polygon modeling programs provide “sculpting,” their features do not compare to
the detailing possible in Blender. Indeed, only multiresolution sculptors like ZBrush are
comparable.
Now that you understand the use of the Multires modifier, let's begin playing around
in Blender's Sculpt mode:
1. Go to the 3D viewport and open the Mode pull-down list. Select Sculpt Mode, as
shown in Figure 5.7.
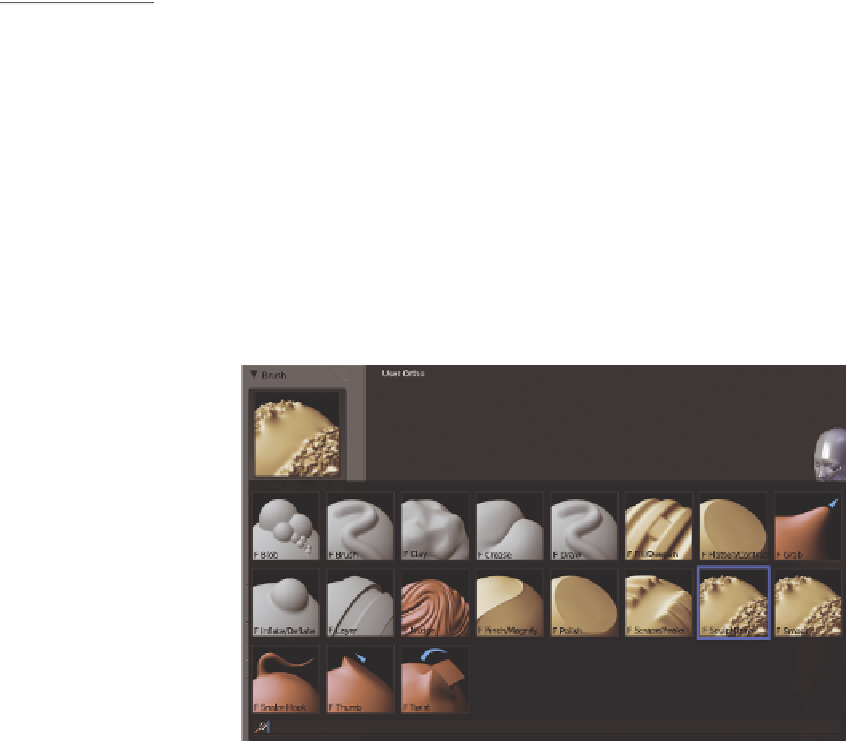
2. Press the T key to open the Toolshelf if it isn't already open. This is where you will
find your sculpting brushes. At the top of the Toolshelf is a preview of the currently
selected sculpting brush. Click this button to open a menu showing all the sculpting
brushes, as shown in Figure 5.8.
Figure 5.7
Select the Sculpt
Mode option.
Figure 5.8
Sculpting brushes
Selecting Sculpting Brushes
The sculpting brushes do a great deal of things that can be useful when you are adding
detail to a 3D model. As shown in Figure 5.9, each brush has a Radius and a Strength
setting that you can adjust using the F hotkey (for Radius) and the Shift+F hotkey
(for Strength). Also, you'll find buttons for additive or subtractive sculpting. Pressing
Ctrl+LMB as you sculpt can switch from additive to subtractive as well. Also note the

Search WWH ::

Custom Search