Game Development Reference
In-Depth Information
Unwrapping the Default Cube
Before you jump into unwrapping your zombie, let's begin with something simpler
to demonstrate the process of drawing seams and unwrapping the mesh. A box, like
Blender's default cube, is a good form to experiment with when learning how to unfold
3D meshes, so that's what you'll use.
Open a new Blender file with the default cube and two 3D viewports.
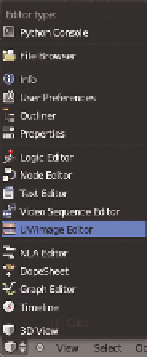
1. In one of the 3D viewports, go to its Header bar and change Editor Type to UV/
Image Editor, as shown in Figure 4.4.
2. Back in your 3D View editor, select your cube and press the Tab key to enter Edit
mode.
3. Press Numpad 3 to go into the Side view. Press Numpad 5 to make sure that perspec-
tive is turned off. Consider the side you see in this view as your “base side”—the side
that will be the anchor for the unwrapped polygons.
4. Orbit around the cube in the viewport so that you can see the polygon on the top of
the mesh. Enter Edge Select mode by pressing Ctrl+Tab to bring up the Mesh Select
Mode menu and select the three edges that do not connect to your base side.
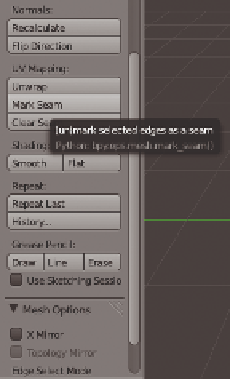
5. You'll turn these edges into your first seams. Go to the Toolshelf in your 3D View
editor (press T to activate it if it isn't visible) and click the Mark Seam button, as
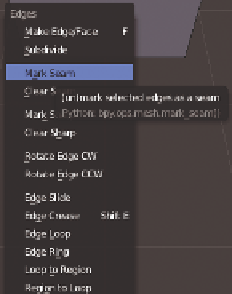
shown in Figure 4.5. Alternatively, you can press Ctrl+E to open the Edge menu,
where you can find the same option (Figure 4.6). If you use the hotkey option, make
sure you don't accidentally extrude these edges. Use Figure 4.7 as a reference.
Figure 4.4
Changing to the UV/
Image Editor
Figure 4.5
The Mark Seam option in the
Toolshelf
Figure 4.6
The Mark Seam option in the
Edge menu


Search WWH ::

Custom Search