Game Development Reference
In-Depth Information
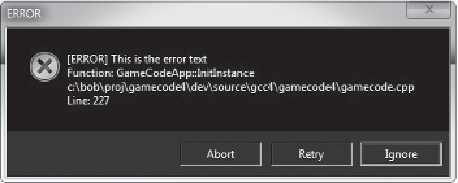
Figure 23.3
Debug error message.
number. There will be three buttons; Abort, Retry, and Ignore. Choosing Abort will
cause the program to break into the debugger using the hard-coded breakpoint trick
you saw previously in this chapter. Retry will cause the program to continue as if
nothing happened. If this error is not recoverable, your game will probably crash.
Choosing Ignore will cause the program to continue as well, but it will also flag that
error as disabled. If that line is hit again, the error will not trigger. This is extremely
useful for asserts and errors that are placed inside loops. Figure 23.3 shows what the
error dialog looks like.
Warnings are less urgent errors. They shouldn
t as dire as
errors. A warning will log all the same information as an error, but it doesn
'
t be ignored, but they aren
'
'
t display
a dialog box. Instead, it displays in the output window in Visual Studio.
Log messages at Info level are also displayed in the output window, but they don
t
include any of the extra debug information like function, filename, and line number.
Info messages just show the message text.
Every log is tied to a tag that determines the behavior of any messages logged under
that tag. There are a few hard-coded tags, but most are user defined. The hard-coded
tags are
'
which are used when throwing an
error, a warning, or a generic info message. You can log to any other tag as well
and set up flags for how those logs should be handled by the system. We
“
ERROR,
”“
WARNING,
”
and
“
INFO,
”
'
ll see how
that works later in this chapter.
With this design, we can now create a simple interface.
namespace Logger
{
class ErrorMessenger
{