Information Technology Reference
In-Depth Information
4.
Click the Resource Allocation tab.
5.
Select the network resource pool you want to edit and click the Edit pencil icon.
6.
From the Network Resource Pool Settings dialog box, modify the Host Limit, Physical
Adapter Shares, or QoS Tag values as desired.
7.
Click OK to save the changes to the network resource pool.
You might prefer to leave the predei ned network resource pools intact and create your own.
Perform the following steps to create a new network resource pool:
1.
If it is not already running, launch the Web Client and connect to a vCenter Server
instance.
2.
Navigate to the Networking view.
3.
Select the vDS on which you want to create the new network resource pool.
4.
Click the Resource Allocation tab.
5.
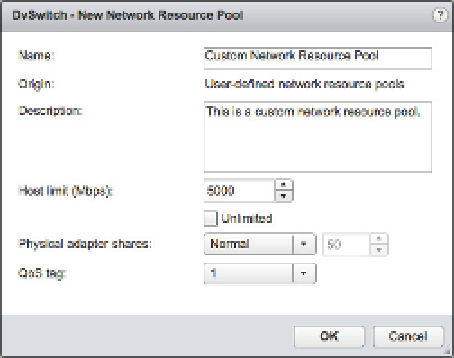
Click the New Network Resource Pool plus icon. The New Network Resource Pool dialog
box appears (Figure 11.21).
Figure 11.21
Administrators
have the option of
creating new net-
work resource pools
for custom network
tra c control.
6.
Supply a name and description for the new network resource pool.
7.
For Physical Adapter Shares, select a predei ned option (Low, Normal, or High), or select
Custom and enter a value from 1 to 100.
8.
To set a limit, select the Unlimited check box (to uncheck it) and then enter a value for
Host Limit. This value is entered in Mbps (megabits per second).
9.
If you want to apply a QoS priority tag, select the value from the drop-down list.
10.
Click OK to create the new network resource pool with the values you specii ed.
After you have at least one user-dei ned network resource pool, you have the option of map-
ping port groups to your network resource pool.