Information Technology Reference
In-Depth Information
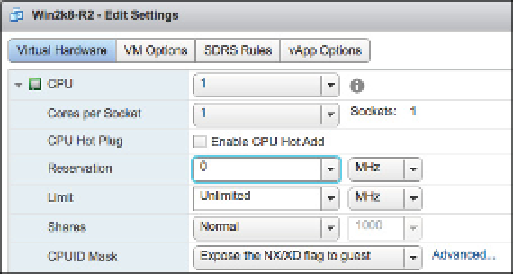
Figure 11.7
By default, vSphere
provides no CPU
reservation, no CPU
limit, and 1,000
CPU shares.
Setting CPU A! nity
In addition to shares, reservations, and limits, vSphere offers a fourth option for managing CPU
usage: CPU afi nity. CPU afi nity allows an administrator to statically associate a VM to a spe-
cii c physical CPU core. CPU afi nity is generally not recommended; it has a list of rather signii -
cant drawbacks:
CPU afi nity breaks vMotion.
◆
The hypervisor is unable to load-balance the VM across all the processing cores in the
server. This prevents the hypervisor's scheduling engine from making the most efi cient
use of the host's resources.
◆
Because vMotion is broken, you cannot use CPU afi nities in a cluster where vSphere DRS
isn't set to Manual operation.
◆
Because of these limitations, most organizations don't use CPU afi nity. However, if, for
example, you i nd that you need to use CPU afi nity to adhere to licensing requirements, you
can coni gure your VM to use it.
Perform these steps to coni gure CPU afi nity:
1.
If it is not already running, launch the Web Client and connect to a vCenter Server
instance or a stand-alone ESXi host.
2.
Navigate to either the Hosts And Clusters or VMs And Templates view.
3.
Right-click the VM for which you'd like to coni gure CPU afi nity and select Edit Settings.
4.
On the Virtual Hardware tab, click the triangle next to CPU.
5.
In the Scheduling Afi nity section, supply a list of the CPU cores this VM is allowed to
access.
For example, if you wanted the VM to run on cores 1 through 4, you could type
1-4
.
6.
Click OK to save the changes.
Rather than trying to use CPU afi nity to guarantee CPU resources, you're far better off using
reservations.