Information Technology Reference
In-Depth Information
4.
The OVF Template Details screen summarizes the information about the template. Click
Next to continue.
5.
Click the Accept button to accept the end user license agreement, and click Next.
6.
Supply a name for the new VM you're deploying from the OVF template, and select a
location within the vCenter Server inventory.
This is a logical location, not a physical location; you'll select the physical location (where
the new VM will run and where the virtual hard disk i les will be stored) in the next step.
7.
Select a cluster, an ESXi host, or a resource pool where the new VM will run, and then
click Next.
8.
If you selected a cluster for which vSphere DRS is not enabled or is set to Manual, you
must select a specii c host on which to run the VM. Select an ESXi host and click Next.
9.
Choose the datastore or datastore cluster where you want to store the new VM.
If you are unsure of how much space the new VM requires, the OVF Template Details
screen, described in step 4, shows how much space the VM requires. Click Next after
you've selected the datastore you want to use.
10.
Select the virtual disk format you want to use for the new VM.
Click Next after selecting a disk format.
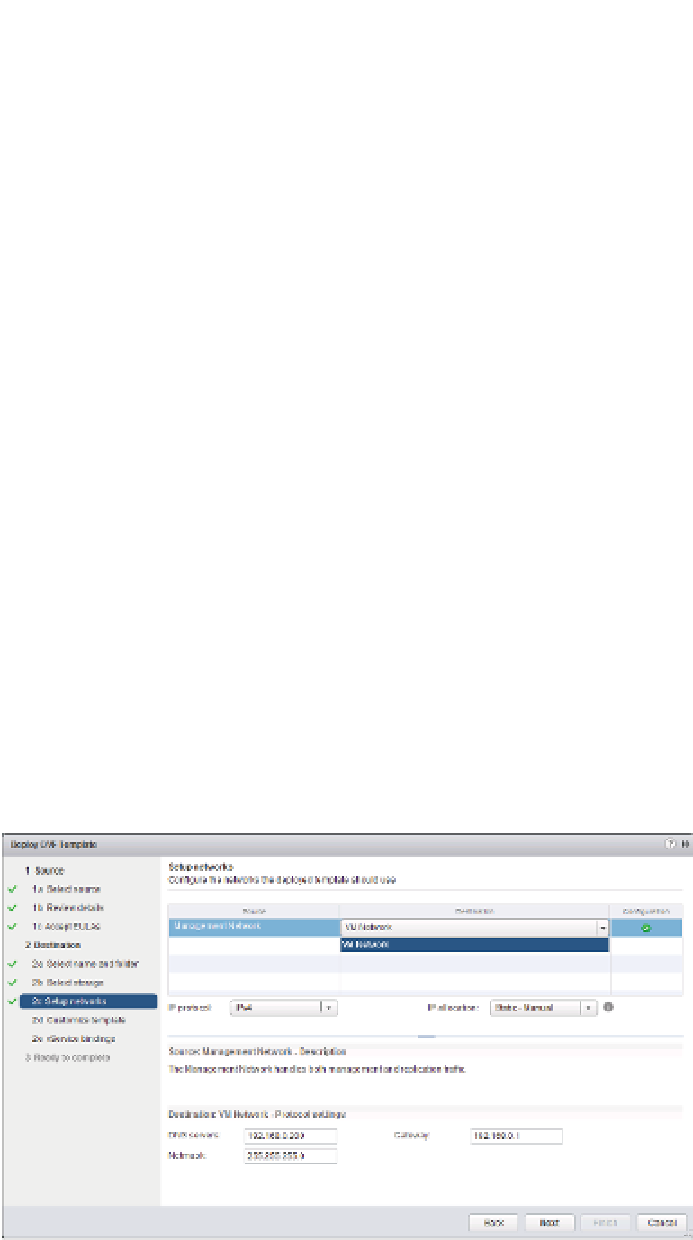
11.
Map each source network dei ned in the OVF template to a destination network in vCen-
ter Server.
The destination networks are port groups or dvPort groups, as you can see in
Figure 10.13. For more information about port groups, see Chapter 5, “Creating and
Coni guring Virtual Networks.”
Figure 10.13
Source networks
defi ned in the
OVF template are
mapped to port
groups and dvPort
groups in vCenter
Server.
12.
Some OVF templates will ask you to coni rm how IP addresses should be assigned to the
new VM, as you can see in Figure 10.14. Select the option you prefer (Static - Manual or
DHCP) and click Next.