Information Technology Reference
In-Depth Information
To make this work as you would expect, you would have to assign permissions on each of the
10 web server VMs individually. Clearly, this is not an efi cient process. Further growth result-
ing in more web server VMs would require additional administrative effort to ensure access
control.
Alternatively, you could use the No Access role on the non-web-server VMs to prevent access,
but this method also does not scale well and requires administrative overhead.
This issue presents one of the drawbacks of managing access control on an individual ESXi
host. Keep in mind as well that all of the steps we have discussed so far would have to be per-
formed on each ESXi host in the virtual infrastructure. What if there were a way to organize
the inventory of VMs? In other words, what if you could create a “container object” for the web
server VMs, such as a folder, and put all the web server VMs into it? Then you could assign the
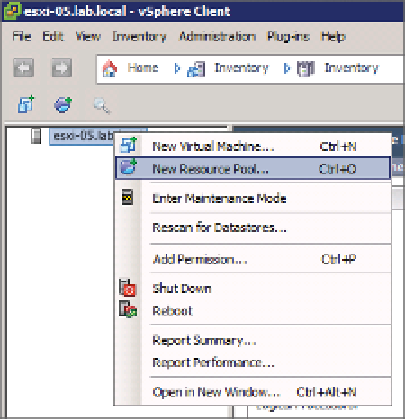
group to the role at the parent object level and let inheritance take over. As shown in Figure 8.9,
the problem is that folder objects are not possible on a single ESXi host. That means your only
option is a resource pool.
Figure 8.9
Folder objects
cannot be added
to an individual
ESXi host, leav-
ing resource pools
as the only viable
option to
group VMs.
Using Resource Pools to Assign Permissions
A
resource
pool
is actually a special object. Think of it as a folder of sorts. We'll discuss resource
pools in much greater detail in Chapter 11, “Managing Resource Allocation”; we strongly urge
you to read that chapter and understand the purpose behind resource pools and how they work
before attempting to use them to organize your VMs. The focus here is on how resource pools
can help you organize your VMs, but it's important to understand that using resource pools in
this manner might have unintended side effects.
Perform the following steps to create a resource pool:
1.
Launch the vSphere Client if it is not already running, and connect to an ESXi host.
2.
Navigate to the inventory view by using the navigation bar, by using the Ctrl+Shift+H
keyboard shortcut, or by selecting View
➢
➢
Inventory
Inventory from the menu.
3.
Right-click the ESXi host, and select New Resource Pool, as shown previously in
Figure 8.9.