Information Technology Reference
In-Depth Information
6.
To restrict access to a particular source, toward the bottom of the dialog box, deselect the
check box labeled Allow Connections From Any IP Address.
You can then specify the allowed source address or addresses in three different formats:
192.168.1.24: A specii c source IPv4 address
◆
192.168.1.0/24: A specii c subnet of source IPv4 addresses
◆
2001::1/64: A subnet of source IPv6 addresses
◆
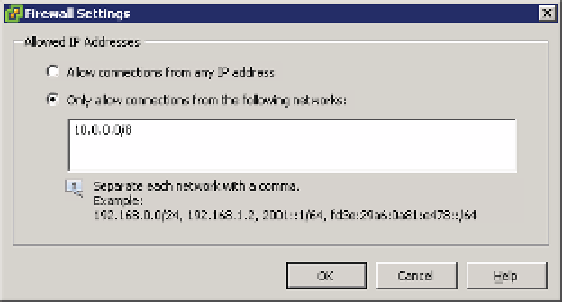
Figure 8.4 shows a source subnet of 10.0.0.0/8 coni gured for the selected network trafi c.
Figure 8.4
Tra c to the
selected network
tra c on this ESXi
host will be lim-
ited to addresses
from the specifi ed
subnet.
7.
Click OK to close the Firewall Settings dialog box and return to the Firewall Properties
dialog box.
8.
Click OK to close the Firewall Properties dialog box and return to the vSphere Client.
This feature of the ESXi i rewall gives you much more l exibility in not only dei ning what
services are allowed into or out of your ESXi hosts but also in dei ning the source of the trafi c
into or out of the host. The two previous examples outline how to perform i rewall tasks with
both the traditional vSphere Client and the vSphere Web Client. There may be the odd occasion
when you need to coni gure your own ports and services through the i rewall, and this needs to
be performed through the ESXi shell or via SSH.
The following steps will guide you through creating your own custom i rewall rules.
1.
Log on to the ESXi shell via SSH.
2.
To display the current i rewall rules run the following command:
esxcli network firewall ruleset list
3.
Make a backup of the i rewall coni guration i le:
cp /etc/vmware/firewall/service.xml /etc/vmware/firewall/service.xml.bak
4.
Allow the i rewall coni guration i le to be changed with the following:
chmod 644 /etc/vmware/firewall/service.xml
5.
Toggle the sticky bit l ag using the following command:
chmod +t /etc/vmware/firewall/service.xml