Information Technology Reference
In-Depth Information
4.
From the list of distributed port groups on that distributed switch, select the distributed
port group(s) that you want to edit. You can select multiple distributed port groups, if you
desire. For Windows users, this usually means pressing the Ctrl key while selecting the sec-
ond and subsequent distributed port groups; on OS X, you would use the Command key.
Click Next once you've selected the desired distributed port groups.
5.
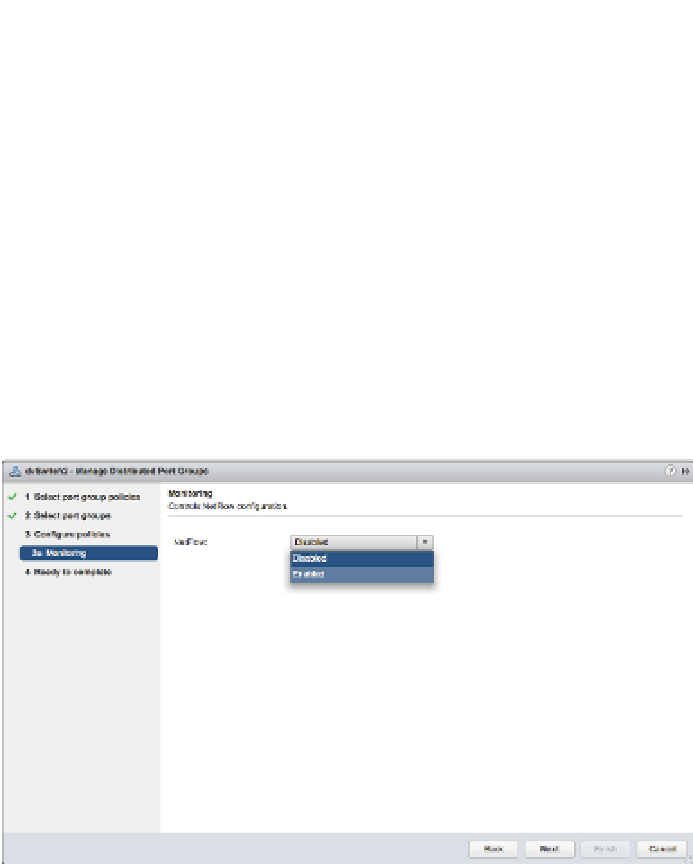
At the Monitoring screen, shown in Figure 5.65, set NetFlow to enabled; then click Next.
6.
Click Finish to save the changes to the distributed port group.
This distributed port group will start capturing NetFlow statistics and reporting that infor-
mation to the specii ed NetFlow collector.
Another feature that is quite useful is vSphere's support for switch discovery protocols, like
Cisco Discovery Protocol (CDP) and Link Layer Discovery Protocol (LLDP). The next section
shows you how to enable these protocols in vSphere.
Figure 5.65
NetFlow is disabled
by default. You
enable NetFlow on
a per-distributed
port group basis.
Enabling Switch Discovery Protocols
Previous versions of vSphere supported Cisco Discovery Protocol (CDP), a protocol for exchang-
ing information between network devices. However, it required using the command line to
enable and coni gure CDP.
In vSphere 5.0, VMware added support for Link Layer Discovery Protocol (LLDP), an
industry-standardized form of CDP, and provided a location within the vSphere Client where
CDP/LLDP support can be coni gured.
Perform the following steps to coni gure switch discovery support:
1.
In the vSphere Web Client, navigate to a specii c distributed switch in the vSphere Web
Client's inventory lists.
2.
With the distributed switch selected on the left, select Edit Settings from the
Actions menu.
3.
In the Edit Settings dialog box, select Advanced.