Information Technology Reference
In-Depth Information
ESXi Dump Collector on a Windows Server
If you are using a Windows-based vCenter Server, you can also install the ESXi Dump Collector
on a Windows server. This can be the same server as vCenter or a separate server. To install
ESXi Dump Collector on Windows, follow these steps:
1.
Mount the vCenter Server DVD on the Windows server.
2.
If the Autorun splash screen does not appear, manually run the setup wizard from the
root of the DVD.
3.
Select the appropriate language for the install.
4.
Accept the end-user license agreement.
5.
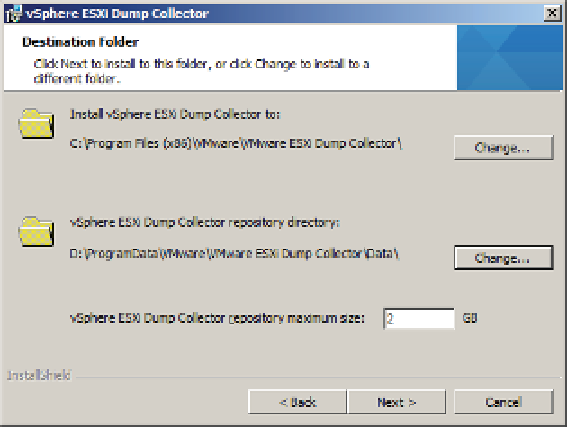
Select where to install the application and where the dumps should be stored. As with
any volatile data, it is advisable to move the dump repository off the C: drive. Figure 4.41
shows the dump repository moved to the D: drive. This screen of the wizard also allows
you to increase (or decrease) the maximum amount of storage that the tool can use to
keep core dumps.
Figure 4.41
Move the dump
repository off the C:
drive if possible.
6.
The setup type screen allows the installer to register the Dump Collector instance with a
vCenter Server instance. Select VMware vCenter Server Installation and click Next.
7.
If you selected to integrate the install with a vCenter instance, as described in the previ-
ous step, you will now enter the vCenter details and appropriate account credentials.
After you click Next, the installer will ask you to verify the server's SSL certii cate. Click
Yes to accept the certii cate.
8.
Accept the default port of 6500 and click Next.