Graphics Programs Reference
In-Depth Information
4.
Eject at er import:
checking this box (see Figure 2-21) will do a safe
removal of the media when the import has completed, so you can pull the
card out of the reader immediately. Entirely optional.
2
5. Also optionally, make selections from the thumbnails. h um bnails with
the checkbox ticked will be imported; those unchecked will not. h is is
detailed in the previous section about importing from a hard drive.
To import everything from the card, leave all the thumbnails checked.
(I usually import all the images from a shoot because I want to avoid
making editing decisions during import. h e exceptions are obviously
bad captures—blurry shots of my foot, for example—whose thumbnails
I would uncheck.
Scroll through the thumbnails to be sure of what you're importing.
6. By default, the i le handling in the top panel will be set to
Copy
(see
Figure 2-21). You can change it to Copy as dng, w hich is what I prefer
and is explained in the next section.
7. On the right side of the Import
screen, notice the additional
panels now showing under To,
and that your default hard disk
is shown as the destination
(see Figure 2-21). To choose a
dif erent hard drive (or folder),
click the To button and either
choose the other drive if it's
listed in the popup menu, or
choose Other Destination…
to navigate and select another
drive.
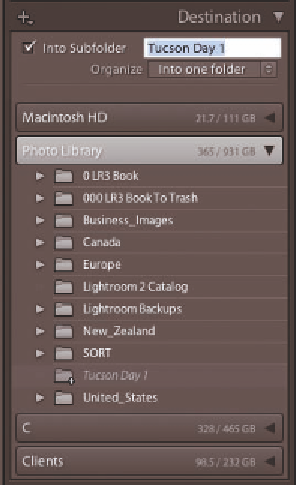
8. I n the
Destination panel
at
the bottom of the right panel
group, specify the directory
where the i les will be copied.
You can do this in several ways.
You can choose an existing
folder, or you can create new folders by clicking the + button on the
Destination panel header; see Figure 2-22.
Figure 2-22


Search WWH ::

Custom Search