Graphics Programs Reference
In-Depth Information
When you're done making changes in the color picker, click the X in the upper let
corner or simply press Return/Enter. If you want to cancel any changes you made in
the color picker, press Esc. For more on the color picker, review Chapter 4.
8
h e bottom portion of the Options panel contains the settings for Cast Shadow. h es e
shadows show “behind” the photos, as if the photos were l oating in front of the
background. You can't apply a color to the Cast Shadows; they're always neutral gray.
Tick the checkbox to enable or disable shadows. h en use the following four settings
to customize the shadow:
Opacity:
the overall strength of the shadow. 100% opacity will be solid black, and
lower opacities will make the shadow lighter and transparent over the background. If
you're using a solid color or gradient for the background, the ef ect of Opacity is not
as evident as when using a photo as a background (which we'll discuss in just a bit).
Of set:
sets how far away from the edge of the photo the shadow is placed. Larger
of sets give the appearance of more depth between the photo and the background.
Radius:
dei nes the sot ness of the edge of the shadow. A radius of zero will be a
totally hard edge. Larger values will apply more feathering of the shadow edge.
You'll need to work a bit with the settings for Of set and Radius to get your ideal
combination of distance and sot ness.
Angle:
simulates a single light source positioned to illuminate the slide. h e circle
shows this as if the slide is laying l at and the light is above. You can click and drag
inside the circle to position this virtual light source, use the slider or enter numeric
value. Like Radius, the ef ect of the Angle will be more, or less, obvious depending on
the Of set.
⌘
+2 or Ctrl+2
Open/close the
Layout panel
Layout panel
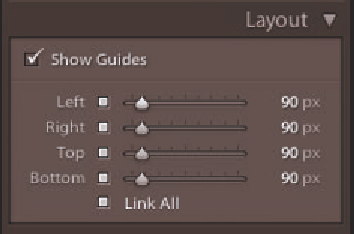
h e Layout panel (see Figure 8-5) is
where you set the slide margins, which
determine the photo's distance from the
edges of the slide. You can set dif erent
margins for each side, but the same
margins are used for all slides.
⌘
+Shift+H or
Ctrl+Shift+H
Hide/show the
layout guides
Tick the checkbox to Show Guides or
uncheck the box to hide them. With
guides visible, you can set the widths for Let , Right, Top and Bottom using the sliders
or by typing in numeric values. Also, when the guides are visible, you can click and
drag to position them directly in the preview.
Figure 8-5


Search WWH ::

Custom Search