Graphics Programs Reference
In-Depth Information
4
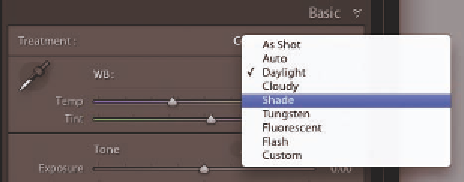
WHITE BALANCE PRESETS
h e fastest, easiest way to apply standard white balance values is to select from
the preset values in the popup menu; see Figure 4-26. While doing so, pay
attention to each preset's ef ect on the slider settings. h is is a good way to learn
the numeric values for specii c lighting conditions. At er choosing the preset
closest to your
desired look,
you can i ne-
tune the hite
balance using
the sliders and/
or numeric
entry.
Figure 4-26
Lightroom vs. camera settings
In many cases, the numeric values for Lightroom's white balance settings uses
will be dif erent than those used in the camera. For example, the Daylight
setting on my Canon 5D Mark II uses a temperature of +4850 and a tint of +1,
whereas Daylight in Lightroom is +5500 and +10. Depending on the photo,
this may not be an important distinction, and white balance on a raw capture
is only a metadata value, so you can apply any numeric settings you want in
Lightroom.
W
Activate the
White Balance
eyedropper
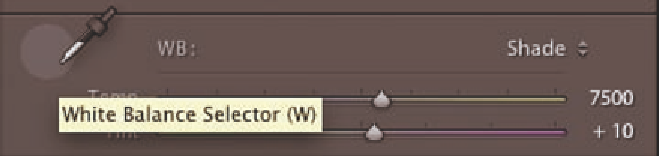
THE WHITE BALANCE EYEDROPPER
To activate the white balance Eyedropper click the tool (see Figure 4-27) or use
the shortcut (from anywhere in the Library or Develop modules). Move the
cursor around the image; a small grid overlay appears, depicting enlarged pixels
under the cursor (see Figure 4-28 next page). If the Navigator is visible, it will
show a dynamic preview of the white balance that would result from clicking
in a particular spot. Click on an area of the image that you believe should be
neutral gray and the white balance will be adjusted to neutralize that area.
Other colors in the image will be adjusted accordingly. Press W again or
press Esc to deactivate the tool.
⌘
+Shift+U or
Ctrl+Shift+U
Apply auto
white balance
Figure 4-27


Search WWH ::

Custom Search