Graphics Reference
In-Depth Information
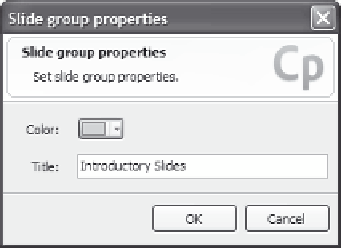
Figure 11-5. Slide group properties window
5.
From the Color pop-up menu, select a color. This color will display
on the border of all the slides in the group when the group is
expanded. It will NOT appear in the finished movie.
6.
In the Title box, type a name for the group. The name will display
on the Branching view at the top of the grouped slides, and at the
bottom of the collapsed group in the Edit and Storyboard views.
7.
Click
OK
to close the properties window.
Expanding or Collapsing a Slide Group
Once you've created the groups, an icon for the group will display
instead of the individual slides in all three views (Storyboard, Edit, and
Branching). To see the individual slides instead of the icon for a group,
do any one of the following:
Select the group you want to expand, then click the
Expand
icon
at the top of the Branching view window.
Click the
Expand All
icon at the top of the Branching view win-
dow to expand all groups.
Hover the mouse over the icon for a group to display small images
of each slide in the group.
Click the small triangular button beneath the icon for a group (and
above the list of slide names).
Right-click on the icon for a group and choose
Slide Group
, then
choose
Expand
or
Expand All
.
From the Slide menu, choose
Group
, and then
Expand
or
Expand All
.