Graphics Reference
In-Depth Information
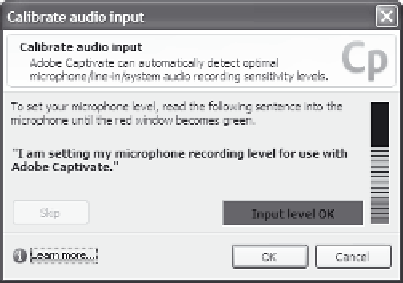
Figure 8-3. Captivate indicates if an acceptable recording level
exists.
6.
Once the level is set, click
OK
to close the Calibrate audio input
window.
7.
Click
OK
to close the Audio settings window.
Setting Audio File Size
When you record Captivate audio files, the system records your voice
in WAV format and then converts it to MP3 format for storage with
each slide. During this conversion process, you have the option of also
compressing the audio to reduce file size. However, this will also lower
the quality of the audio sound. You'll need to set the audio options
based on the needs of your audience. For example, if many of your
viewers will be downloading your movie over a slower, dial-up connec-
tion, you may be more concerned with keeping the file size small. On
the other hand, if you're delivering on a CD, you may decide to set the
audio to a higher quality even though it increases the file size.
To set the audio recording quality, follow these steps:
1.
Make sure your microphone is plugged in and turned on.
2.
Open an existing Captivate project.
3.
From the Audio menu, choose
Settings
.