Game Development Reference
In-Depth Information
Step 10: Lighting and Lightmapping
Now it's time to consider lighting and lightmapping for CMOD. For me, lightmapping is one of the
most fascinating ideas in game development. It was introduced as a limited solution to an intractable
problem; one which even today has no all-encompassing solution. The problem is that calculating
the effects of real-world lighting in a 3D environment—such as shadows, reflections, and indirect
illumination—is such a computationally expensive process that even the best consumer hardware
cannot approximate the effects with strong believability in
real time
. Lightmapping is one of the
solutions to this problem. But it has important limitations, as we'll see.
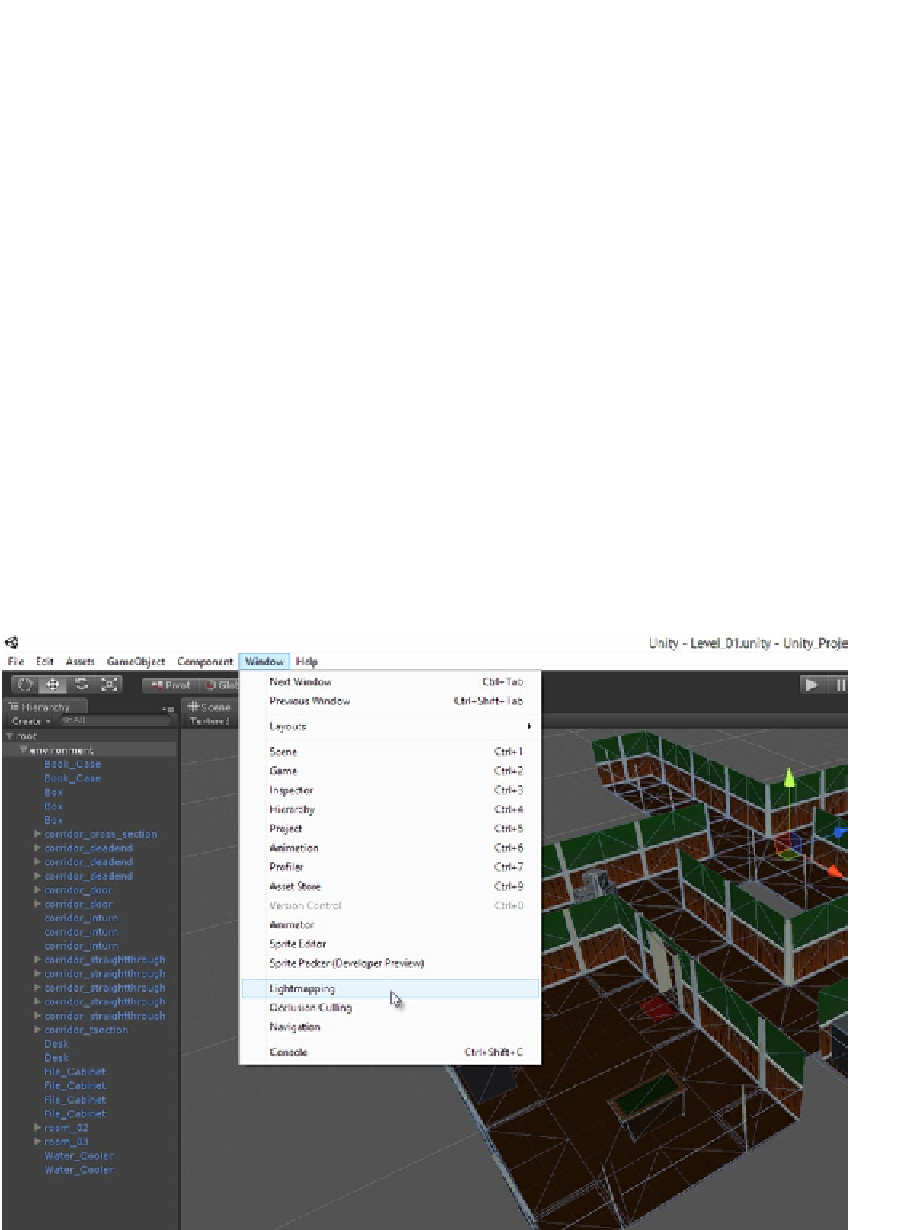
Lightmapping is achieved in Unity via the Beast lightmapper, which is accessible from the main menu
via
Window
➤
Lightmapping
(see Figure
2-27
). This is a tool that casts rays of light into the scene,
outward from all light sources, and then traces how those rays bounce and react to scene geometry.
The purpose of this is to assess how bright or dark (and which color) the impacted surfaces should
be. This process can be time-consuming (in terms of hours or even days), but it lets developers
precalculate
the effects of scene lighting at design time using the Unity Editor, and to bake the results
of that process into dedicated textures, known as
lightmaps
. The lightmaps contain information
about shadows, color bleeding, indirect illumination, and more. Unity then automatically blends the
lightmaps onto the scene geometry at run-time, on top of the regular textures and materials, to make
the geometry
appear
illuminated by the lights. Lightmapping is an intricate “trick,” but it can produce
powerful results. The famous author Arthur C. Clarke once said, “Any sufficiently advanced technology
is indistinguishable from magic,” and indeed, lightmapping has a certain kind of “magic” about it.
Figure 2-27.
Accessing the Beast lightmapper in Unity