Game Development Reference
In-Depth Information
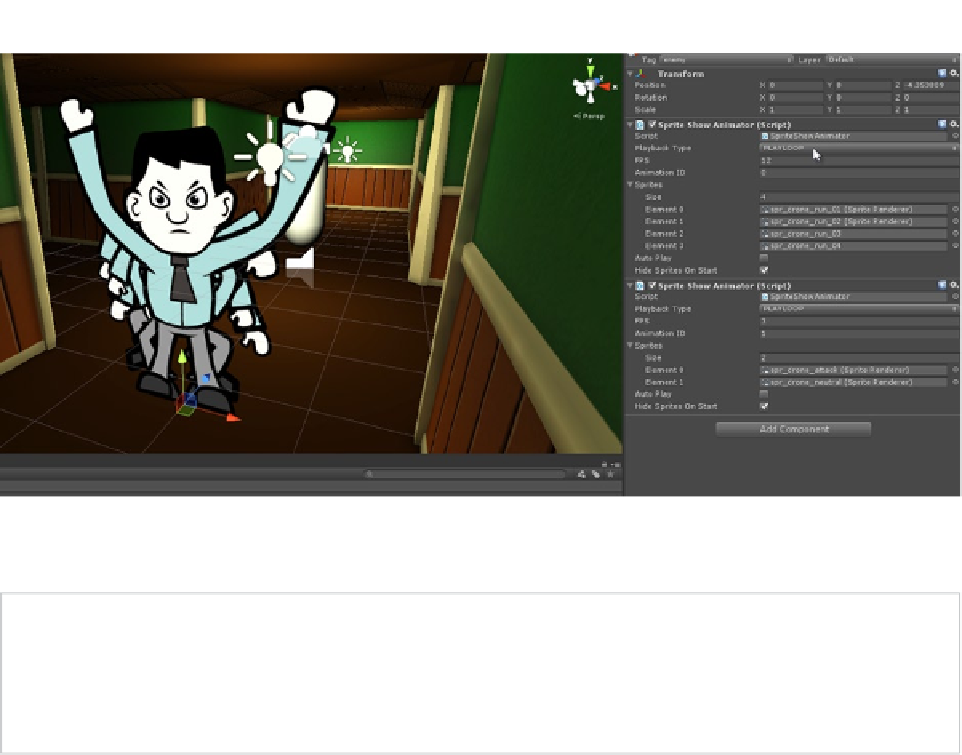
Figure 7-6.
Configuration animations for the Enemy objects using SpriteShowAnimator components
Note
I've given each SpriteShowAnimator component a unique ID number. Further, the Walk animation has
an FPS of 12, and the Attack animation has an FPS of 3. You don't need to maintain exactly the IDs I've used
here, nor the FPS values I've chosen; so long as you choose consistent IDs and FPS values, choose what
works best in your view and with your assets.
Be sure to tag the Enemy object as an
enemy
; a value we'll use later when detecting collisions.
That is, use the
Tags
drop-down in the Object Inspector to label the object as an Enemy. In addition,
hide all the added sprite objects by deactivating their Sprite Renderer components, leaving only the
default (neutral) sprite visible as the main sprite and frame for the Enemy in all cases when it's not
animating. This prevents all frames of animation from being seen at the same time when the level
begins; only one frame should be visible at once. Finally, to complete the basic configuration, add
both a
Billboard
component and a
Box Collider
component to the enemy object; the former keeps
the Enemy sprite aligned to the camera, and the second ensures that the Enemy has a basic volume
and bounding area for collision detection (see Figure
7-7
).