Graphics Reference
In-Depth Information
Now that the audio strip is in place, you get to do some math!
Divide the total number of frames from the audio, shown in the
Len
fi eld in the
Edit
panel, by the number
of images in the image strip and round the result down. In the case of
The Beast
, this yielded 48 (a 4103 frame
sound divided by 85 images
48.27). This number represents how many frames each storyboard image will
need to be to fi ll the available time. Of course, we'll have to make adjustments, but it's a good place to start.
Use the right mouse button to select the image strip and either press the
Y
key or choose
Separate Images
to Strips
from the
Strip
menu on the VSE workspace's header. A dialog pops-up asking for an
Image
Duration
. We are breaking the single image strip with all of the storyboards in it—into individual strips, end
to end, so that we can adjust their start and end points to match the audio track. For
Image Duration
, enter
the value you just calculated. The image strip will be broken into a series of strips, the last one falling near
the end of the audio strip, if you did the math correctly (Figure 4.47). If not, just use
Ctrl-Z
to undo and ask
someone else to do the arithmetic.
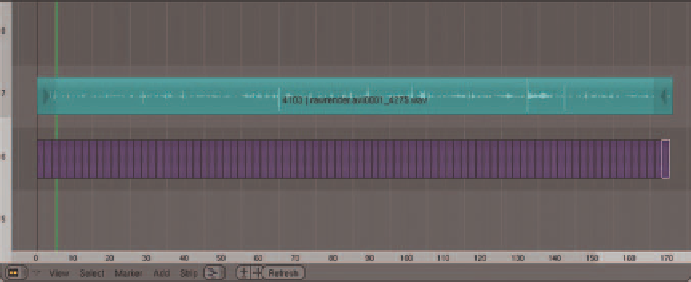
Figure 4.47
The Beast's
image strip separated into its components
And now begins the somewhat tedious task of adjusting the timing of the storyboard images. The workfl ow
proceeds like this:
●
Identify a sound cue
. Press
Alt-A
to play the story reel and listen for the fi rst defi nitive audio cue that you
can sync to. It may be a bit of dialog, a crash or some other sound effect, or the fake trumpet sound you
made with your mouth to announce the arrival of your character.
●
Note where in the timeline the sound cue takes place
. Remember that you can use the left mouse button to
scrub in the timeline and hear specifi c portions of audio to narrow it down. The waveform preview on
the audio strip can also help.
●
Locate the storyboard that matches that cue.
You've been working with the storyboards for long enough now
that you should know which image you are looking for. Also, if you are working sequentially, the next
storyboard in line will almost certainly be the one that you need. This is where any notations or dialog
that you've drawn directly into the storyboards can be very helpful.
●
Position the storyboard to match the location of the sound cue on the timeline.
Figure 4.48 shows the dog's yelp matched up with the bone striking its head.
Search WWH ::

Custom Search