Graphics Reference
In-Depth Information
OR
Figure 4.33
Enabling Texture Painting
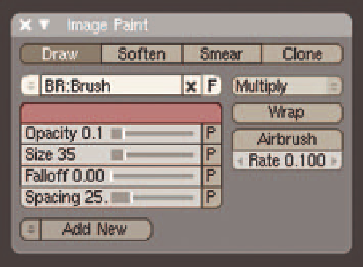
Finally, press the
C
key to bring up a panel with the image
painting brush tools. This panel allows you to choose paint col-
ors, brush type and settings, and color blending modes. While
Blender's image editor isn't the most advanced paint applica-
tion in the world, it does have enough options to make set-
tings appropriate for sketching a little hard to come by. Figure
4.34 shows the panel confi gured for a decent approximation
of a sharp-pointed felt tip marker.
The settings in Figure 4.35 show a confi guration appropriate
for washing some color into a storyboard after the sketch, if you
choose to do that. The brush size can be adjusted depending on
the overall size of the image and the area you are coloring.
Figure 4.34
Felt-tip marker settings
Remember that if you choose to sketch your storyboards
directly within Blender's image editor, there is only a single
level of Undo, and your image will not automatically be saved
if you accidentally close the program. Unlike other image edit-
ing programs, there are no selections or masking available and
no easy way to actually erase mistakes.
Creating the Storyboards
At this point, your artistic sense must begin to take over a bit.
Read through your script, close your eyes, and try to visualize
Figure 4.35
A good setup for applying some color


Search WWH ::

Custom Search