Graphics Reference
In-Depth Information
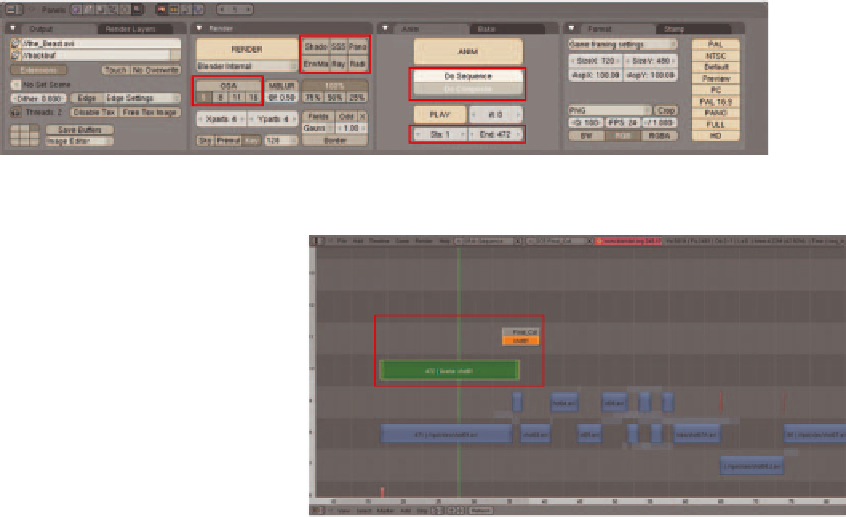
Figure 16.7 shows the Render buttons for the frames from shot 01 of
The Beast
. Its range is from frame 1
through frame 472 (471 total frames plus 1). It is also important to set the proper render size and frame rate
to make sure that everything works in the fi nal composite. You can disable
OSA
,
Shadows
,
SSS
, and all
other render options because you won't actually be rendering anything. Enable
Do Composite
, and con-
nect the Image input node to the Composite output node.
Figure 16.7
The Render buttons for the Shot 01 composite
Switch back to the
FinalCut
scene that
will hold the Sequence Editor strips. In
the Sequence Editor,
Add
a
Scene
strip,
selecting
Shot01
(or whatever you named
it) from the menu that pops up. This adds
a strip to the sequencer that represents the
compositing result from the Scene you
just created. You can see the composite
if you add a Sequencer Preview window.
Figure 16.8 shows the fi rst shot brought
in as a Scene strip.
Figure 16.8
A Scene strip added to the existing sequence
To add a new shot, go back to the com-
positing scene, which is called “shot01” in
this example. From the Scene menu on
the main header,
Add
a new Scene, but
this time use the
Full Copy
option. This
means that you just need to rename this
new Scene (“shot 02”, etc.),
Load
a new
starting image in the Image node and
adjust the frame ranges on the node and
in the Render buttons. Each new scene
can then be added to the Sequence as a
Scene strip, replacing the preliminary and
OpenGL renders already in place. Figure
16.9 shows this in process, with several of
the old render strips (blue) replaced with
Figure 16.9
The Sequencer on the way to including all of the fi nal shot
renders

Search WWH ::

Custom Search