Graphics Reference
In-Depth Information
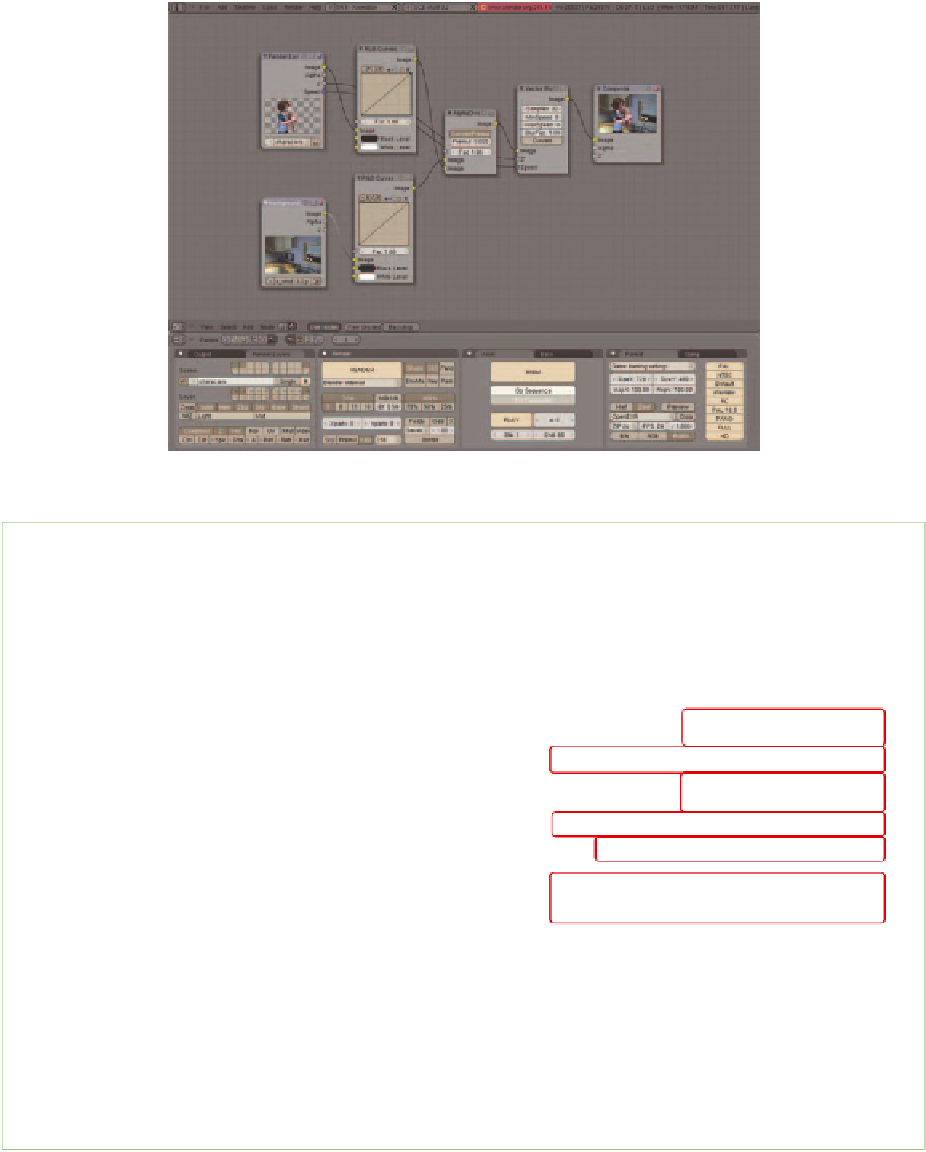
Figure 15.20
Composite node added, and the renderer set to Do Composite
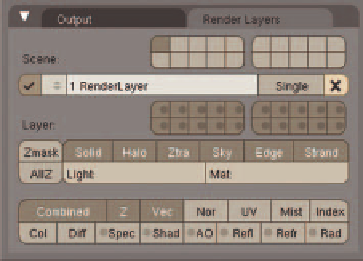
The Render Layers Panel
The
Render Layers
panel is the bridge between the renderer and the compositor. It is here that
you can create different groups of layers and passes, as well as setting lamp and material over-
rides and special Alpha options.
Figure 15.21 shows the
Render Layers
panel broken
into numbered sections.
1
1.
Scene Layer buttons:
This is a convenient copy of
the main Scene layer buttons, also located on the
header of the 3D view. These buttons, like their
header-based counterparts, control which objects
are considered during render preparations.
2
3
4
5
2.
RenderLayer drop-down menu:
To avoid confu-
sion, this really should have been called some-
thing like “Render Groups,” but we go into battle
with the terminology that we have. This menu
is where you manage groups of render set-
tings that are determined by the controls below.
These groups can be selected by name as Input
nodes in the compositor. Each group defi ned here can be enabled/disabled with the check
box on the far left, renamed in the drop-down box, and removed with the “X” control on
the far right. Removing one of these defi ned groups does not affect the scene objects in any
way—it just removes the particular grouping of settings created in this panel. The
Single
button causes Blender to ignore all other Render Layers and render only this one.
6
Figure 15.21
The Render Layers panel
Search WWH ::

Custom Search