Graphics Reference
In-Depth Information
the darkness of the fi nal result. Figures 13.12 and 13.13
show both methods used to fi x the problem from
13.11. Personally, I have achieved more visually pleas-
ing results with the
Correction
tool. I turn it up to
1.0, the maximum, and work it down from there until
it gives the look I'm after.
Remember when working with AAO and looking at
these examples that it is meant to be a basis for the rest of
your lighting scheme, so it will look dark to begin with.
AAO rendering speed can be greatly increased by
increasing the Error value. It begins at 0.250, but can
be set as high as 10.0. Basically, the error value repre-
sents how tolerant AAO is going to be of nonoptimal
conditions within the solution or how lazy it will be
about fi xing bad stuff. As you can see in Figure 13.14,
a value of 10.0 means that it is very, very lazy. You will
have to experiment with the setting for your own shots,
but I have found that a value of even 0.5 produces a
result mostly indistinguishable from lower values but
with a signifi cant increase in speed.
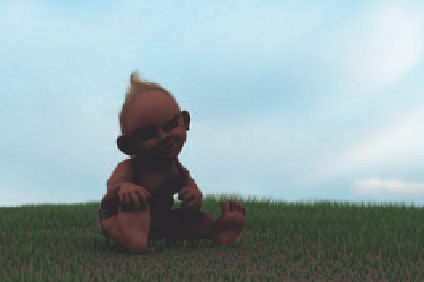
Figure 13.11
An out-of-the-box render using AAO
Falloff
functions much the same way as it does in raycast
AO. It is an adjustment from 0.0 to 10.0 that determines
how quickly a shadow fades out as it moves away from
the face that casts it. A value of 0.0 gives you the default
render from 13.13, while maxing it out at 10.0 produces
short shadows that fade quickly, as in Figure 13.15.
Figure 13.12
Passes set to 2 to fi x overocclusion
Figure 13.13
Correction set to 1.0 to fi x overocclusion
Figure 13.14
Error cranked up to 10.… It's a good thing
it doesn't go all the way to 11!


Search WWH ::

Custom Search