Graphics Reference
In-Depth Information
Full OSA
Full OSA
is not one of the options you'll be tempted
to overuse. It is mostly implemented when a texture
that is attached to a material has details that produce an
unsightly pattern, either in stills or during animation.
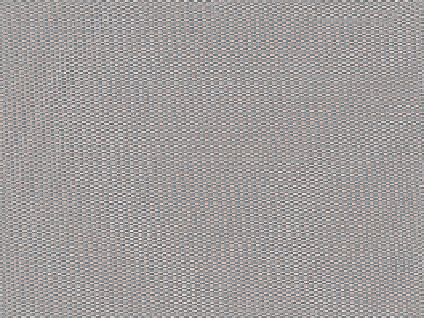
Figure 13.7 shows the texture for most of the fabrics in
The Beast
(the skirt, couch, and carpet). When applied to
something like the couch and rendered under normal cir-
cumstances, the repetitive nature of the texture image can
produce ugly renders, even at the highest Scene buttons'
OSA settings. The reason is that the tricks that are used
to “shrink” the texture to properly map it onto the model
and then sample it for render can produce inconsistent
results. Toggling
Full OSA
uses a
much stronger but slower sampling
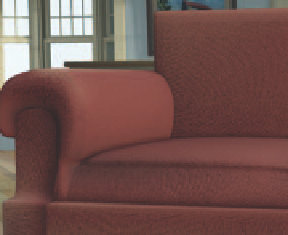
algorithm. In Figure 13.8 you can
see the difference between the couch
rendered with Full OSA (time: 3:10)
and without it (time: 2:06).
Figure 13.7
The base texture for
The Beast's
fabrics
How do you know when to use
Full OSA
on a material? When
your renders show an uneven,
choppy pattern in a reduced tex-
ture that should have a fairly uniform look. Also, you may notice it when animating an object whose texture
seems to “crawl” from frame to frame. Although it takes signifi cantly longer to render (50% longer in the pre-
ceding case!),
Full OSA
is the only real solution to this problem, short of entirely changing the texture itself.
Figure 13.8
Full OSA versus regular sampling
Before moving on to lighting, let's touch on a few notes for materials that can raise the believability of your
objects:
●
Turn down the saturation. Few objects in real life have highly saturated colors. Instead of using the RGB
sliders to generate your colors within Blender, switch to the HSV (hue, saturation, and value) controls on
the
Material
panel. You don't want your entire animation to appear drab, but it is much easier to “turn up”
the color in postproduction if you need to and maintain a good dynamic range than it is to remove over-
saturation without damaging the visual quality of the shot. Slightly reducing the saturation of most objects
will also allow you to give your main characters additional visual punch by saturating them a bit more.
●
Turn down, or turn off, specularity. Take a look at your immediate surroundings and observe how many
things have a noticeable specular highlight, compared to how many have them in your scene. Specularity is
a default in Blender's materials, so it shows up much more often than it is needed. If you have a material that
you think shows no, or almost no, specularity, try setting the
Spec
value very low, like 0.1, and the
Hard
value as low as 10, so that a very weak specular highlight, only a hint really, will spread over a large area.

Search WWH ::

Custom Search