Graphics Reference
In-Depth Information
Making such a loop at this stage of the animation shows a series of smoothly sliding poses evenly spaced in
time. Clearly, this isn't what we're looking for.
Here's one way to work with the timing of motion in Blender.
Timing
If you watch people or animals, you will see that unless they are performing some kind of repetitive activity,
such as walking or stirring a pot, their motions are brief and often quick. Spend some time around people
(You're into computers and 3D like me, I know. It's sometimes hard to associate with normal people. But do
it. It's worth it!) and watch how they move. If you're very lazy or agoraphobic, turn on the television for half
an hour. Although the fi nal product will depend heavily on the level of stylization you have chosen and your
actual subject matter (Human beings? Sixteen-winged organic thermos creatures?) human motion will be
your observational core.
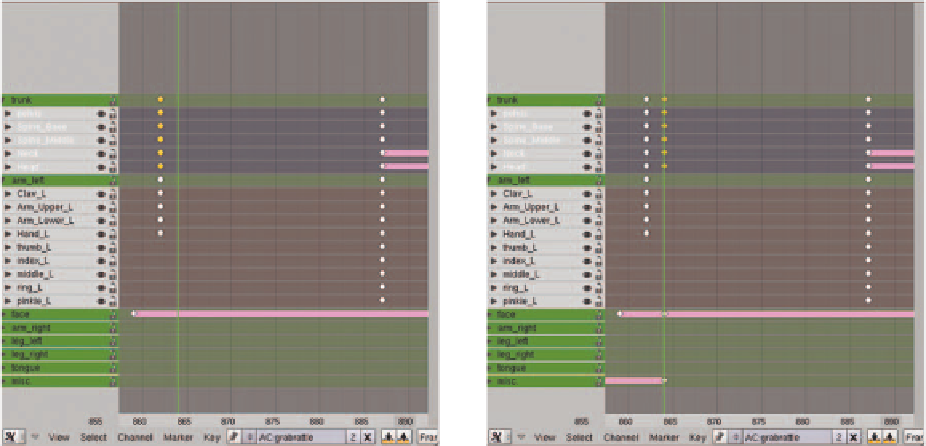
From observation, I determined that the amount of time between the initial pose and the glance pose would
be about 1 second (24 frames in my production). However, the actual movement would take only about half
a second. So the initial pose must hold for about 12 frames then fall into the glance pose. To make this hap-
pen, you select any Action channels that received keyframes in the glance pose and place the current frame
marker a couple of frames after the initial pose, as in Figure 11.26. Then, with the cursor over the Action
Editor, press the
I
key to insert a keyframe and choose
Only Selected Channels
from the pop-up menu
that appears. The result is Figure 11.27. This creates new keyframes that represent the interpolated pose just a
few frames into the blend between the two poses.
Figure 11.26
The current frame marker is advanced slightly
from the fi rst pose
Figure 11.27
New keys are added
Search WWH ::

Custom Search