Graphics Reference
In-Depth Information
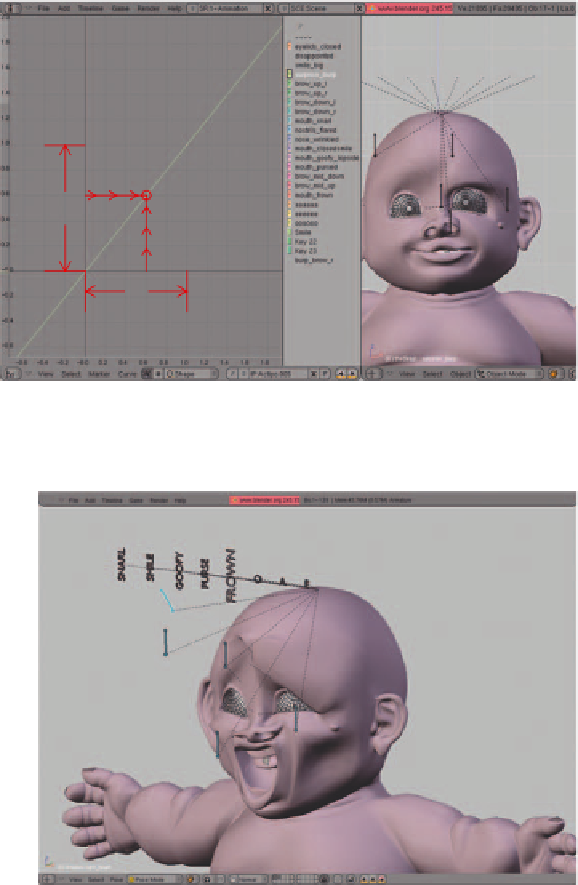
Before you rig this, let's take a closer
look at the
Ipo Editor
for one of
these bound controls. Figure 10.36
shows how the shape strength maps
to the bone position in the curve
Editor. The X-axis (horizontal) rep-
resents the value of the bone. The
Y-axis (vertical) is the strength of the
shape (0.0-1.0 is 0%-100%). So, with
this default line for the control, the
bone's chosen value (
Location Y
in
the example) runs between 0.0 and
1.0, mapping to 0% to 100% of shape
strength. This relationship can be
altered so that moving the bone in
the opposite direction triggers a dif-
ferent shape.
SHAPE
STRENGTH
100%
60% Strength
Y
0.6 Control
0%
X
0.0
1.0
ACTUAL VALUE OF CONTROL
Figure 10.36
The default mapping explained
Notice how the line that extends past the
(0,0) and (1,1) points into infi nity. This
means that the further you move the control
in either direction, the more pronounced
the shape will become, and that is exactly
the effect we see in Figure 10.37. If this
shape is the only one that will be attached
to the control, this might be desirable, so
that you can really exaggerate the expres-
sion from time to time. Otherwise, the
effect can be stopped by setting the curve's
Extend
mode to
Constant
. To do this,
select the curve, then choose
Extend
Mode
Constant
from the
Curve
menu on the
Ipo Editor
's header. In
addition, you will want to set the driver's
Interpolation mode
to
Linear
from the
same
Curve
header menu. When generat-
ing keyframes for the controllers, Bezier interpolation will already be present in the animation Ipos, so leaving it
as Bezier in the driver would multiply the “ease in/ease out” effect.
>
Figure 10.37
The “distressed/burp” expression applied way too heavily.
Poor little guy
If we want a different expression to be controlled by moving that same bone in the opposite direction, we're
going to have to create a curve where the X-axis, which represents the bone value, goes from 0.0 to
1.0,
Search WWH ::

Custom Search