Graphics Reference
In-Depth Information
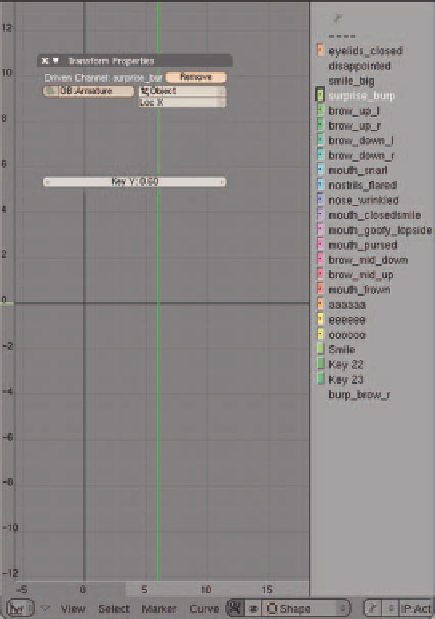
●
Click the
Add Driver
button in the
Ipo Editor's
Transform Properties
panel.
●
Enter the name of the character's control armature in the
OB:
fi eld that appears (Figure 10.30).
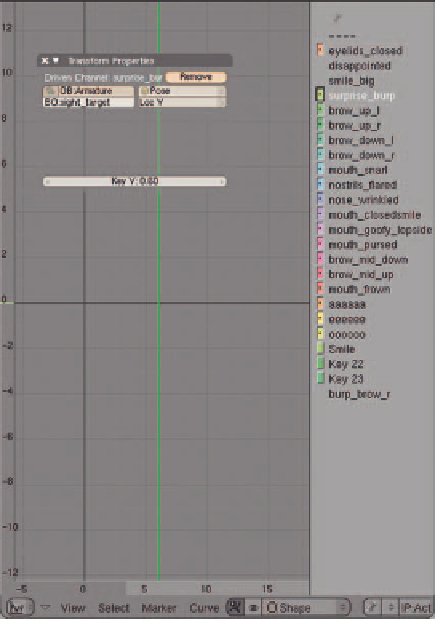
●
Change the setting on the right side of the panel from
Object
to
Pose
.
●
Enter the name of the bone that will act as the animation controller for the shape into the new
BO:
fi eld that
appears (Figure 10.31).
Figure 10.30
Enter the name of armature
Figure 10.31
Enter the name of the controlling bone
●
Now you have to decide which aspect of the bone will control the shape: rotation, location, or scale? In the
example,
Loc Y
has been chosen, meaning that vertical motion of the bone will control the shape. It's best
to choose something that makes sense to you when deciding which type of transformation to use. If the
shape twists the nose to one side or another, you will probably want to choose a rotation along an axis that
corresponds to the actual motion. For shapes that make cheeks puff out, you may want to choose a scaling
transformation. Technically it doesn't have to relate, but it will certainly make the controls more intuitive.
●
With the mouse over the
Ipo Editor
, press the
I-key
and accept the
Default one-to-one mapping
from the
Insert Curve
menu that pops up (Figure 10.32).

Search WWH ::

Custom Search